
Setup Ticketing AI Actions
In this article, you'll learn how to create a Ticketing AI Action so your AI Agent can open tickets in your connected helpdesk directly from a user conversation.
Use this when you want the AI Agent to capture issue details from the user and create a ticket on their behalf — for example, creating a Jira ticket when a user reports an IT issue.
Before you start
You need permission to create and publish AI Actions for the AI Agent.
The ticketing application must be connected under Settings. See the relevant integration guide — Jira, Salesforce, or ServiceNow.
At least one request type must already be added under Ticketing for your AI Agent. See AI Agent Ticketing.
ℹ️ Without a connected ticketing app and at least one request type configured, the Create from Ticketing option will not return any usable request types.
Step 1 — Open AI Actions
Go to AI Agents and open the agent you want to configure.
Select AI Actions from the left navigation.
Click + Add AI Action in the top right.
Select Create from Ticketing.
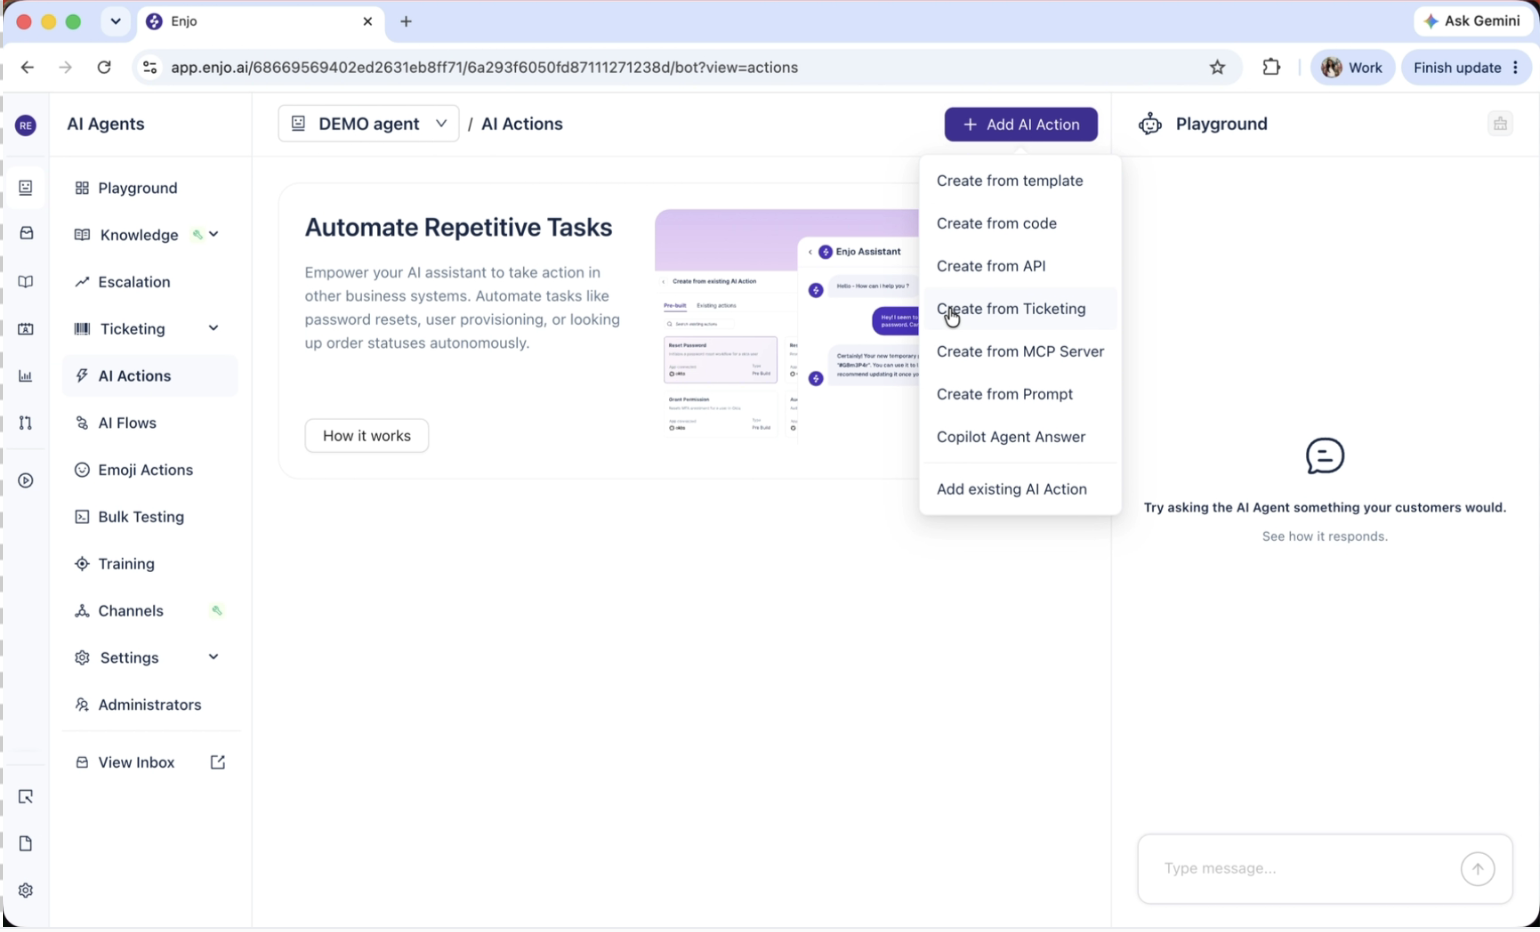
Step 2 — Choose the request type
Open the Request Type dropdown and select the request type you've added in Ticketing — for example, Software – Bug.
Optionally enable Thread Sync if you want conversation threads to sync to tickets created through this action.
Click Next to move to Setup Details.
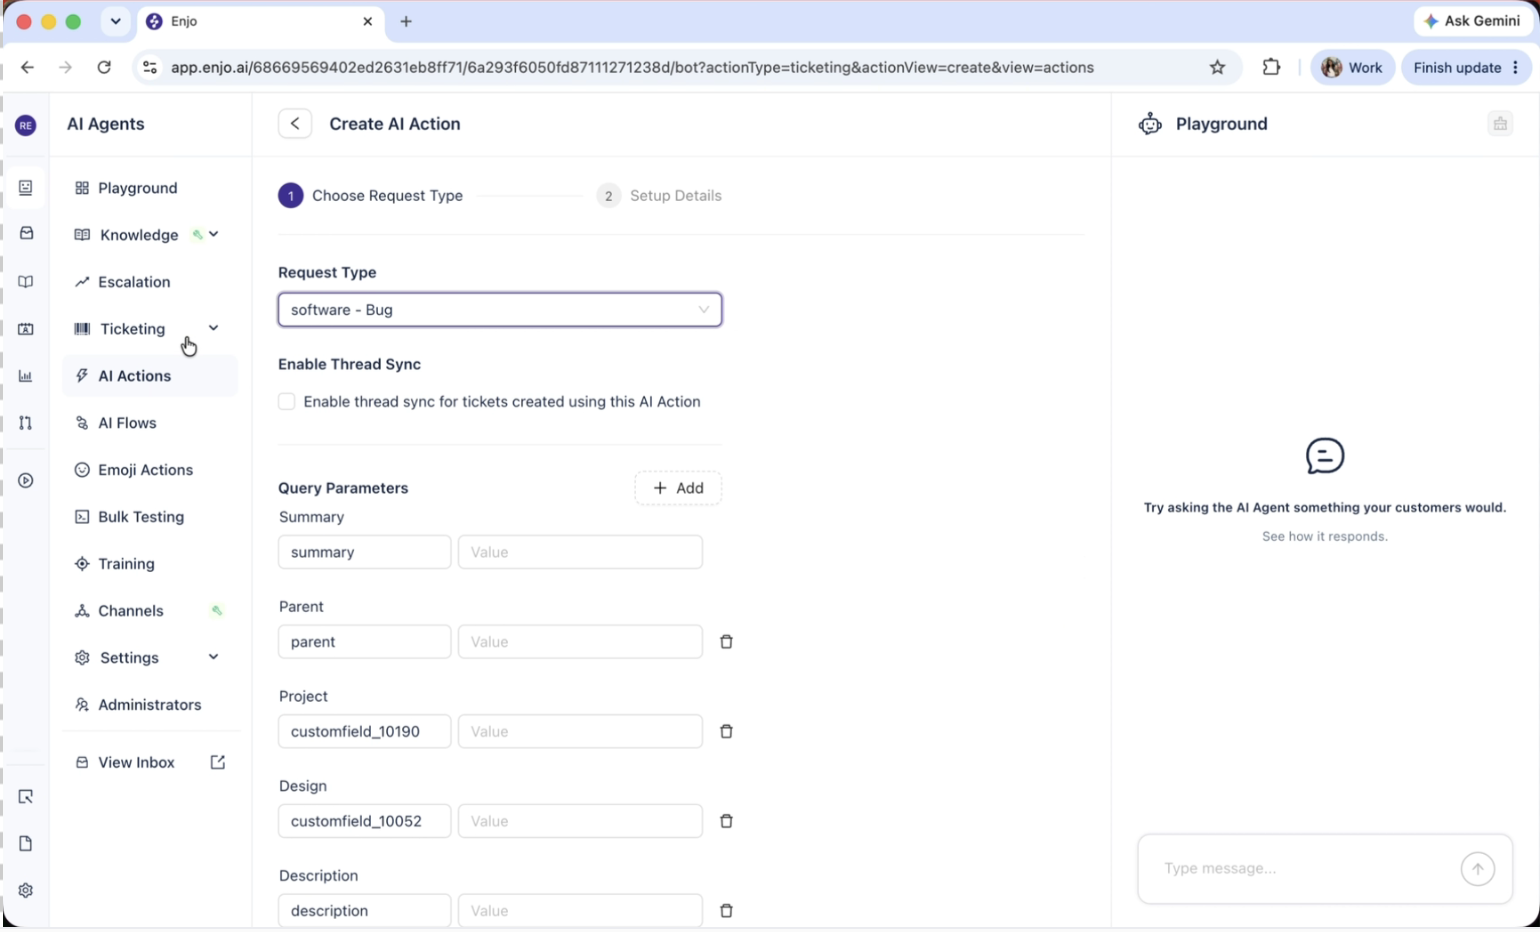
💡TIP: Each Ticketing AI Action is tied to a single request type. To handle multiple request types, create a separate AI Action for each.
Step 3 — Name and describe the action
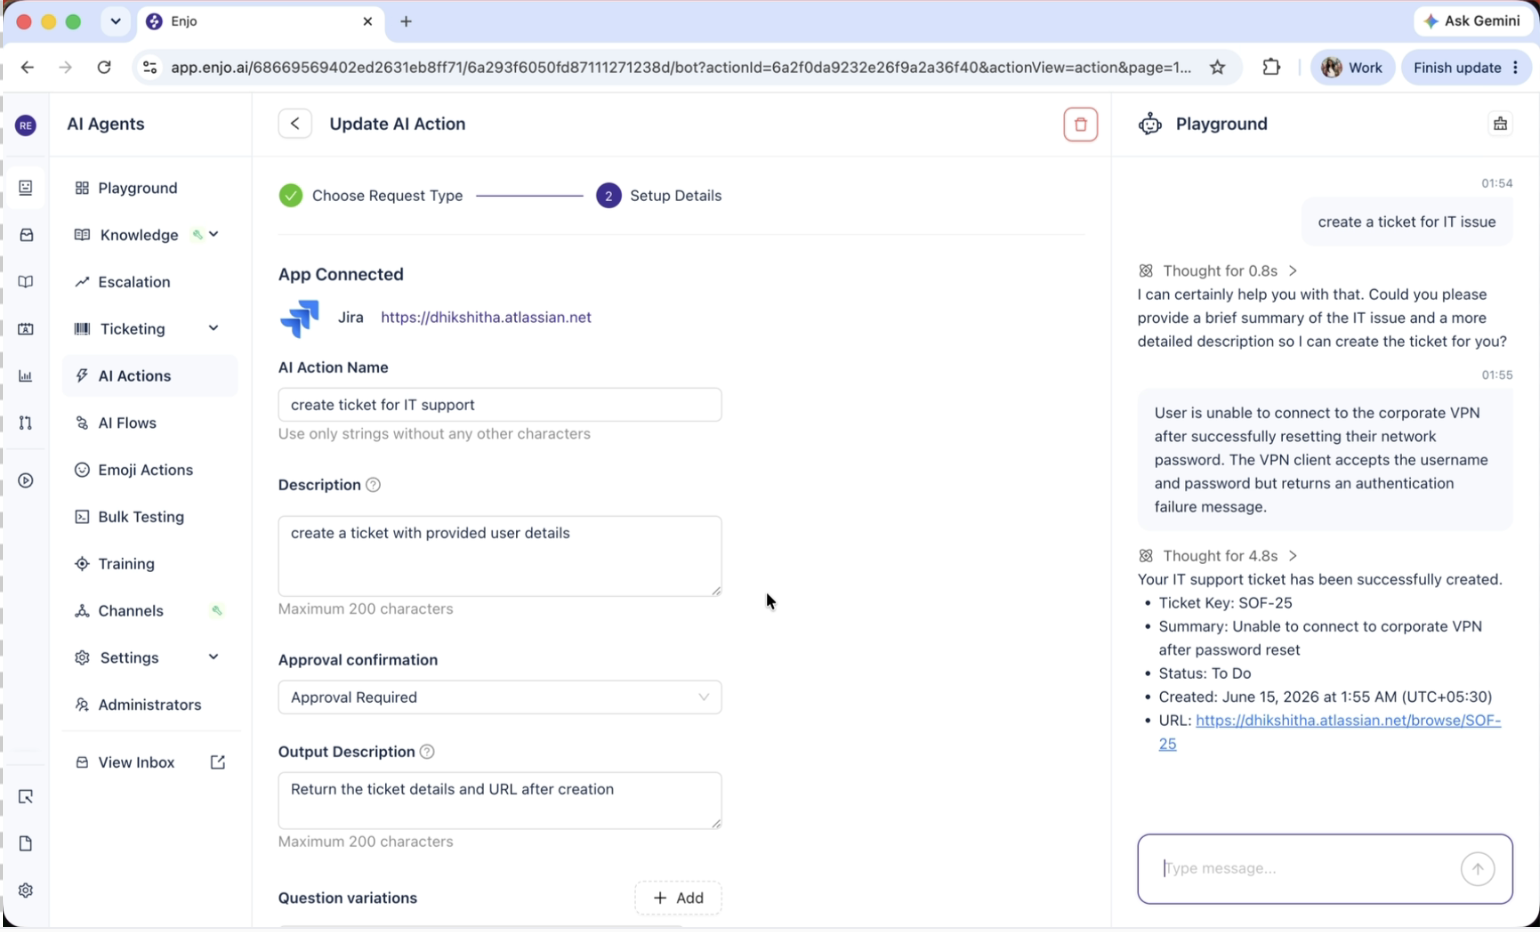
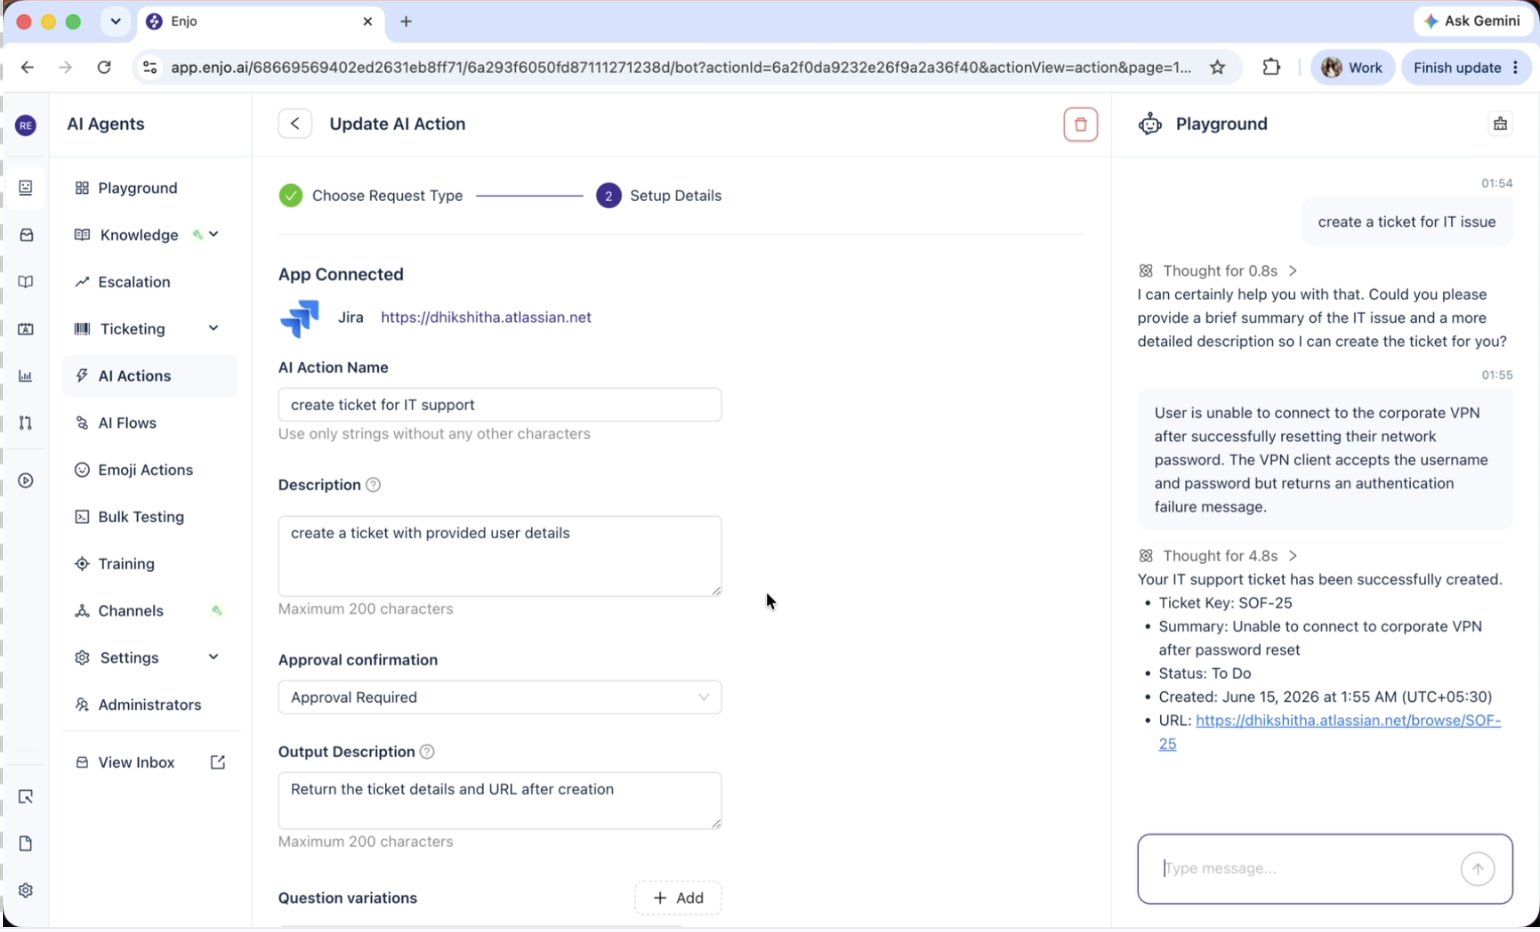
Name Enter a short, descriptive name in the AI Action Name field — for example, create ticket for IT support. Use plain text without special characters. This name appears in lists, logs, and analytics.
Description Enter a brief explanation of what the action does in the Description field — for example, create a ticket with provided user details. Keep it under 200 characters.
💡TIP: The AI Agent reads this description to decide when to trigger the action. A specific description improves accuracy — vague descriptions can cause the agent to miss the action or trigger it at the wrong time.
Step 4 — Set approval confirmation
Choose how the AI Agent handles confirmation before creating the ticket:
Approval Required — the AI Agent asks the user to confirm before creating the ticket. Recommended for actions that write to external systems.
Auto Run — the AI Agent creates the ticket without asking for confirmation.
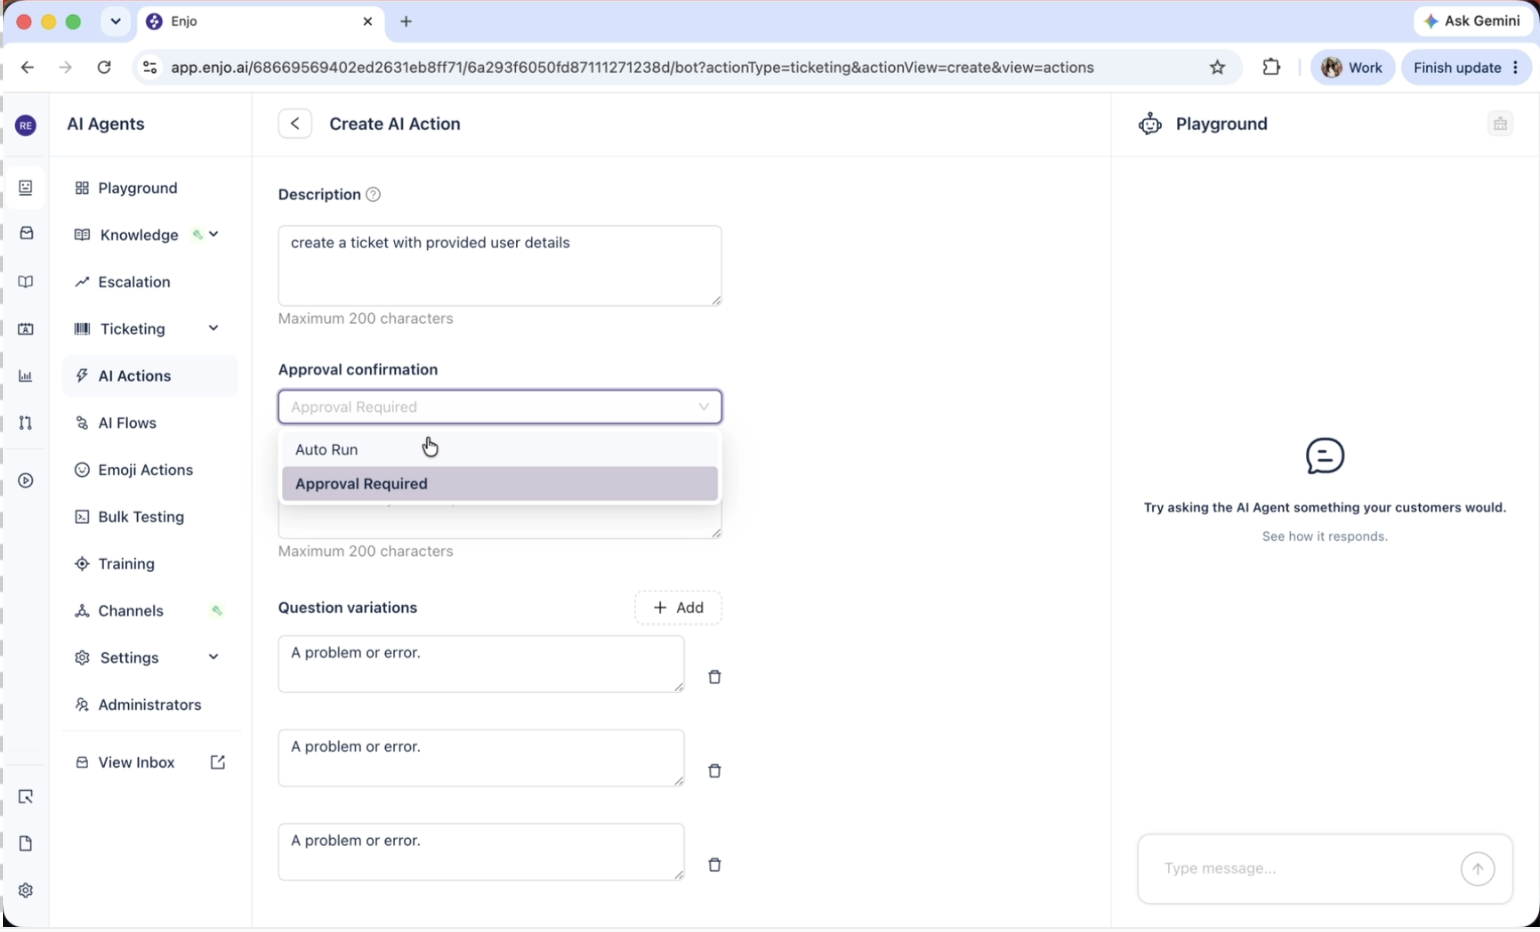
Step 5 — Add an output description
Enter a description of what the user should see after the ticket is created in the Output Description field — for example, Return the ticket details and URL after creation. Keep it under 200 characters.
Step 6 — Add question variations
Question variations are example phrases a user might say to trigger this action. The AI Agent uses them to recognize intent.
In Question variations, click + Add.
Enter a sample user message — for example, create a ticket for IT issue.
Repeat to add more variations.
💡TIP: Add at least three to five variations using natural phrasing. Mix short and longer examples to cover how real users phrase the same request.
Step 7 — Configure query parameters
Query parameters are the fields the AI Action needs when creating the ticket such as summary, description, project, or custom fields from your helpdesk.
For each parameter, configure:
Setting | What it does |
|---|---|
Field label | A short label the AI Agent uses internally — for example, Summary or Description |
Allow Override | Lets the AI Agent populate the field from user input |
Optional | When checked, the AI Agent skips the field if the user doesn't provide it. When unchecked, the AI Agent asks the user for the value before creating the ticket. |
Type | The data type for the value — for example, String |
Step 8 — Publish the AI Action
Click Publish at the bottom of the page.
A confirmation message appears: AI Action added successfully. The new action appears in the AI Actions list with its name, description, connected app, and type.
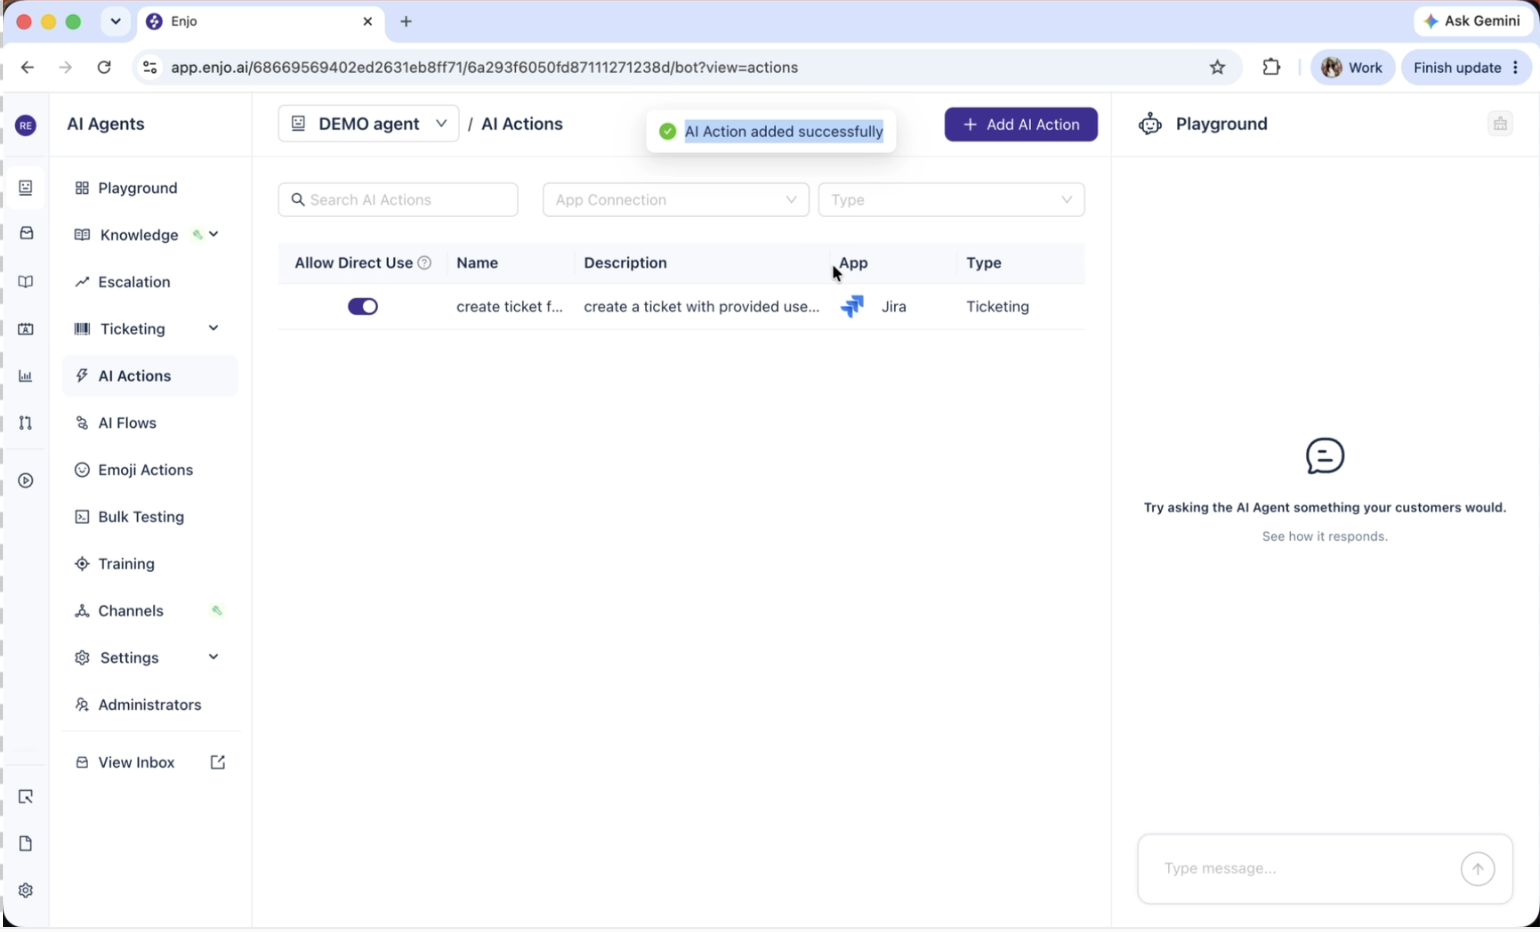
ℹ️ To remove an AI Action, open it from the list and use the Remove option in the top right.
Step 9 — Test from the Playground
Open the Playground panel on the right.
Send a message that matches one of your question variations — for example, create a ticket for IT issue.
If you selected Approval Required, the AI Agent asks for confirmation. Reply Yes to proceed.
The AI Agent asks for any required parameters — for example, a summary and description of the issue.
Provide the requested details.
Once the ticket is created, the AI Agent returns the ticket details and a URL.
Click the URL to open the ticket in your helpdesk and verify the details match what you submitted.
What's next
Set Up Template AI Actions — Create AI Actions from pre-built templates for common use cases.
AI Agent Testing — Test your AI Agent's responses and action triggers before going live.
AI Agent Ticketing — Configure the request types your AI Actions draw from.