
Custom Roles in Enjo
Enjo's six default roles cover common access patterns, but your team may need a different combination of permissions. Custom roles let you define exactly what a user can see and do across any module in your workspace.
This guide covers how to create a custom role, assign it to a user, and manage existing custom roles.
Before You Begin
You must have the Owner or Admin role to create or manage custom roles.
Custom roles are available on the Standard plan and above. If the Create Roles option is not visible in your workspace, check your Enjo Subscription Plans for details.
Custom roles are available alongside the default roles in your workspace.
Permission changes on a role take effect immediately for all users assigned to that role.
Create a Custom Role
Step 1: Open the Create Role form
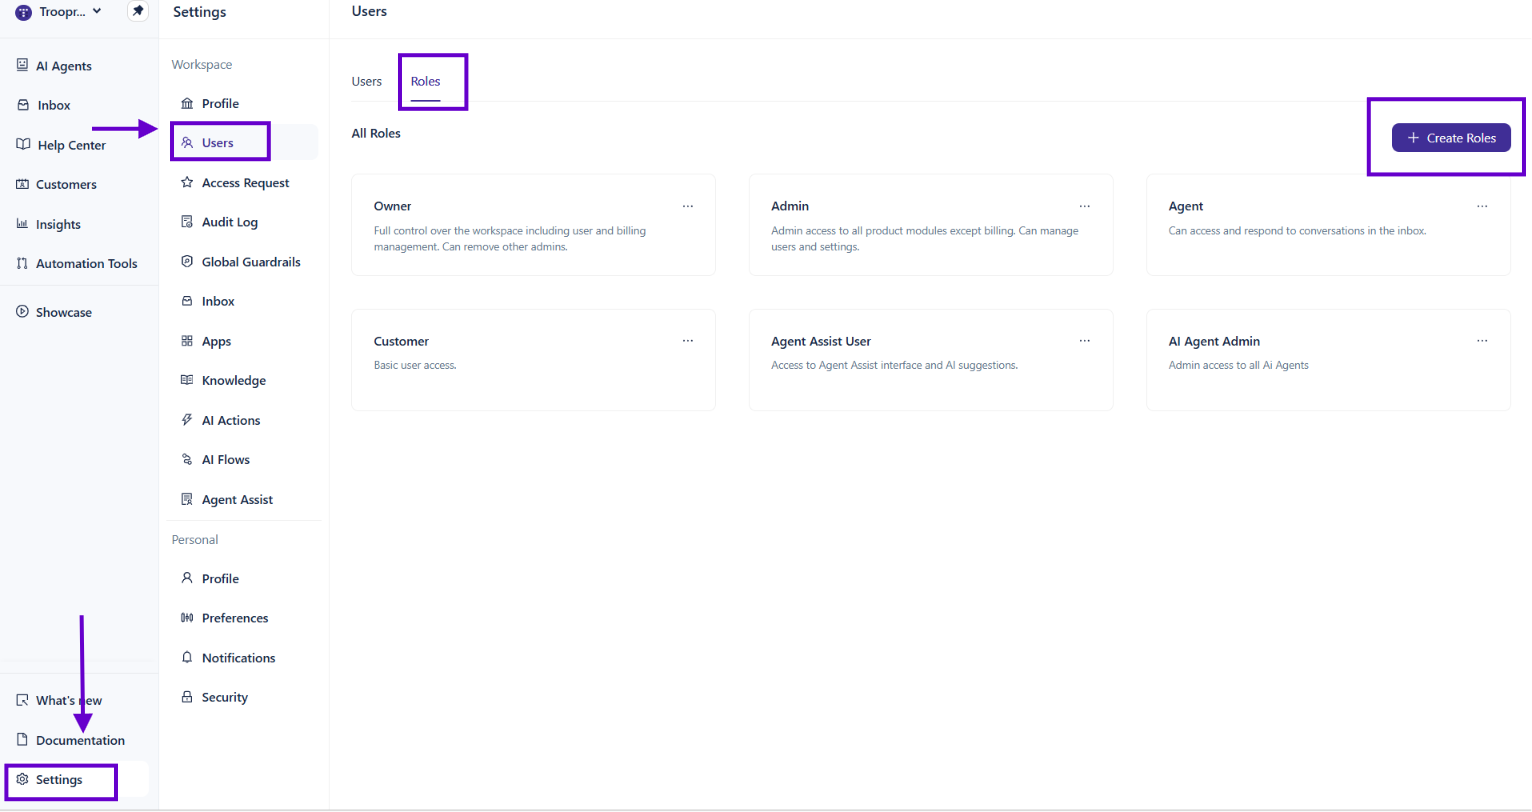
Go to Settings > Users and select the Roles tab. Click + Create Roles in the top right corner.
Step 2: Enter basic information
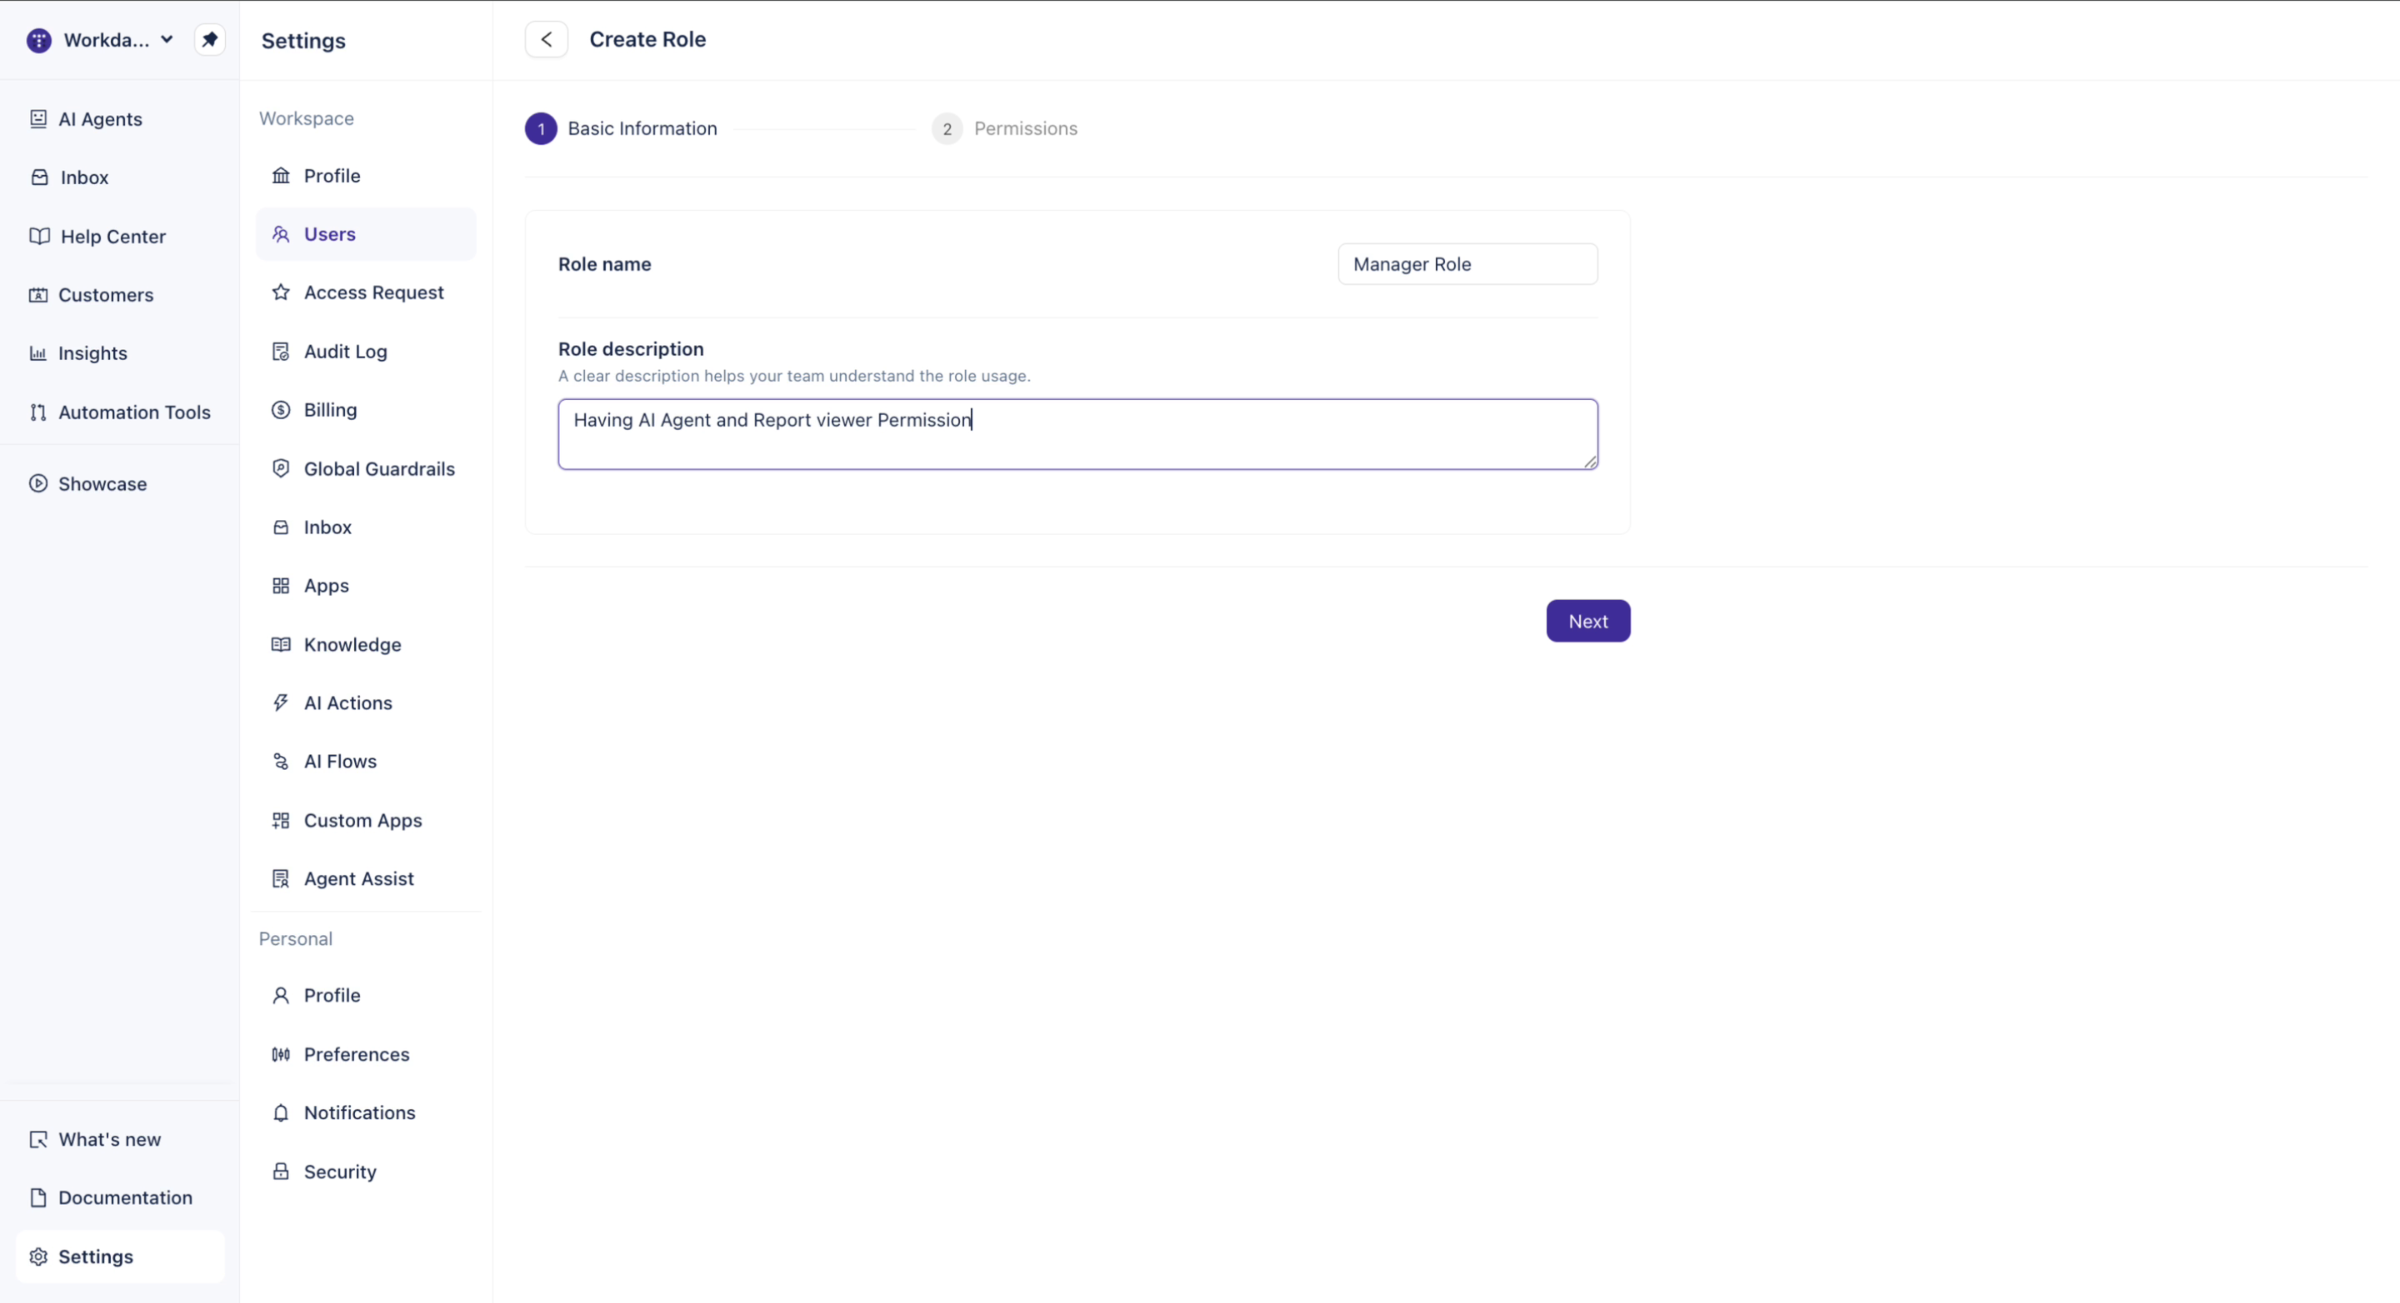
Fill in the Role name field and add a Role description. A clear description helps your team understand what the role is intended for.
Click Next to proceed to the Permissions step.
Step 3: Configure permissions
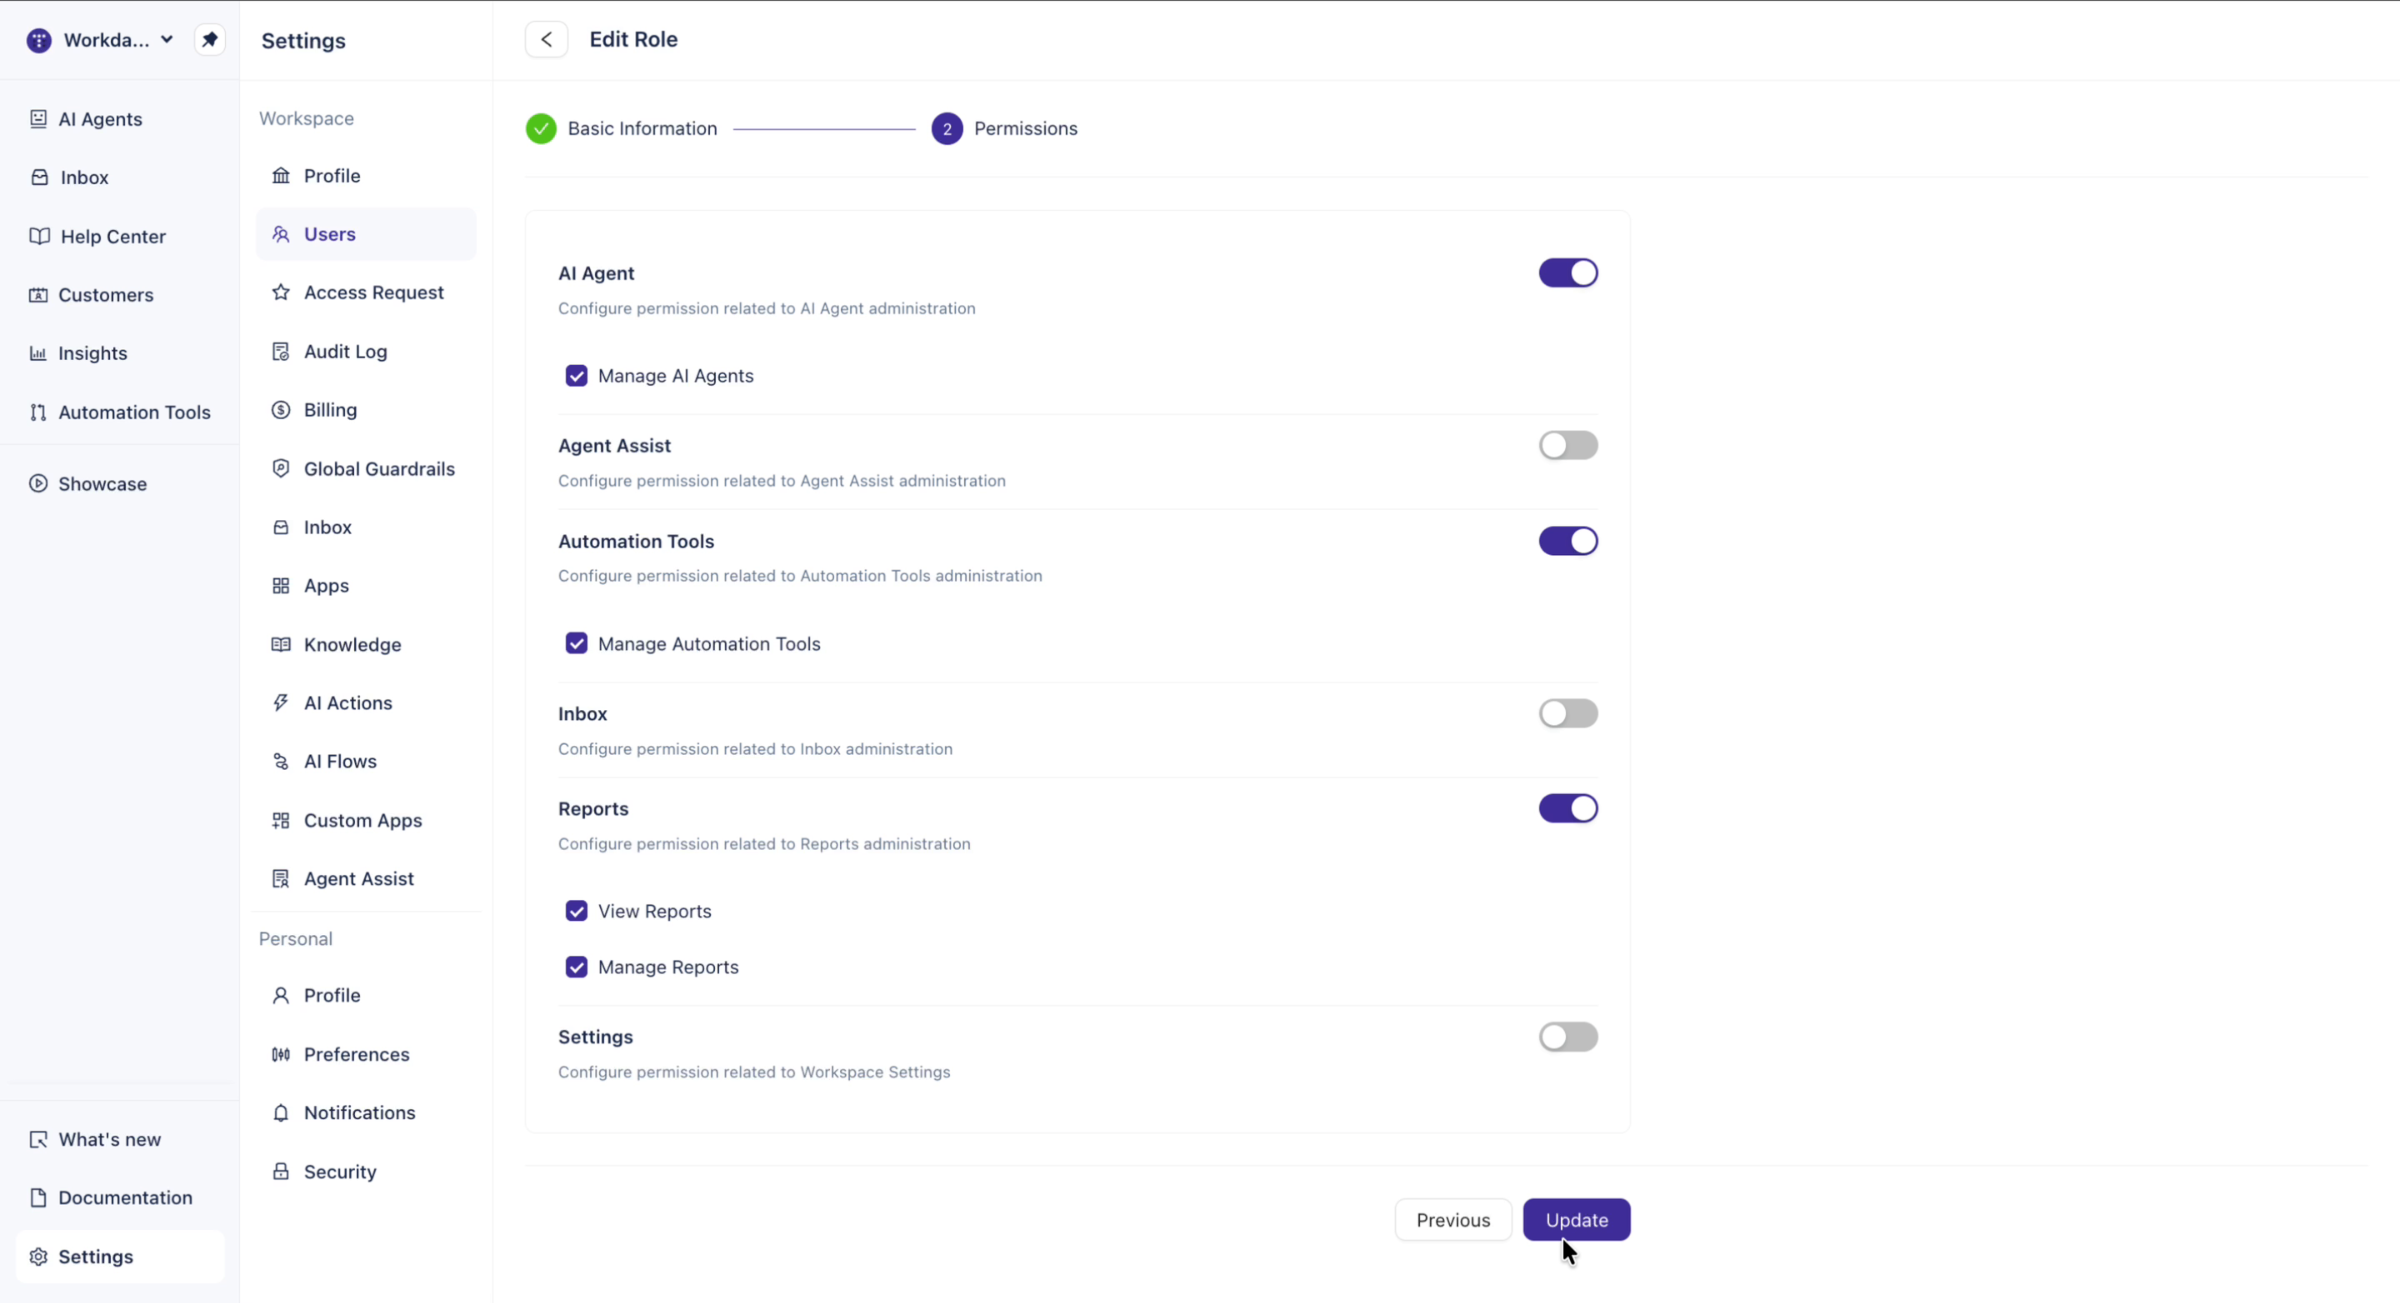
All permissions are off by default. Toggle each category on or off as needed, then enable or disable individual sub-permissions within each category.
The available permission categories are:
Automation Tools: Manage Automation Tools
Agent Assist: Manage Agent Assist, Access Agent Assist
Reports: Manage Reports, View Reports
Settings: Manage Users and Roles, Manage Access Tokens, Manage Billing, Manage Workspace Setting
AI Agent: Manage AI Agents
Inbox: Manage Inbox Settings, Access Conversation, Access Assigned Conversation
Note: Enabling a category toggle expands the sub-permissions for that category. You can enable or disable individual sub-permissions independently of the category toggle.
Step 4: Create the role
Once you have selected all required permissions, click Create.
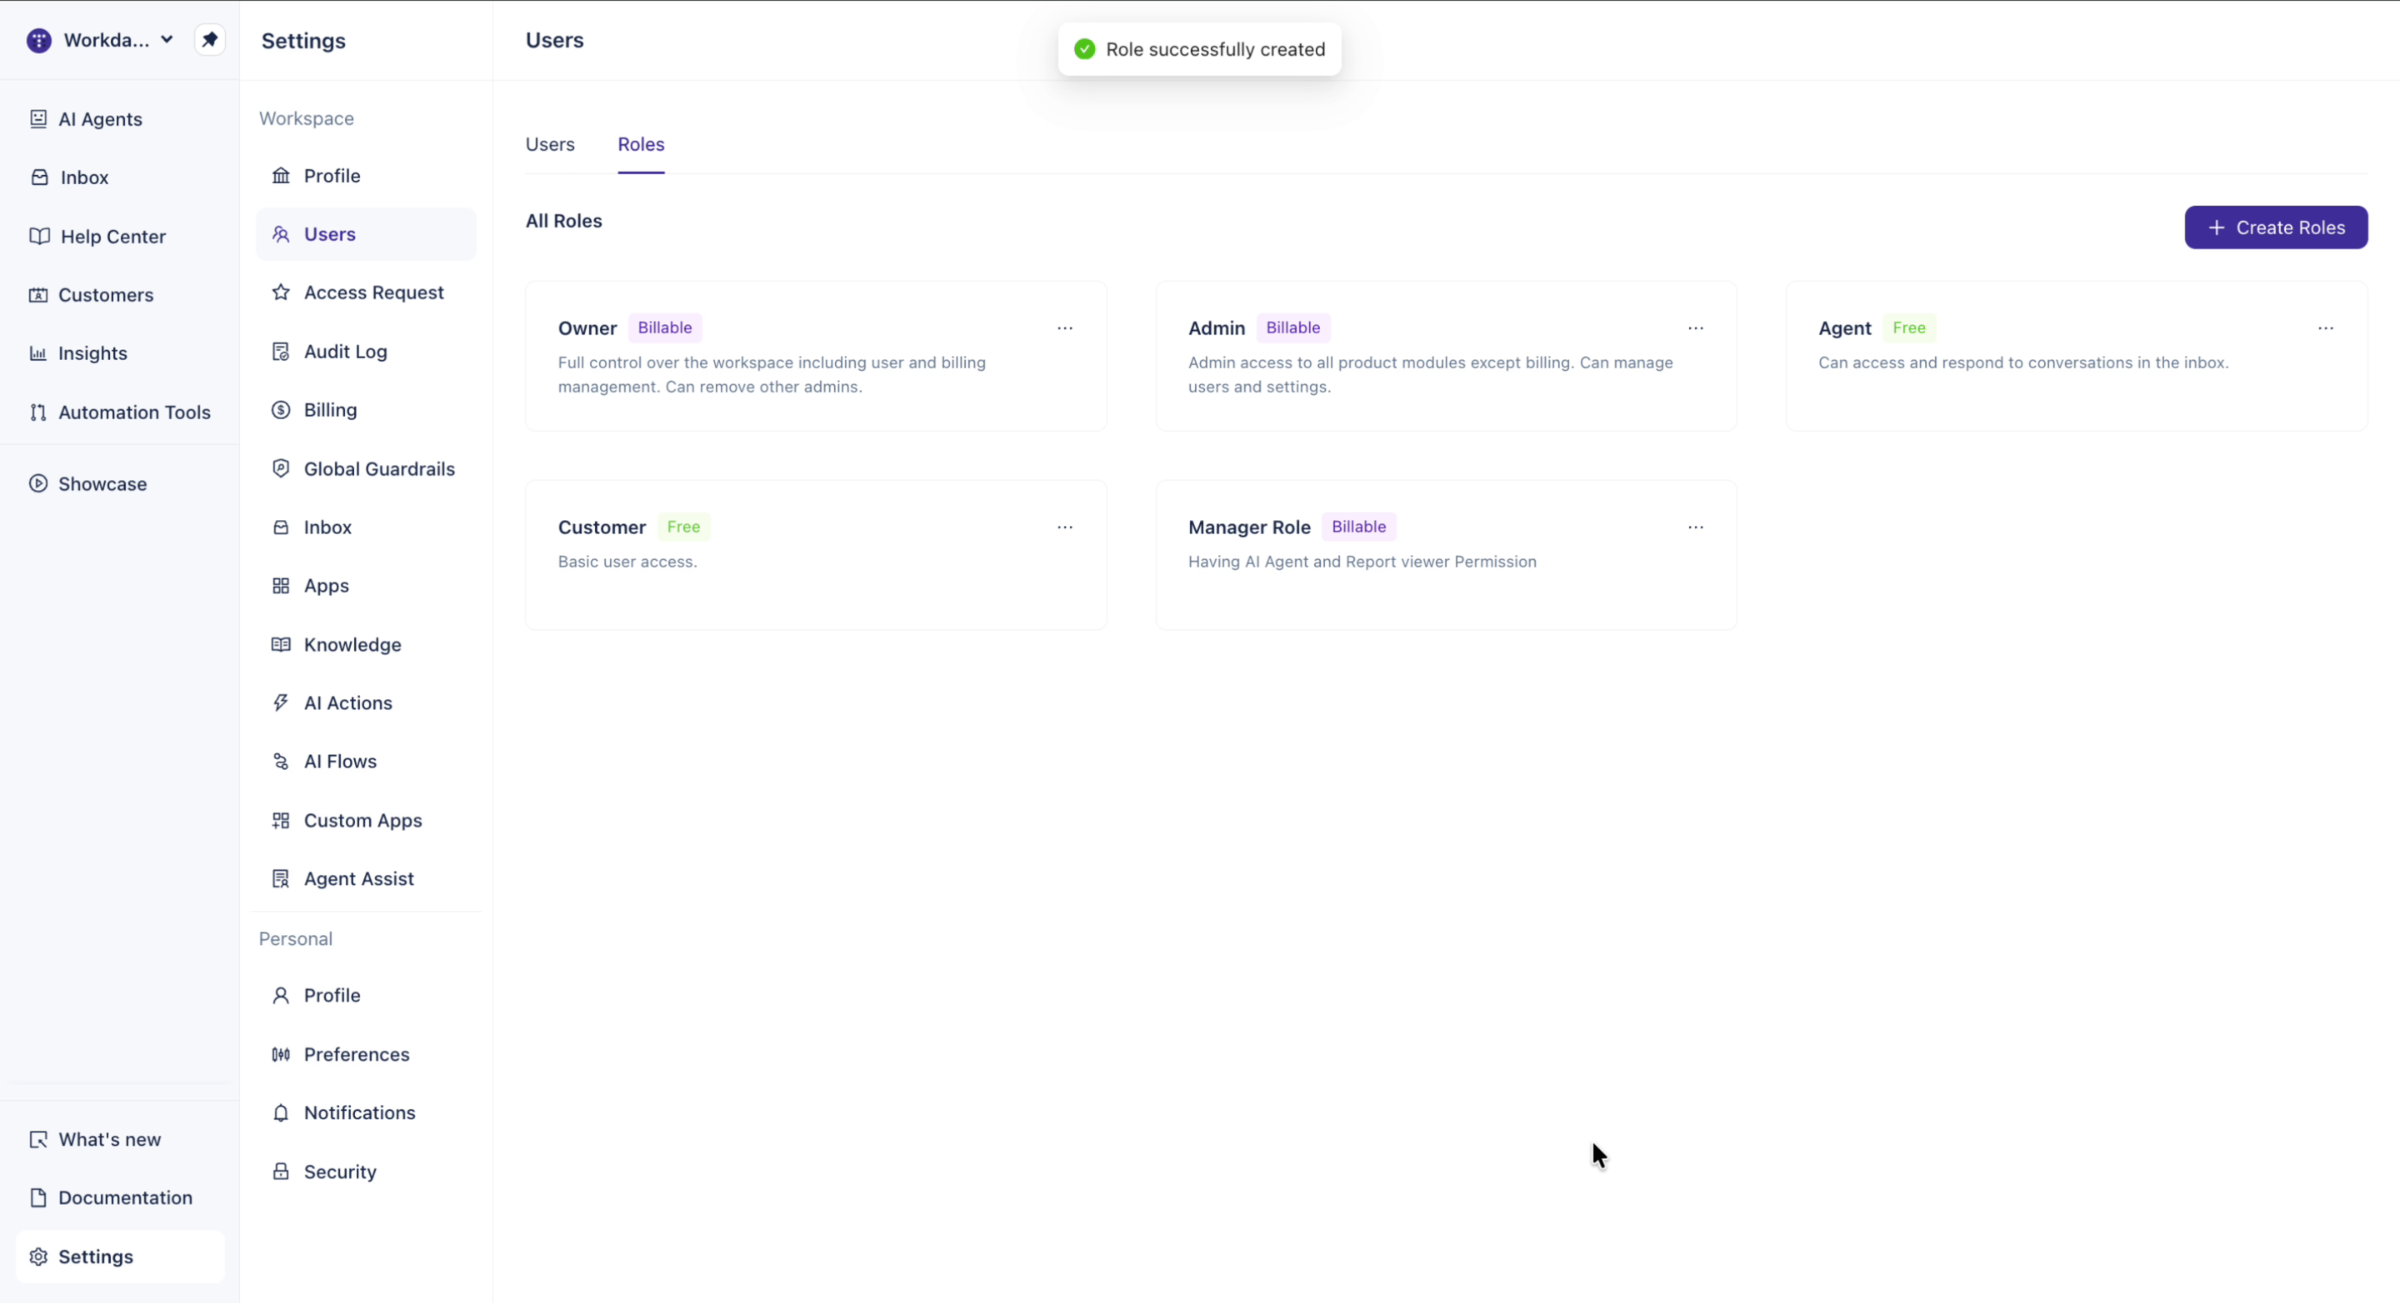
The new role appears on the All Roles page and is immediately available to assign to users.
Assign a Custom Role to a User
You can assign a custom role when adding a new user or by updating an existing user's role.
Assigning during user onboarding
When adding a new user, go to Settings > Users, click Add Users, enter the user's email address, and select Custom role from the role options.
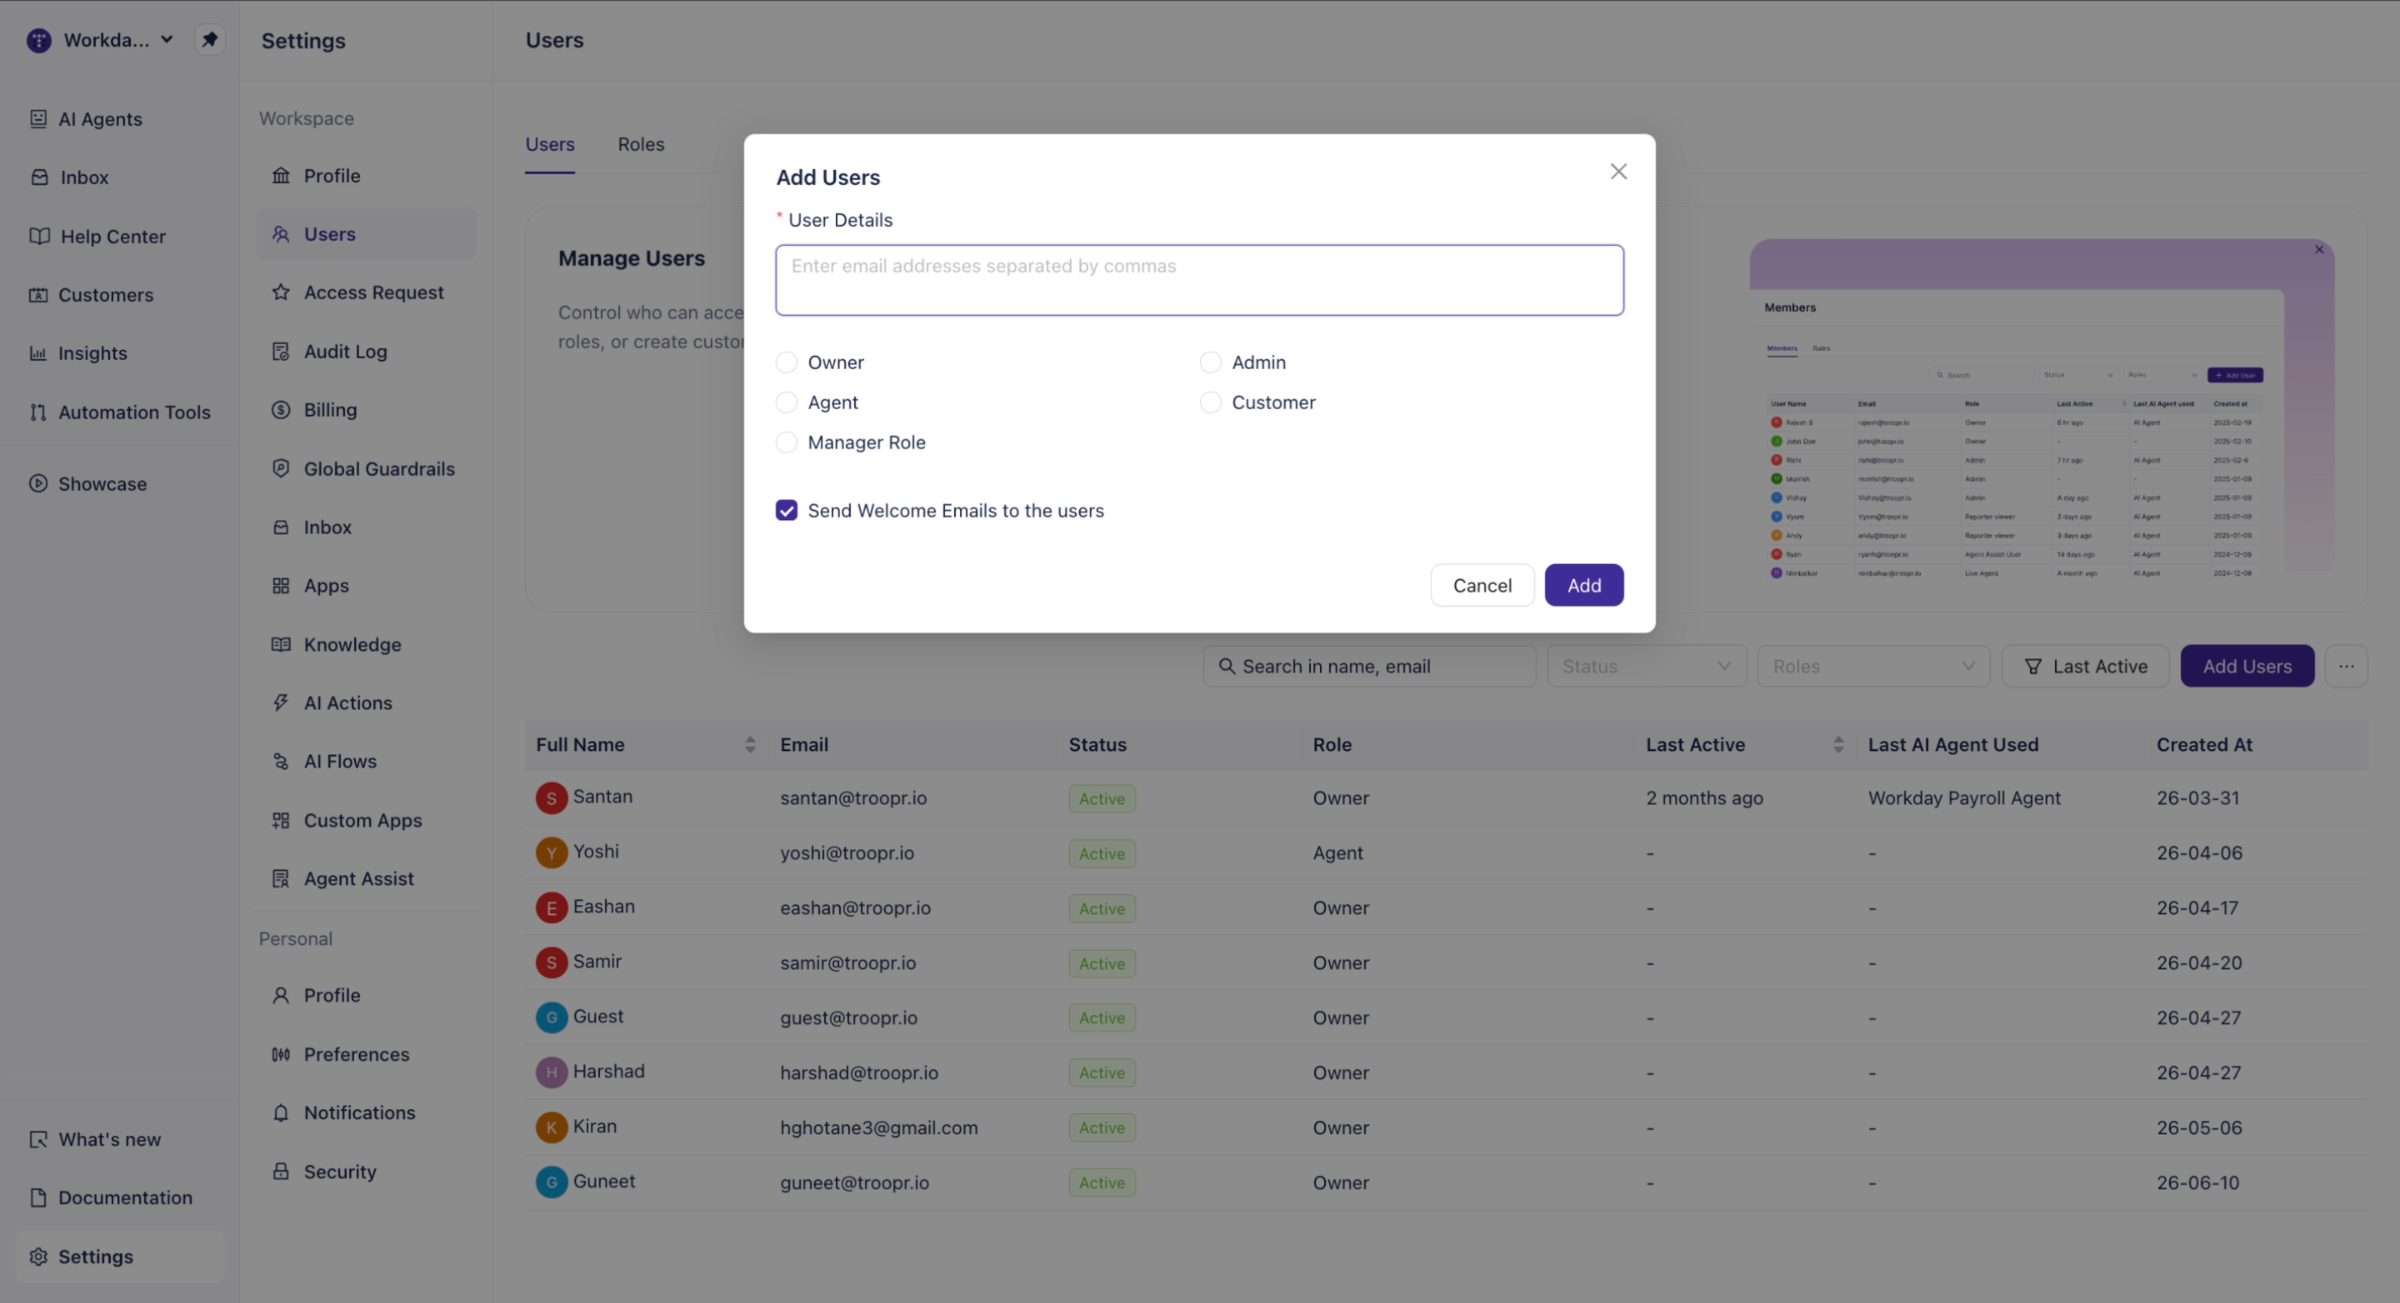
Click Add to send the invitation with the custom role assigned.
Updating an existing user's role
To change the role of a user already in your workspace:
Go to Settings > Users and select the Users tab.
Find the user in the list using the search bar, or filter by Status or Roles.
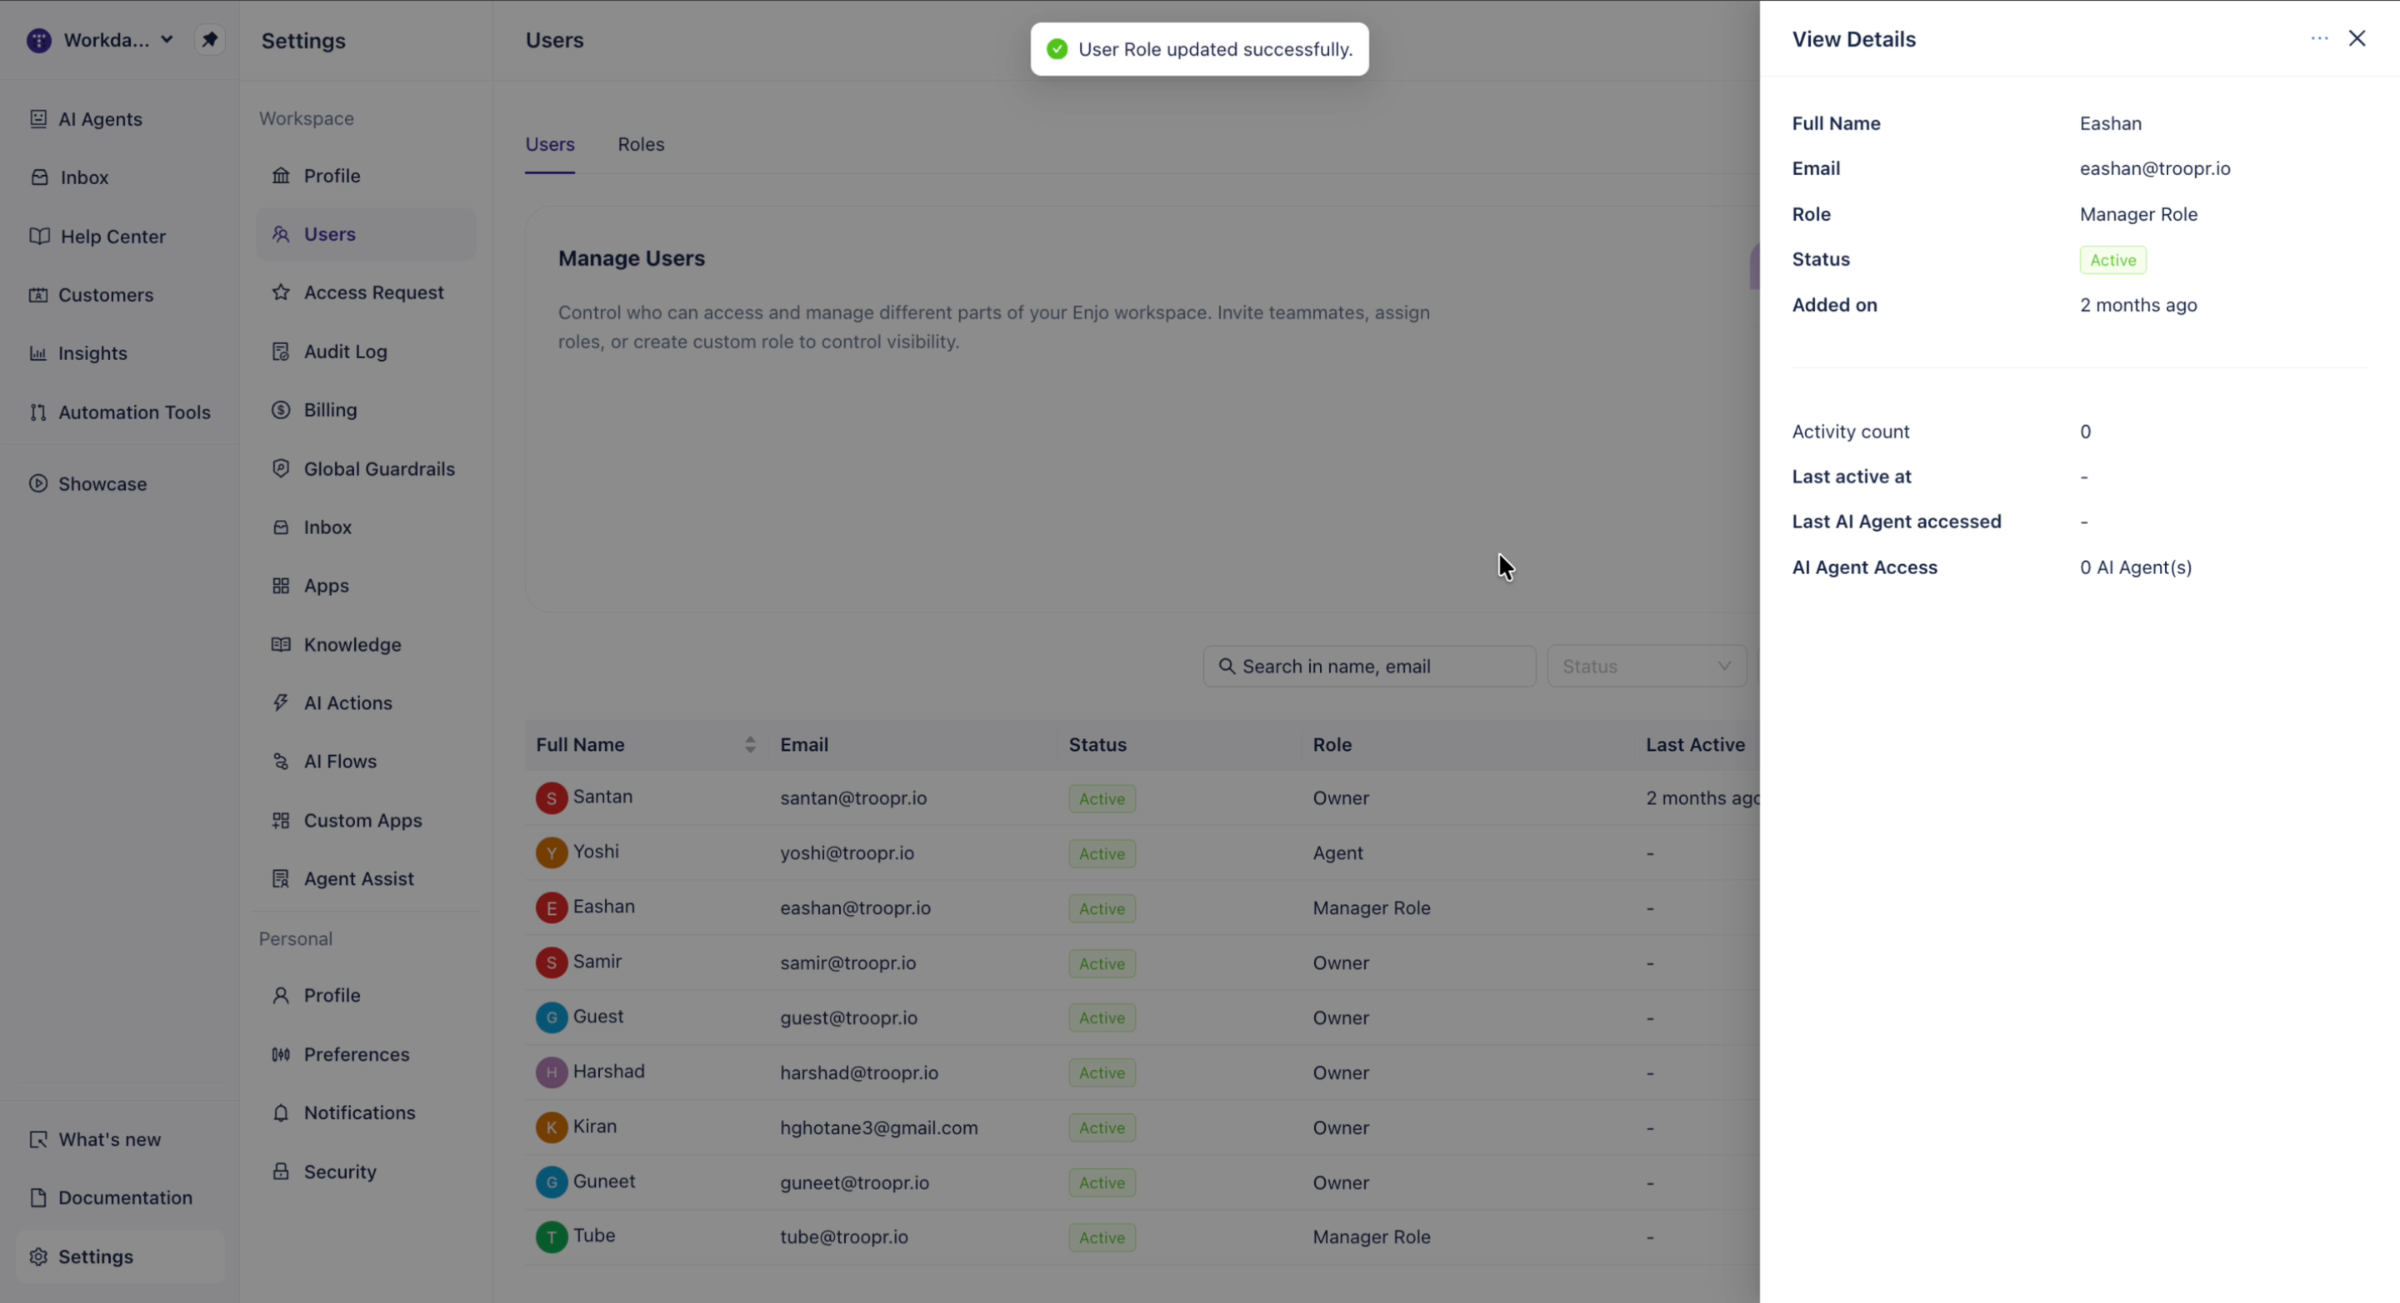
Click on the user to open their View Details panel.
Click the ... menu in the View Details panel and select Edit Roles.
Select the custom role from the role picker and click Update.
View Role Details
To inspect the permissions assigned to any role, including custom roles:
Go to Settings > Users and select the Roles tab.
Click the ... menu on the role card.
Select View Details.
The role detail view shows all permission categories with toggles indicating which permissions are active.
Edit a Custom Role
To update a custom role's name, description, or permissions:
Go to Settings > Users and select the Roles tab.
Click the ... menu on the custom role you want to edit.
Select Edit.
Update the role name or description on the Basic Information step, then click Next.
Adjust permissions on the Permissions step.
Click Update to save your changes.
Note: Changes apply immediately to all users currently assigned to that role.
Delete a Custom Role
To delete a custom role:
Go to Settings > Users and select the Roles tab.
Click the ... menu on the custom role you want to delete.
Select Delete.
Important: Deleting a role removes it permanently. Make sure no users are actively assigned to the role before deleting it.
What's Next
User Roles: Review the six default roles and their default permission sets.
Permissions: See a full reference of every available permission and what it controls across each module.
Invite Users: Add new members to your workspace and assign them a role during onboarding.