
Bitbucket Cloud as a Knowledge Source
In this article, you'll learn how to connect a Bitbucket Cloud repository to your AI Agent so it can use your repository files to answer questions.
Before you start
You need Owner, Admin, or AI Agent Admin role in Enjo.
Your Bitbucket Cloud account must be connected to Enjo. See Connect Bitbucket Cloud if you haven't set that up yet.
At least one AI Agent must be configured in your workspace. See Create AI Agent.
Step 1 — Open Knowledge Sources
Go to AI Agents and select the agent you want to configure.
Open the Knowledge tab.
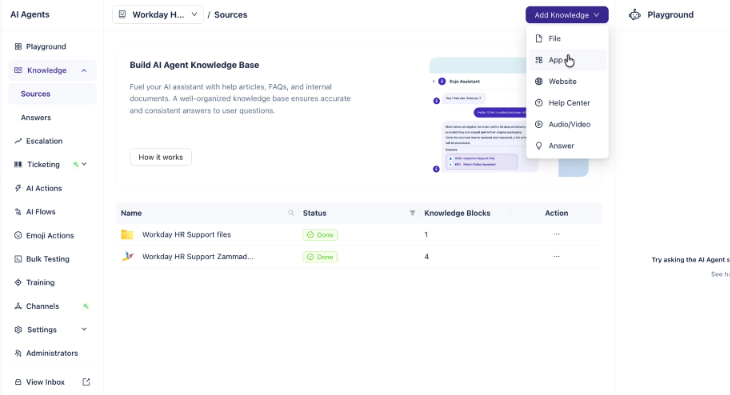
Click Sources from the left navigation.
Click the Add Knowledge dropdown select App.
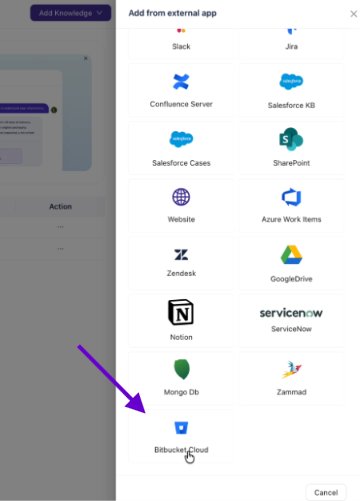
Scroll down and select Bitbucket Cloud.
Step 2 — Select your Bitbucket account
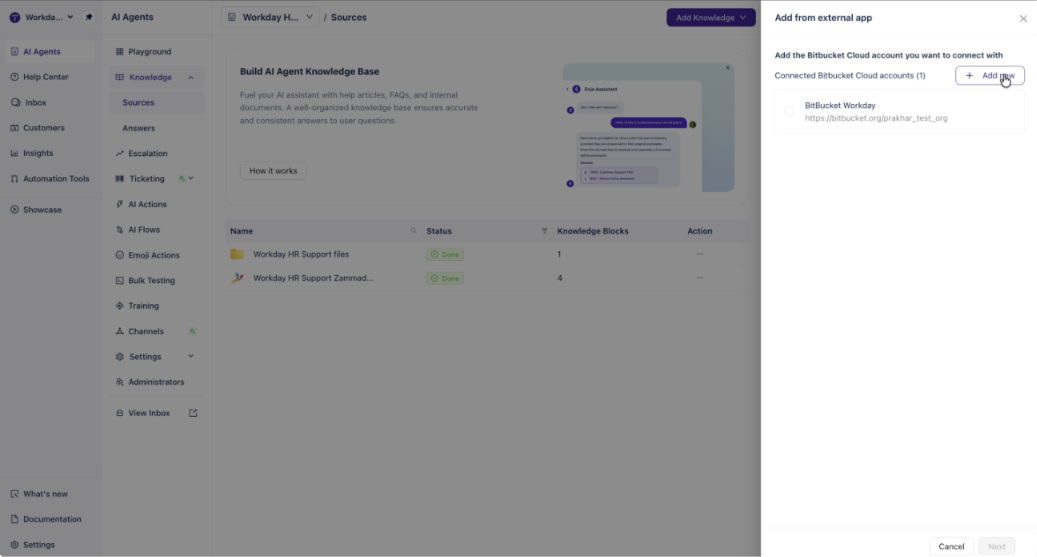
The Add from external app panel opens showing all connected Bitbucket Cloud accounts.
If your Bitbucket account is already connected, select it from the list and click Next.
If it is not connected yet, click + Add New to connect it, or go to Settings > Apps to set it up first. See Connect Bitbucket Cloud.
Step 3 — Create a new knowledge source
Click Create New Knowledge to set up a new knowledge source for this agent.
Step 4 — Configure the knowledge source
Fill in the following fields:
Knowledge Source Name Enter a descriptive name — for example, Workday HR Support Bitbucket Repository 1.
Meta Data (optional) Add key-value pairs to describe the content of this knowledge source. Metadata improves search result quality.
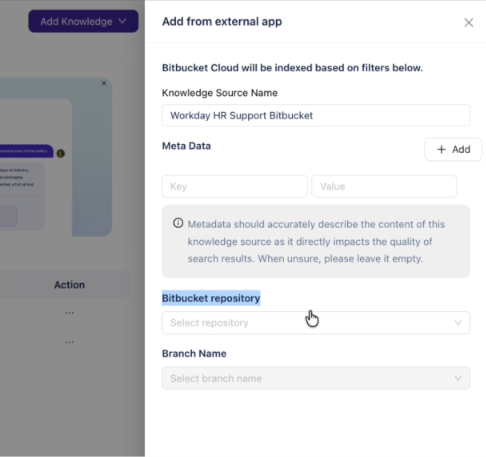
ℹ️ Metadata should accurately describe the content of this knowledge source — it directly impacts the quality of search results. If you're unsure, leave it empty.
Bitbucket Repository Click the dropdown to view all repositories available in the connected account. Select the repository you want to index.
Branch Name Select the branch you want to index from the dropdown.
Step 5 — Start indexing
Click Start Indexing.
The knowledge source status changes to Processing. Click the knowledge source name to view its details — you can see the name, type (Bitbucket Cloud), repository and branch filters, current status, and document count.
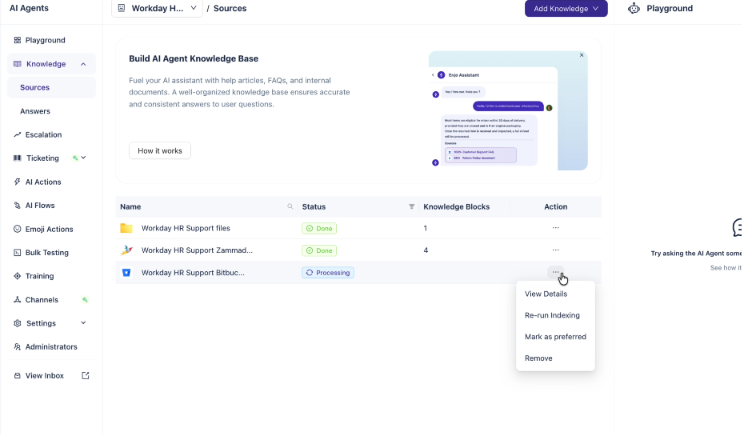
Refresh the page to check progress. Once indexing is complete, the status updates to Done and the document count reflects the total files indexed.
Step 6 — Test the knowledge source
Open the Playground panel on the right.
Ask a question related to the content in your indexed repository.
The AI Agent returns a response with a citation linking back to the source file in Bitbucket. Click the citation link to open the specific file.
What's next
AI Agent Knowledge — Manage all knowledge sources connected to your agent.
Connect Bitbucket Cloud — Set up your Bitbucket connection if you haven't already.
Bulk Testing — Validate AI responses across your knowledge sources at scale.