
Importing Customers
In this article, you'll learn how to sync accounts and contacts into Enjo from an external source, and how to configure and manage those sync connections.
Before you start
You need Owner or Admin role to configure data sync sources.
For Salesforce imports, your Salesforce org must be connected to Enjo. See Connect Salesforce.
Access the import feature
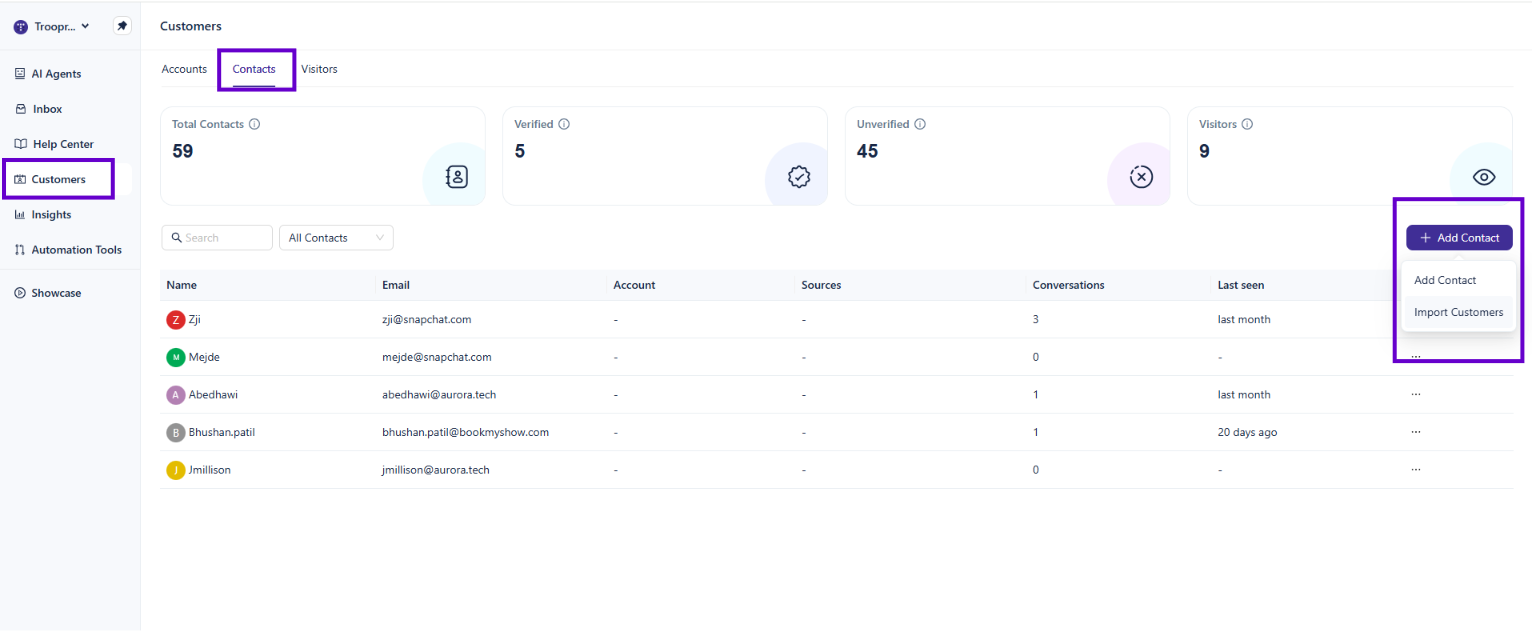
Go to Customers from the left navigation.
Select the Contacts tab.
Click the dropdown arrow next to + Add Contact.
Select Import Customers.
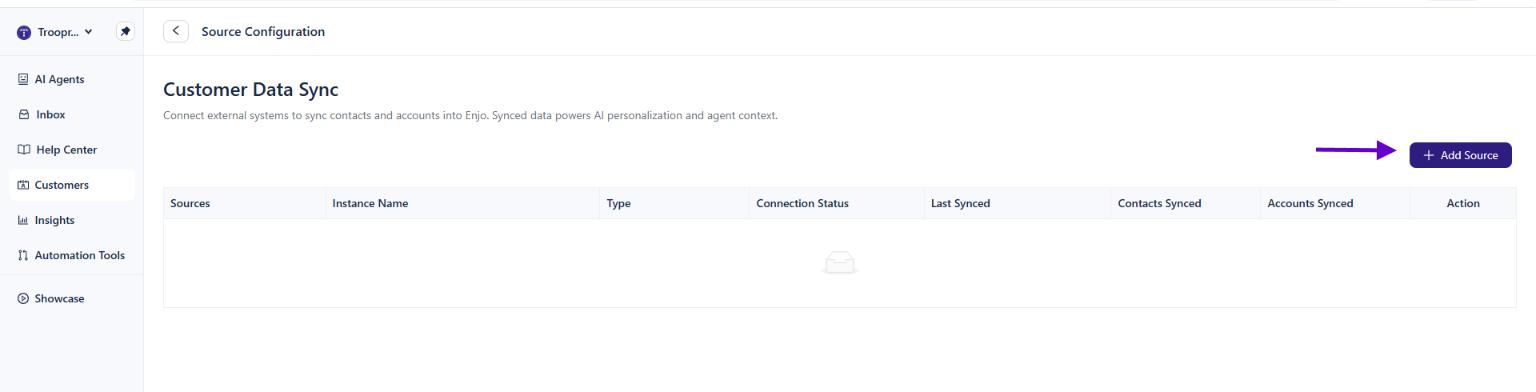
The Customer Data Sync page opens, showing a table of all configured sync sources with their current status.
Column | Description |
|---|---|
Sources | The source system — CSV, Salesforce, etc. |
Instance Name | A label for this import source |
Type | One-time or recurring |
Connection Status | Whether the source is connected and healthy |
Last Synced | When data was last imported from this source |
Contacts Synced | Number of contacts imported |
Accounts Synced | Number of accounts imported |
Action | Controls to run, pause, or configure the import |
Add a sync source
From the Customer Data Sync page, click + Add Source.
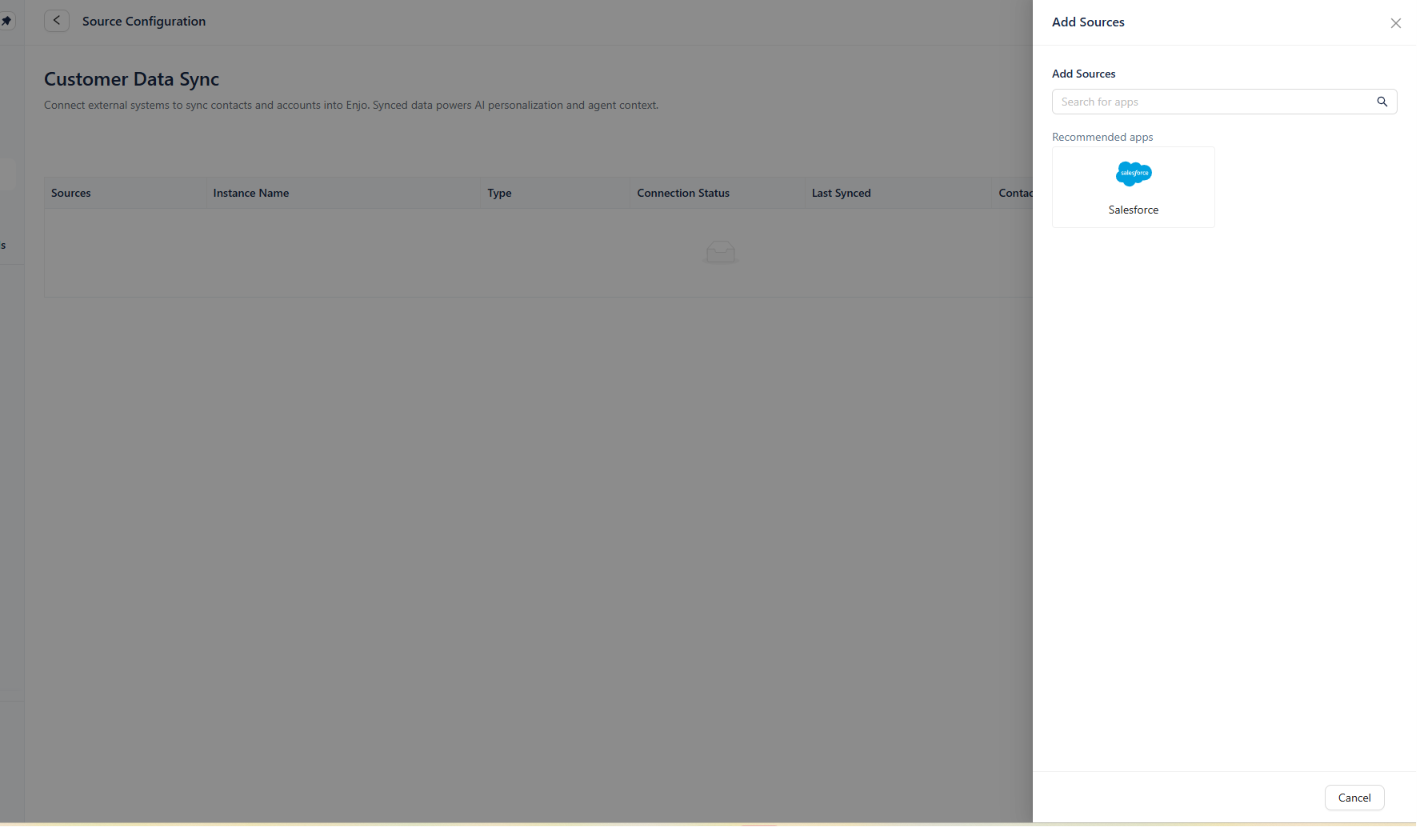
The Add Sources panel opens on the right.
Select a source from the recommended apps list, or search for your source using the search bar.
ℹ️ If Salesforce is not yet connected to your Enjo workspace, set it up first before continuing. See Connect Salesforce.
Sync from Salesforce
Salesforce sync pulls contacts and accounts directly from your Salesforce org. This is useful for teams running Salesforce Service Cloud who want customer context available in Enjo.
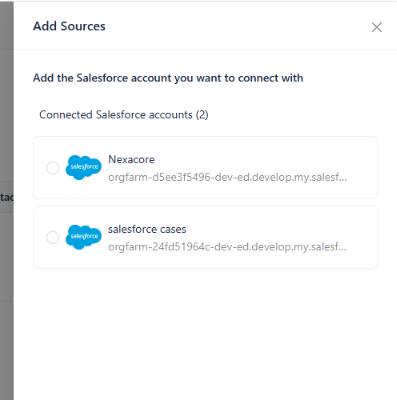
Step 1 — Select your Salesforce account
The Add Sources panel shows all connected Salesforce accounts. Select the account you want to sync from and click Next.
Step 2 — Select what to sync
Choose what to import from Salesforce:
Contacts + Accounts — syncs both contact records and their associated account records
Contacts only — syncs contact records only
Click Next.
Step 3 — Map fields
Choose which Salesforce fields map to Enjo contact and account fields.
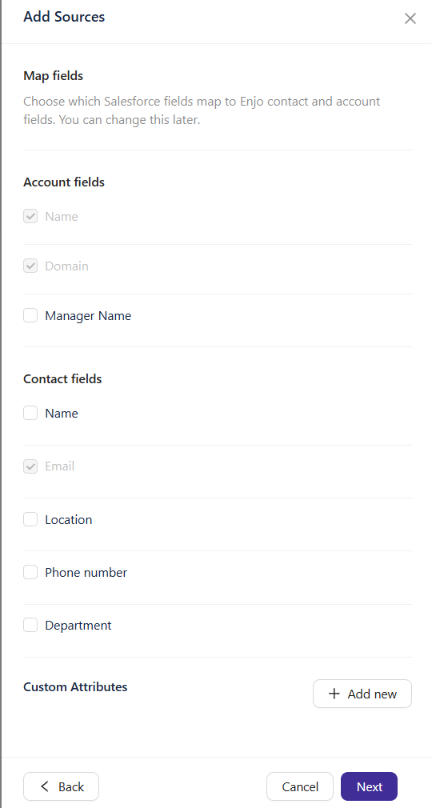
Account fields
Field | Required | Notes |
|---|---|---|
Name | Yes | Pre-selected, cannot be removed |
Domain | Yes | Pre-selected, cannot be removed |
Manager Name | No | Optional — check to include |
Contact fields
Field | Required | Notes |
|---|---|---|
Yes | Pre-selected, cannot be removed | |
Name | No | Check to include |
Location | No | Check to include |
Phone number | No | Check to include |
Department | No | Check to include |
Custom Attributes
Click + Add new to map additional Salesforce fields to custom attributes in Enjo.
💡TIPS: You can change field mappings later from the sync source settings.
Click Next to start the sync.
Step 4 — Sync starts
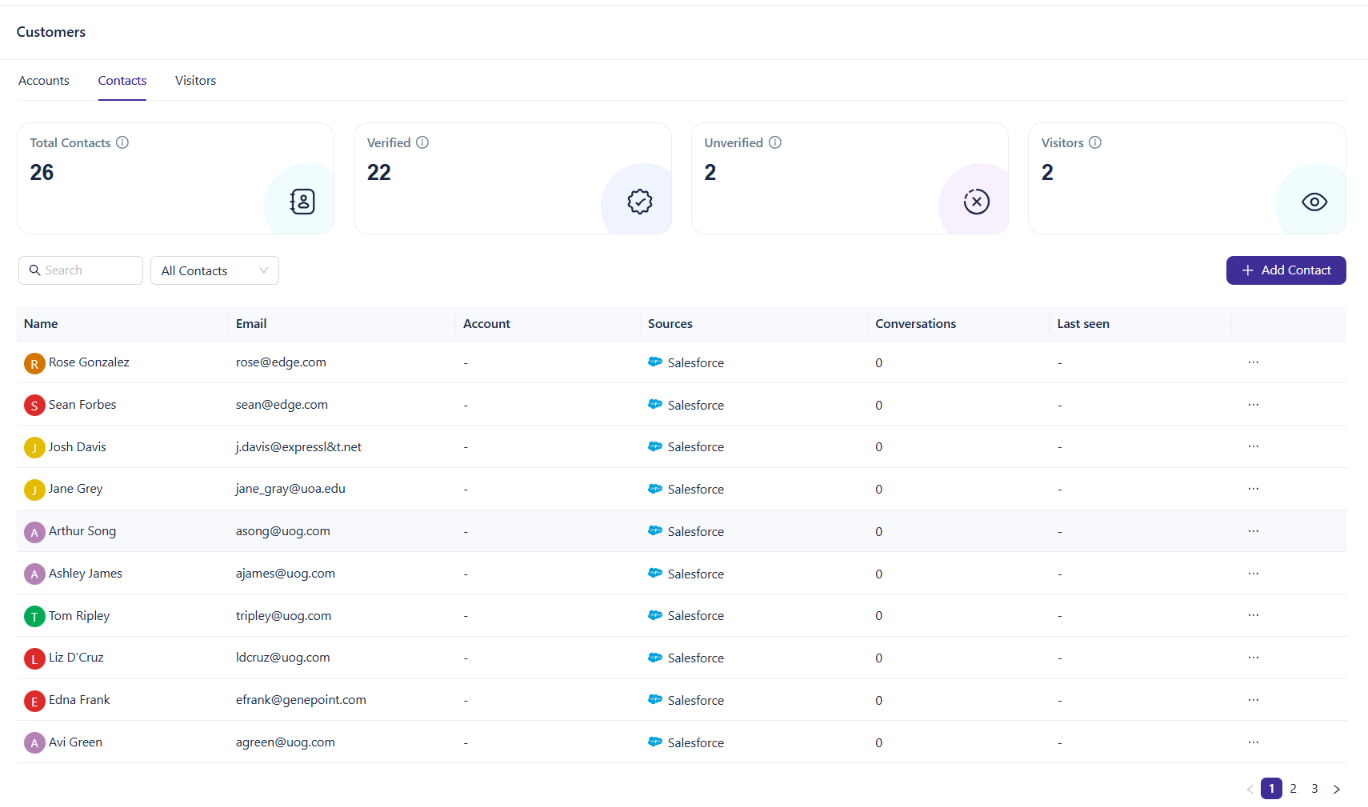
Enjo begins syncing contacts and accounts from Salesforce. Once complete, synced records appear in Customers > Contacts and Customers > Accounts with Salesforce shown as the source.
How sync behaves
Behavior | What it means |
|---|---|
Deduplication | Enjo uses email as the primary match key for contacts. If a contact with the same email already exists, the sync updates the existing record rather than creating a duplicate. |
Account matching | Accounts are matched by name and domain. If a matching account exists, contacts are associated with it. If not, a new account is created. |
Safe updates | Syncs never overwrite Enjo-managed fields like blocked status or verification state. |
⚠️ Blocked status, email verification state, and login enablement are managed within Enjo and are never changed by a sync. An external system cannot accidentally re-enable a blocked user.
What's next
Managing Contacts — View and manage contacts after import.
Managing Accounts — View and manage accounts after import.
Connect Salesforce — Set up your Salesforce connection before running a Salesforce import.
Overview of Customers — Understand how Accounts, Contacts, and Visitors work together.