
Jira Notifications
In this article, you'll learn how to configure Jira notification settings in Enjo, including global defaults, team member preferences, personal notification settings, and Jira request card customization for Slack and Microsoft Teams.
Access Jira Notification settings
There are two paths depending on what you need to configure.
Admins — workspace and team member settings Go to Settings > Apps, find Jira, click ··· and select Configure. All admin-level notification settings and request card customization are on this page.
Personal settings Go to Settings > Notifications > App Notifications > Jira. This opens the General and Inbox tabs for your own notification preferences only.
💡 Settings > Apps changes apply to all users or a selected team member. Settings > Notifications changes apply only to your own account.
Settings > Apps > Jira > Configure
Workspace Jira account
The Jira configuration page shows which Jira instance is connected, who connected it, when, and the account it is connected as.
Auto Mapping When enabled, Enjo automatically maps a Jira user if they are not already mapped when they attempt to create a ticket. Toggle this on or off depending on whether you want Enjo to handle user mapping automatically.
Attribution Controls the text Enjo appends to Jira requests (max 256 characters). Click Customize to edit the attribution template.
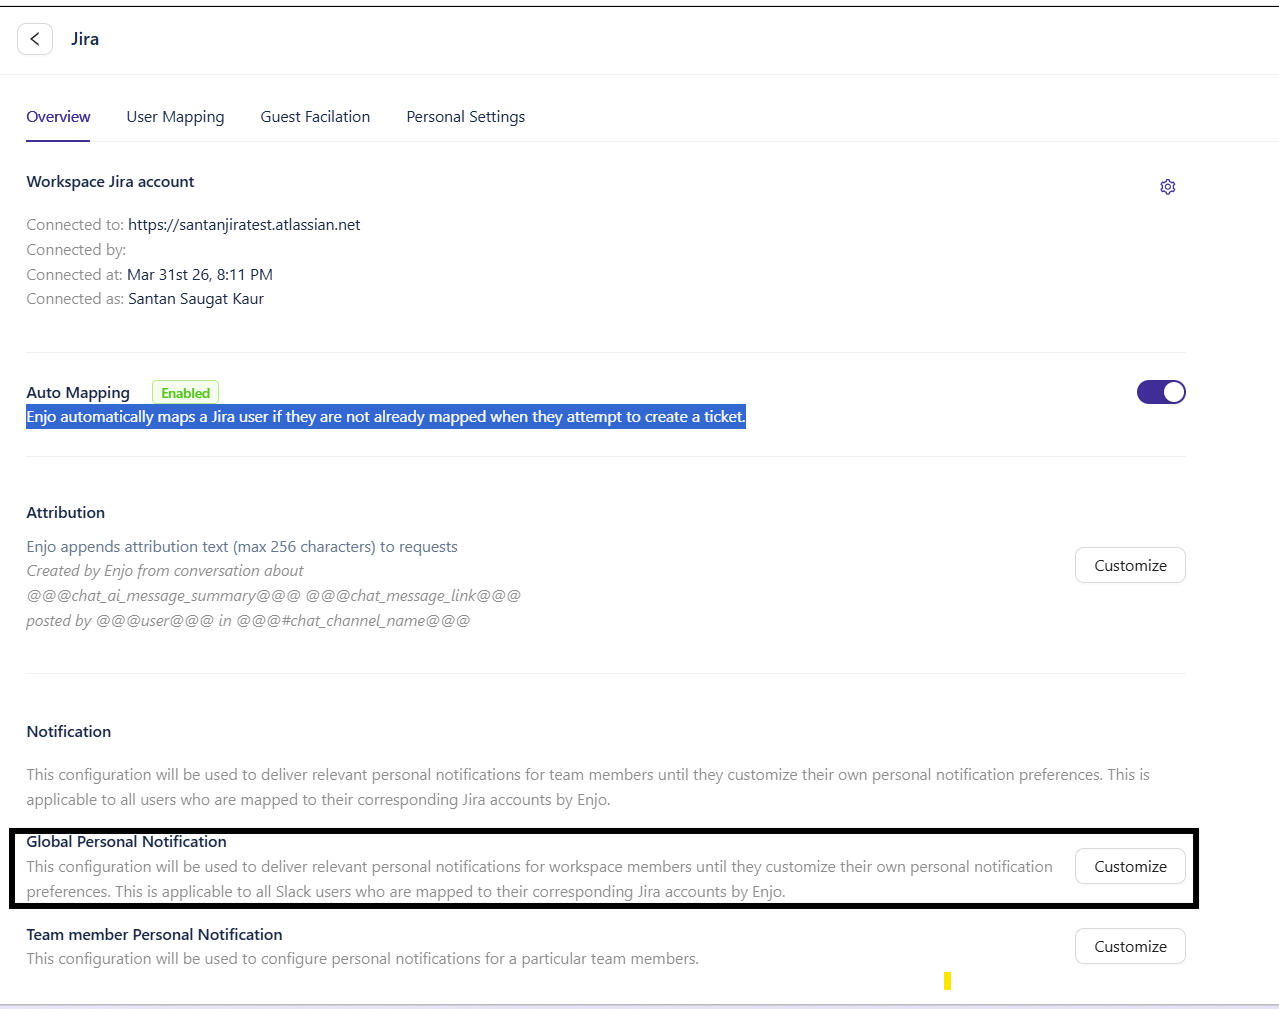
Global Personal Notification
Sets the default notification preferences for all workspace members. Applies to all users mapped to their Jira accounts by Enjo until they customise their own preferences.
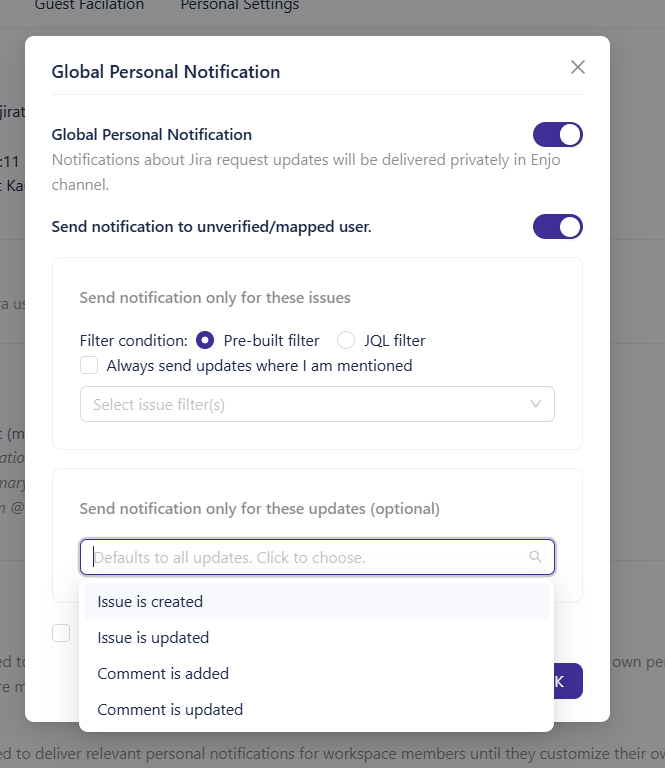
Click Customize next to Global Personal Notification.
Toggle Global Personal Notification on.
Toggle Send notification to unverified/mapped user on if you want notifications delivered to users whose Jira accounts are not yet verified.
Set your filter condition, update types, and self-notification preference. See Filter options reference.
Click OK to save.
💡 Use JQL filter at the global level for precise, consistent rules across your team. Individual users can override these defaults from their own Personal Notification settings.
Team Member Personal Notification
Configure notification preferences for a specific team member. Useful when a member has not set up their own preferences or needs a custom configuration.
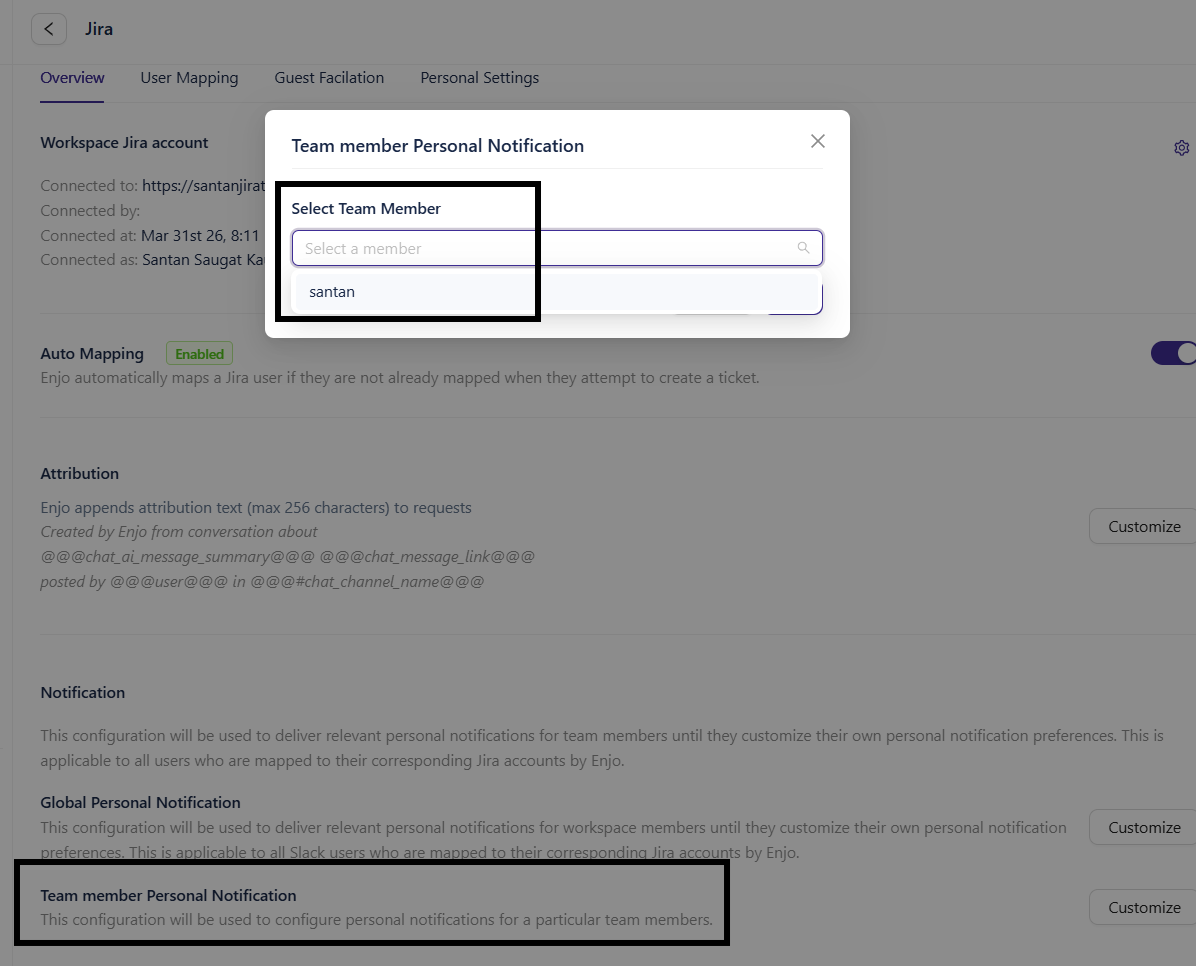
Click Customize next to Team member Personal Notification.
Select the team member from the Select Team Member dropdown.
Toggle Team member Personal Notification on.
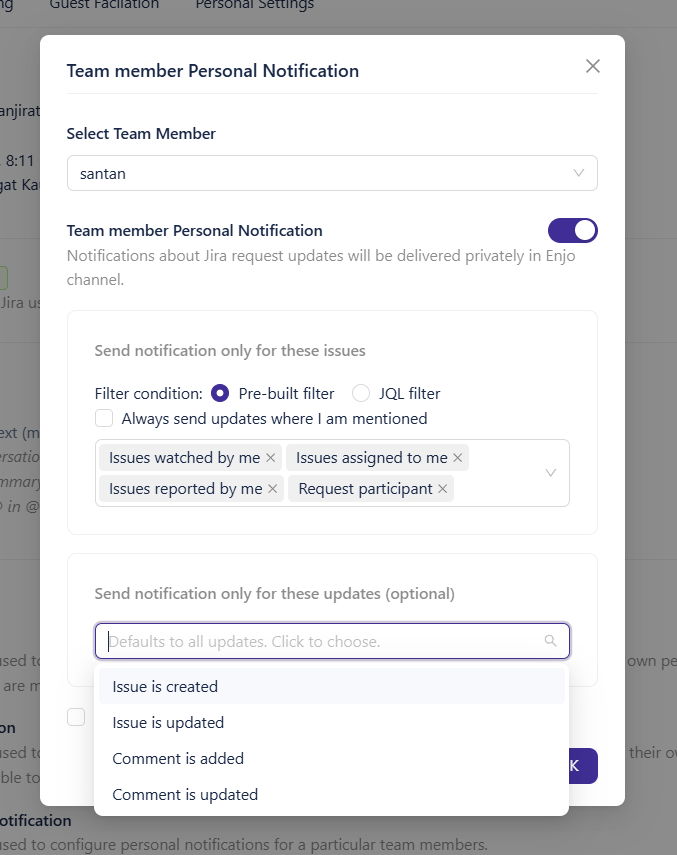
Set the filter condition, update types, and self-notification preference. See Filter options reference.
Click OK to save.
💡 Team member settings override the global defaults for that user. If a user has already configured their own preferences, review before overriding.
Filter options reference
Use these options when configuring any of the three notification levels below.
Filter condition
Choose one of two filter types:
Pre-built filter — Select one or more of the following:
Issues watched by me
Issues assigned to me
Issues reported by me
Request participant
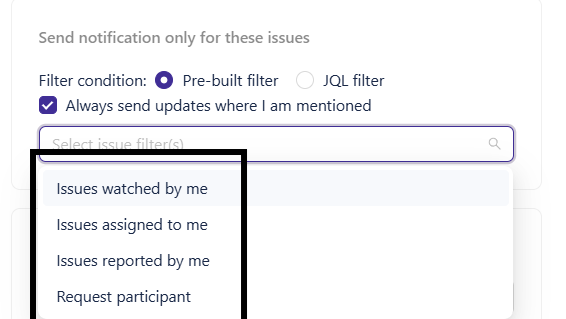
✅ Tick the checkbox "Always send updates where I am mentioned" to receive notifications for mentions regardless of other filter selections.
JQL filter — Enter a custom JQL query to define which issues trigger notifications.
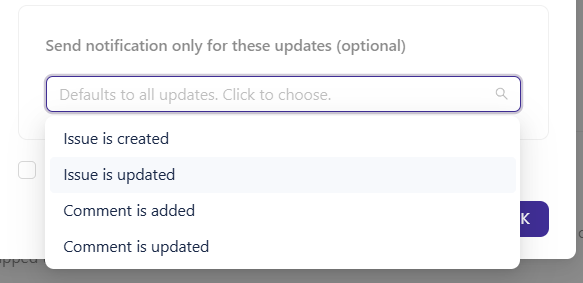
Update types (optional)
Defaults to all updates. Select specific types to narrow:
Issue is created
Issue is updated
Comment is added
Comment is updated
Send notifications for actions taken by self
✅ Check thisT to receive notifications for changes made by the user themselves. Unchecked by default.
Personal Notification
Manage your own Jira notification preferences.
Go to Settings > Notifications > App Notifications > Jira.
Select the General tab.
Click Customize next to Personal Notification.
Toggle Personal Notifications on.
Set your filter condition, update types, and self-notification preference. See Filter options reference.
Click OK to save.
💡 Your personal settings override both the global default and any team member configuration set by an admin.
Inbox Notification settings
Go to Settings > Notifications > App Notifications > Jira and select the Inbox tab.
Setting | What it does |
|---|---|
Enable Notifications | Get notified for new messages in Inbox |
Enable Sound | Play a sound when new messages arrive |
Browser Push Notifications | Get notified even when this tab is in the background |
Toggle each setting on or off based on your preference.
💡 Enable Browser Push Notifications if you work across multiple tabs and do not want to miss incoming messages when Enjo is not your active tab.
Request Card Customization
Customize how Jira request cards appear in Slack or Microsoft Teams.
To access: Go to Settings > Apps > Jira > Configure and click Customize next to Request card customization.
The Customize - Channel Issue Card modal includes a live preview at the top that updates as you make changes, and five configuration tabs.
Title
Select which Jira field appears as the card title.
Click the Title field dropdown.
Select a field. Available options include Status, Issue Type, Project, Time Spent, Fix versions, Parent, and more.
Click Save.
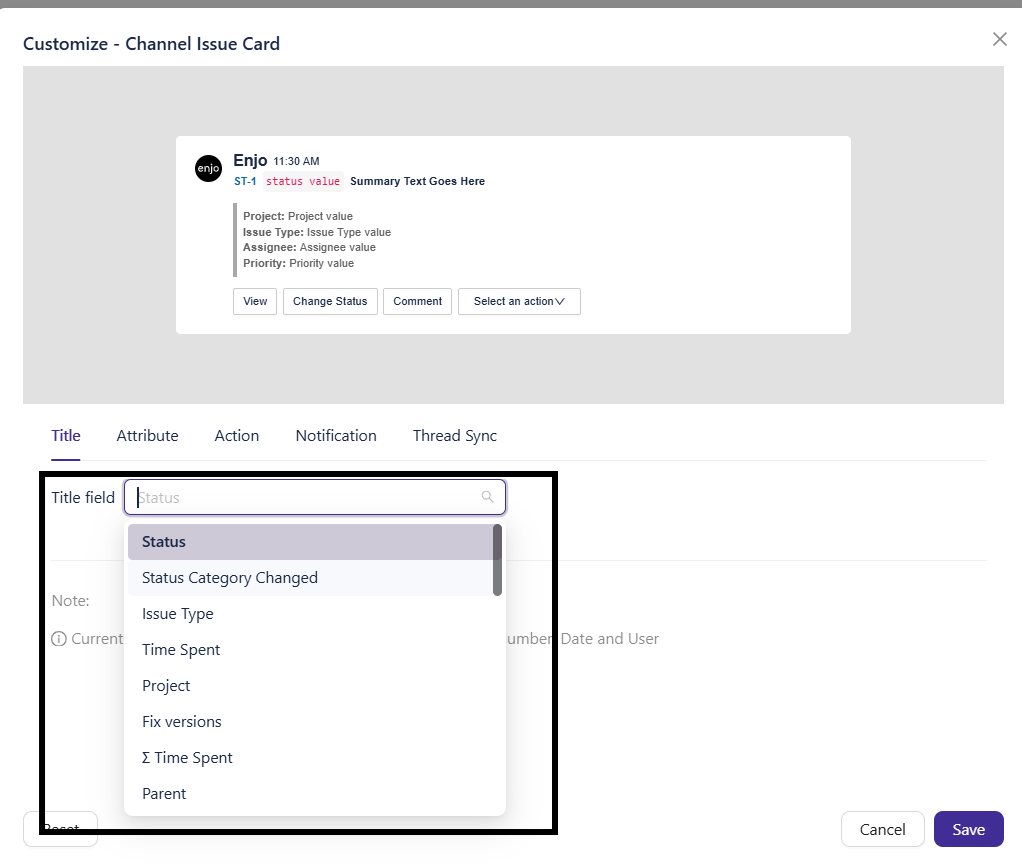
💡 The live preview at the top of the modal updates as you make changes so you can see exactly how the card will look before saving.
Attribute
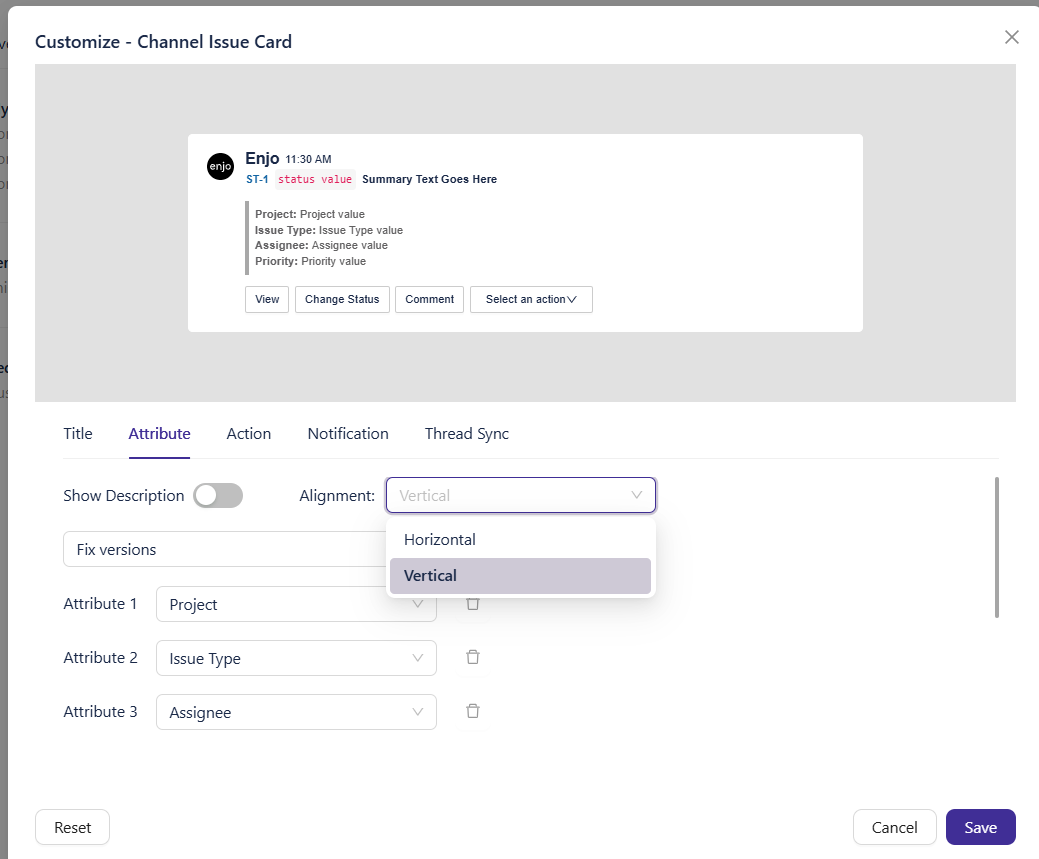
Control which fields appear on the card and how they are laid out.
Toggle Show Description on to display the issue description. Description text is truncated at 300 characters.
Set Alignment to Horizontal or Vertical.
Use Select Attribute to add fields. Available attributes include Project, Issue Type, Assignee, Priority, Time Spent, Fix versions, Parent, Design, Resolved, Work Ratio, and more.
Use the delete icon to remove any attribute.
Click Save.
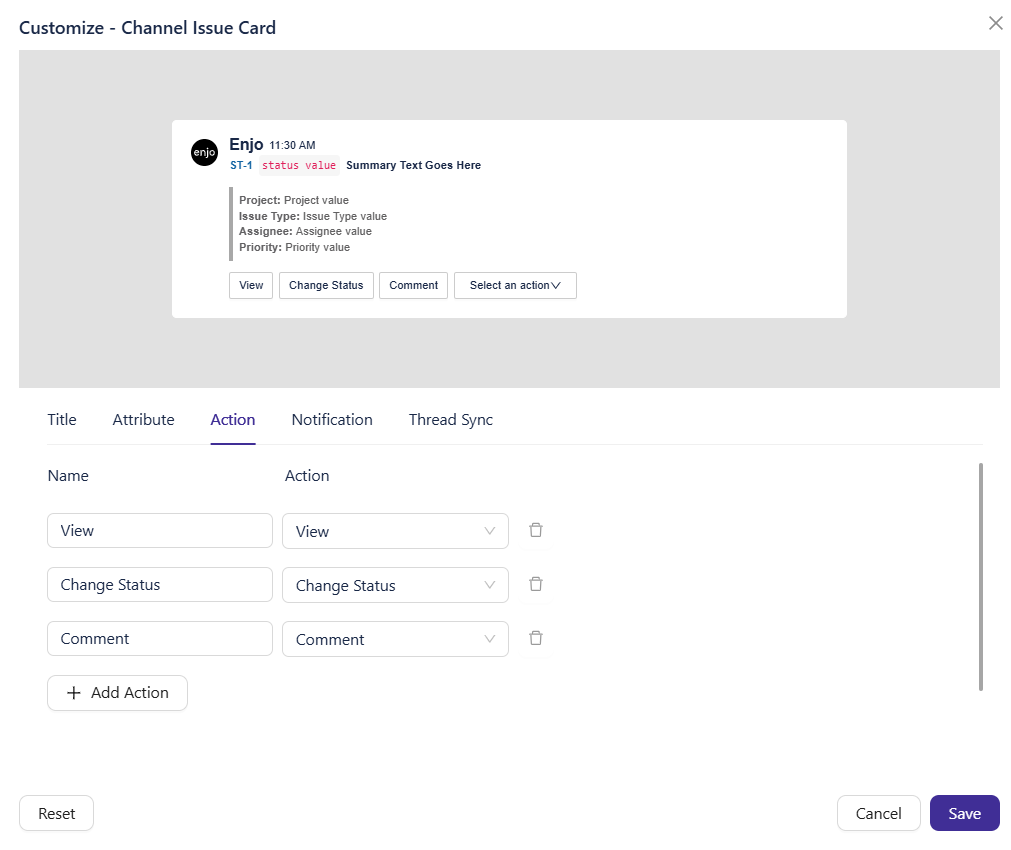
Action
Configure which buttons appear on the card and what each one does.
Review existing actions. Each action has a Name (button label) and an Action type. Default actions are View, Change Status, and Comment.
Edit an existing action by updating the Name field or changing the Action dropdown. Available action types include Change Status, Edit, Update Field(s), Assign to me, Assign, Log Time, Link Issue, and more.
Click + Add Action to add a new button.
Use the delete icon to remove an action.
Click Save.
💡 Keep actions limited to what your team uses most. Too many buttons on a card reduces clarity for users.
Notification
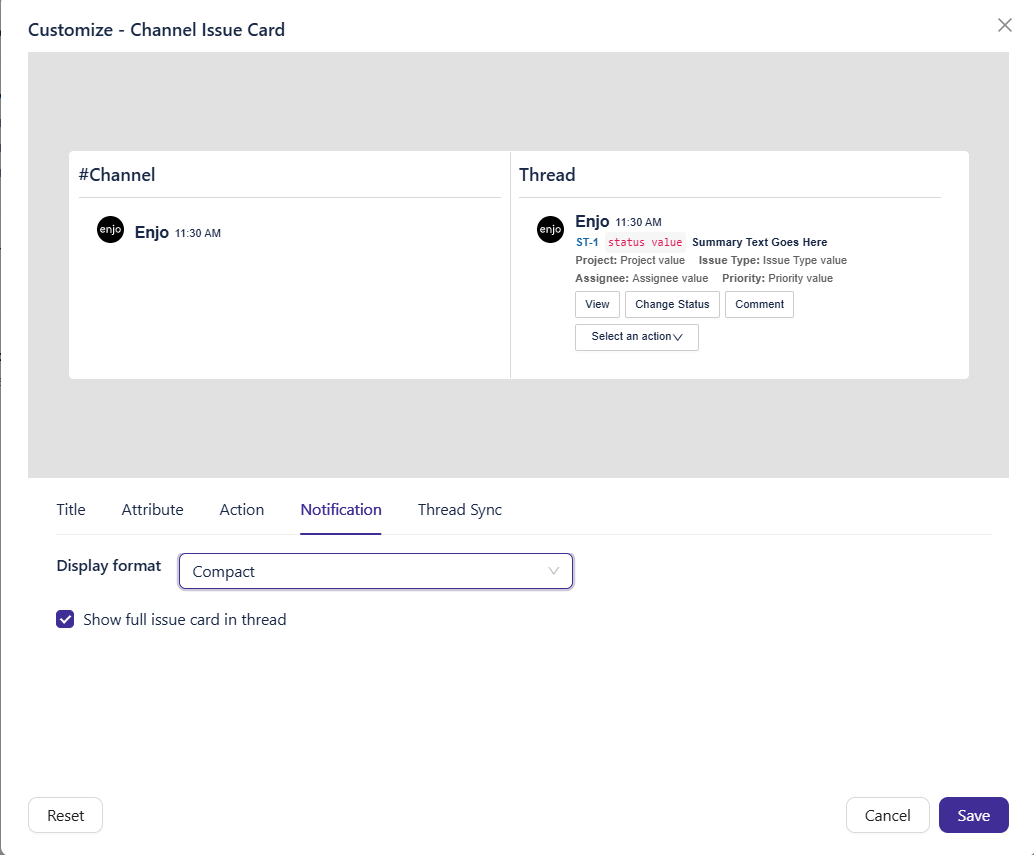
Control how the card looks when delivered as a notification in a channel or thread.
Set Display format by choosing one of the following:
Format | Best for |
|---|---|
Standard | Default view, balanced detail |
Compact | High-volume channels where brevity matters |
Detailed | When agents need full context without opening Jira |
Review the preview. It shows two views side by side:
#Channel — how the card appears in the channel message
Thread — how the card appears inside the thread, including action buttons
Toggle Show full issue on to display complete issue details in the notification. Toggle off for a condensed view.
Click Save.
Thread Sync
Configure card behavior when thread sync is active between Slack or Teams and Jira.
Check Footer message mentioning that the Slack/Teams thread is syncing with Jira to display a sync status indicator at the bottom of the card.
Click Save.
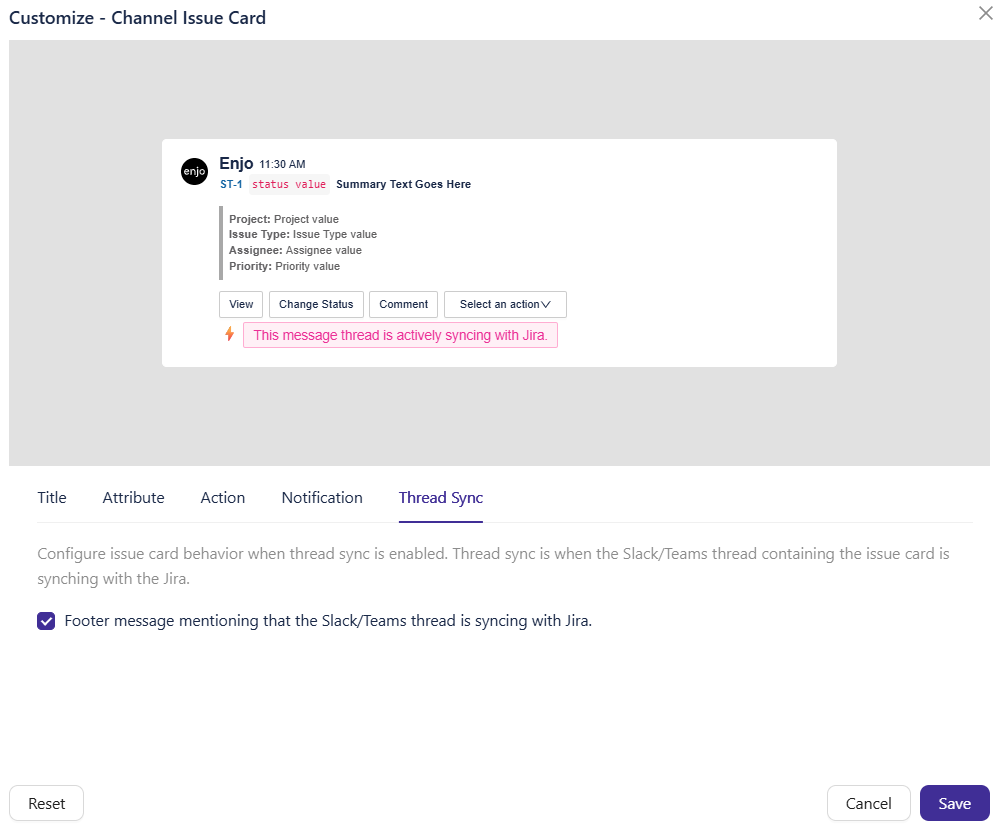
💡 Enabling this footer helps users know at a glance that the thread is actively syncing with Jira, reducing duplicate updates or confusion.
Reset to defaults
Click Reset at the bottom left of the modal at any time to revert all card customizations back to the default configuration.
What's next
AI Actions — Configure what actions the AI Agent can take in Jira.
Jira Ticketing Settings — Set up ticket creation rules, fields, and defaults