ServiceNow
In this article, you'll learn how to connect your ServiceNow instance to Enjo, enabling the AI Agent to create tickets, look up ticket details, and update tickets in real time.
Note: This integration requires admin access in both your ServiceNow instance and your Enjo workspace.Key Integration Features
How this works
ServiceNow is a system action in Enjo — meaning the AI Agent can query and operate on your ServiceNow tickets in real time during request resolution. The connection uses OAuth 2.0 authentication and requires two setup phases:
Create a service account in ServiceNow with admin permissions
Register an OAuth application and authenticate in Enjo
Once connected, your AI Agent can:
Create new tickets
Look up existing tickets by ID
Update ticket fields
Retrieve ticket details for context during resolution
Before you start
Prerequisites:
Admin access to your ServiceNow instance
Admin or Owner role in Enjo
A browser with access to both ServiceNow and Enjo
Prerequisites
Before starting, ensure the following:
ServiceNow Access: You must have an account with administrative privileges.
Enjo Access: An Enjo admin account to configure the integration.
ServiceNow Service Account: A dedicated service account in your ServiceNow Production instance for performing tasks such as creating and updating requests, and accessing catalog items and knowledge base articles.
Creating a Service Account in ServiceNow
Log into Your ServiceNow Instance
Navigate to your ServiceNow instance at https://{{instance_name}}.service-now.com.
Access the User Table
Click on ‘All’ in the navigation menu.
Search for ‘Users’ under “Organization” and click on it.
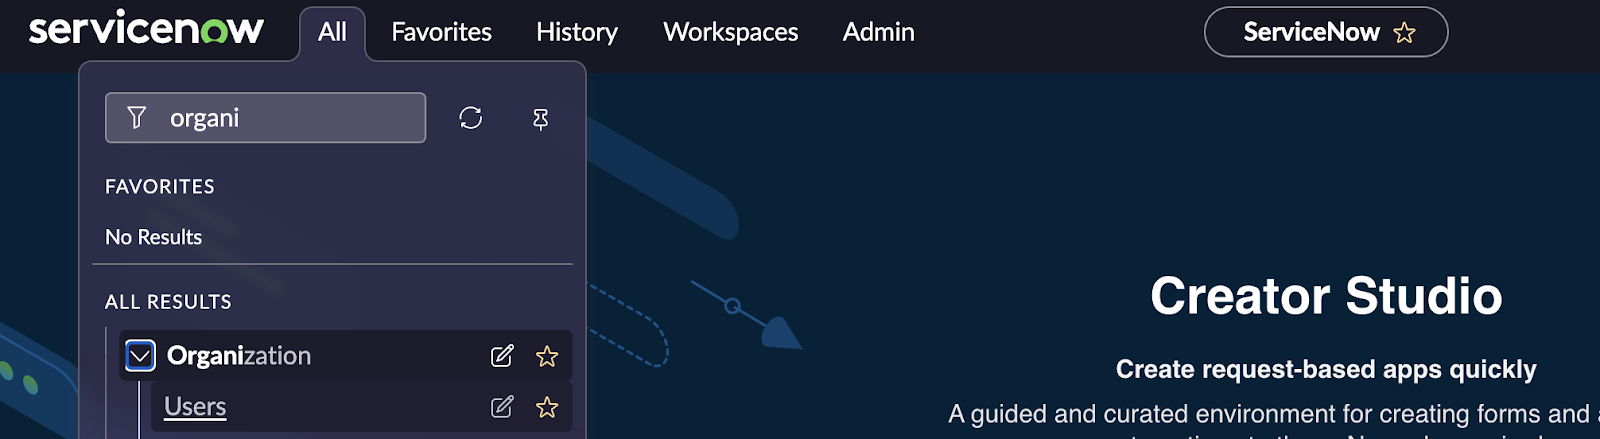
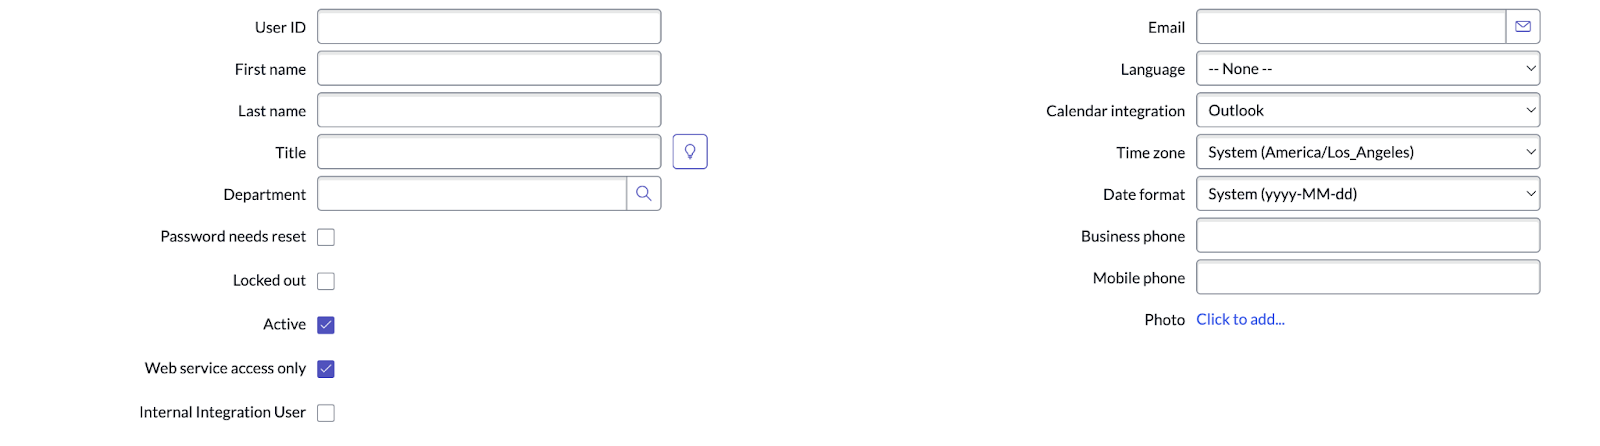
Create a New User
In the user table view, click the ‘New’ button in the top-right corner.
Fill in the required details for the service account.
Ensure that the ‘Web Service Access Only’ checkbox is enabled.
Assign Admin Role
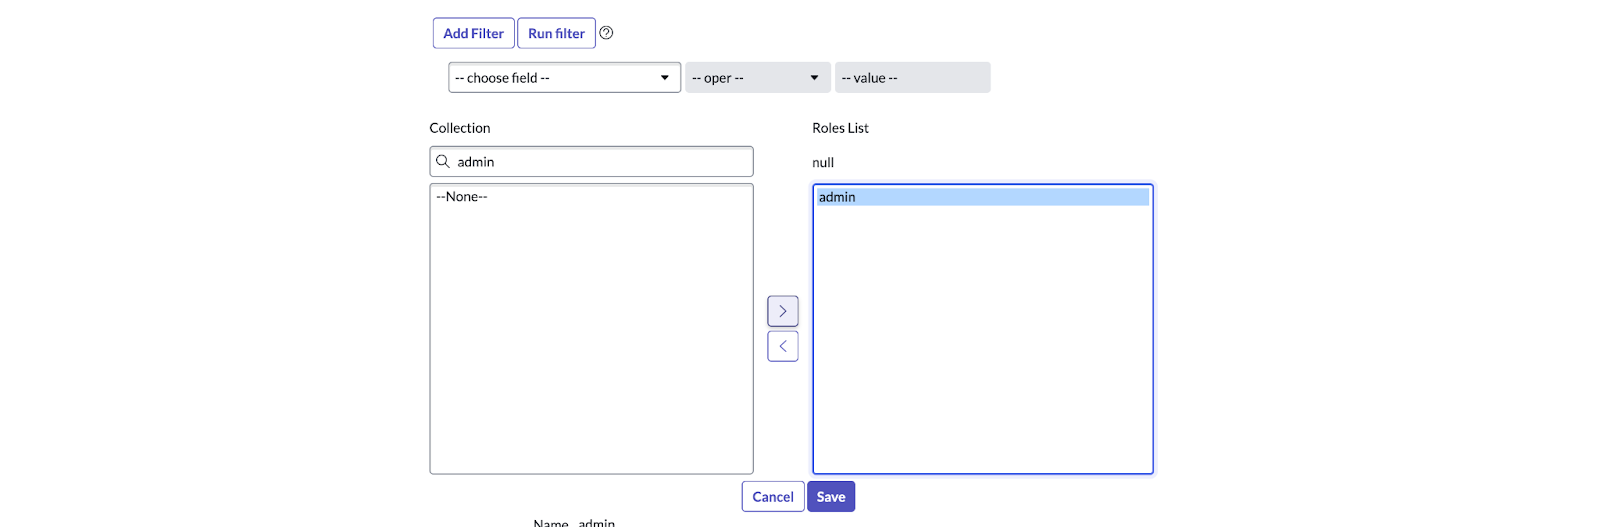
In the same form, click on ‘Roles’ and then ‘Edit’.
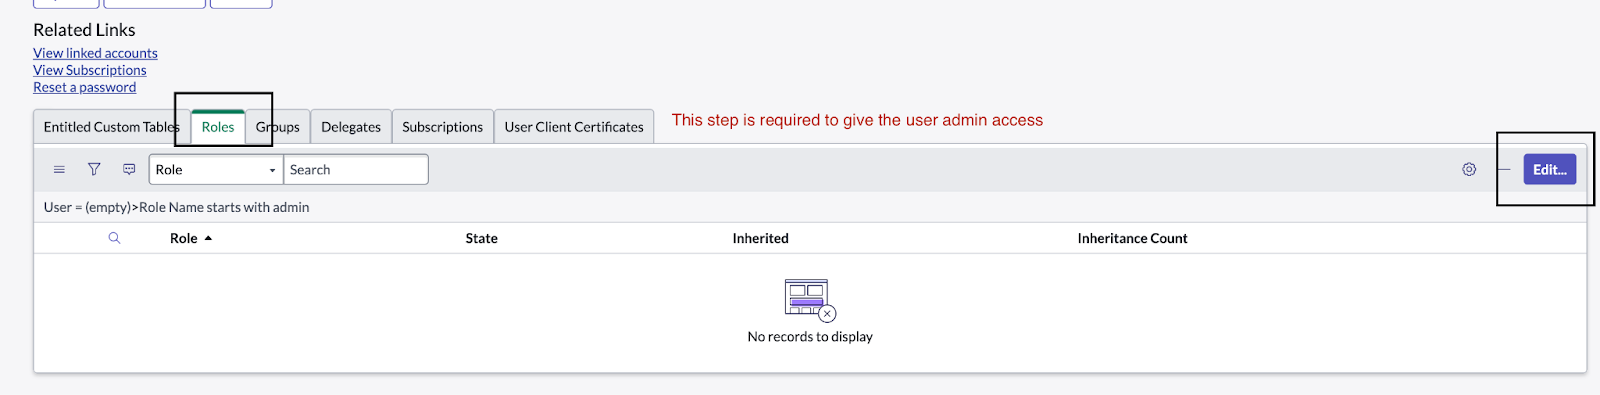
:::Paragraph{listStyleType="disc" listStart="2" indent="2"} Search for the ‘admin’ role and assign it to the user.
:::
Setting up OAuth in ServiceNow
In order to add ServiceNow Connection in Enjo, OAuth must be activated on your ServiceNow instance. If not, please follow the below steps.
Activate OAuth
Navigate to your ServiceNow instance at https://{{instance_name}}.service-now.com.
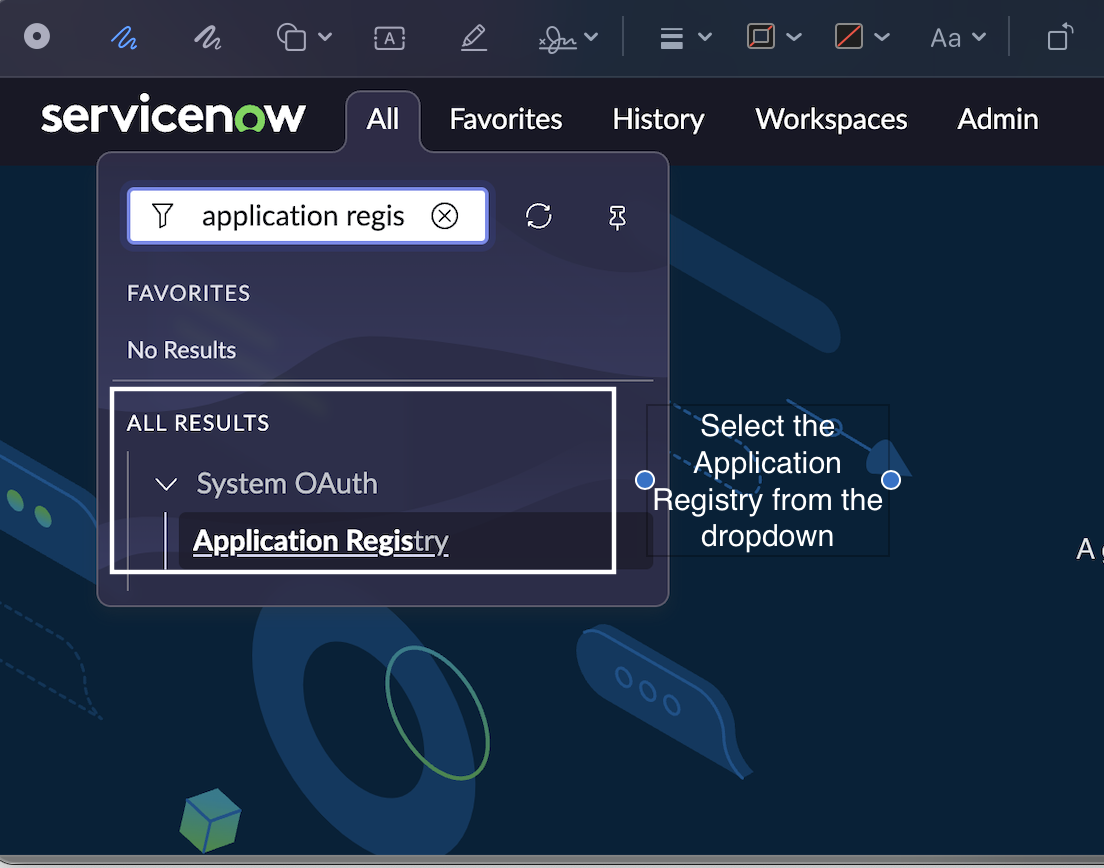
In the navigation menu, click ‘All’ and search for ‘System OAuth’.
Under ‘System OAuth’, click ‘Application Registry
Create an OAuth API Endpoint
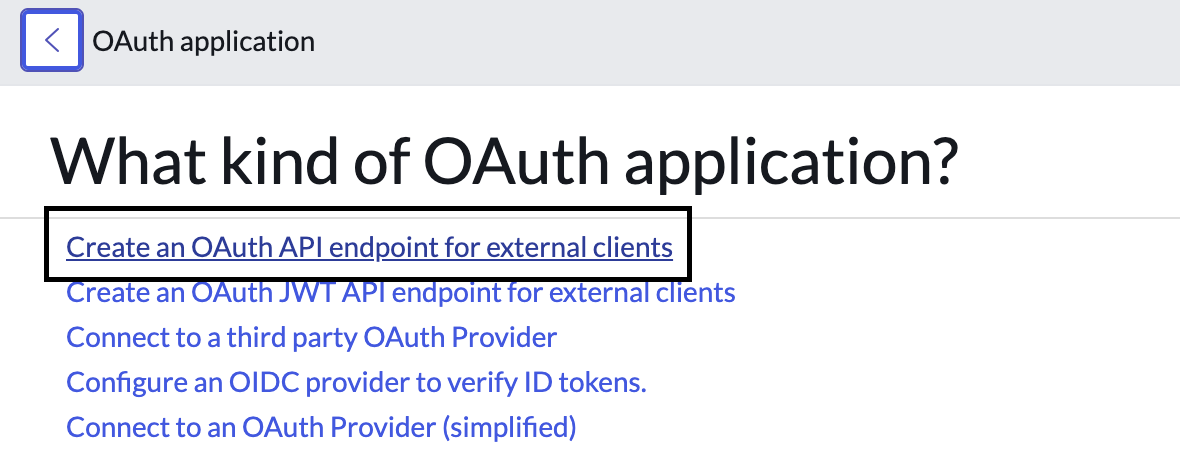
Click the ‘New’ button in the top-right corner.

Select ‘Create an OAuth API endpoint for external clients’.
Complete the form with the required details and click ‘Submit’.
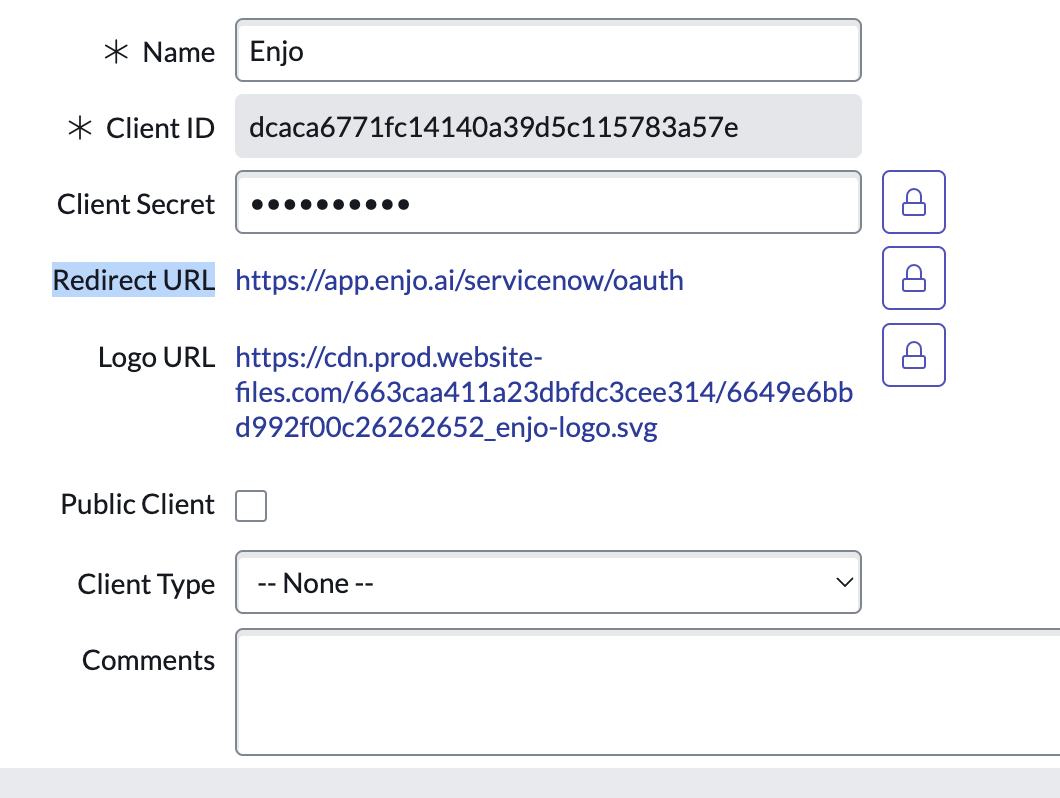
Copy the Client ID and Client Secret displayed upon submission. These will be needed for the Enjo configuration.
Configuring the Integration in Enjo
Access the Enjo Dashboard
Log in to Enjo at https://app.enjo.ai.
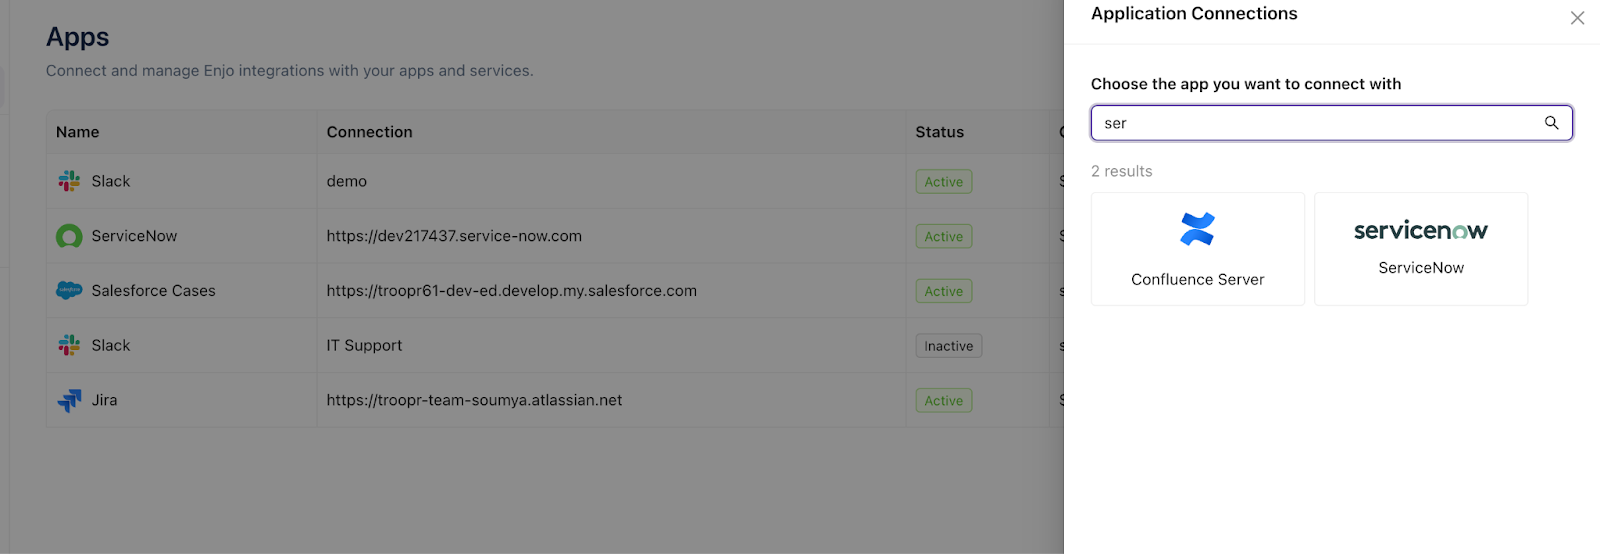
Navigate to Settings > Apps > Connect Apps.
Select ‘ServiceNow’ from the available apps
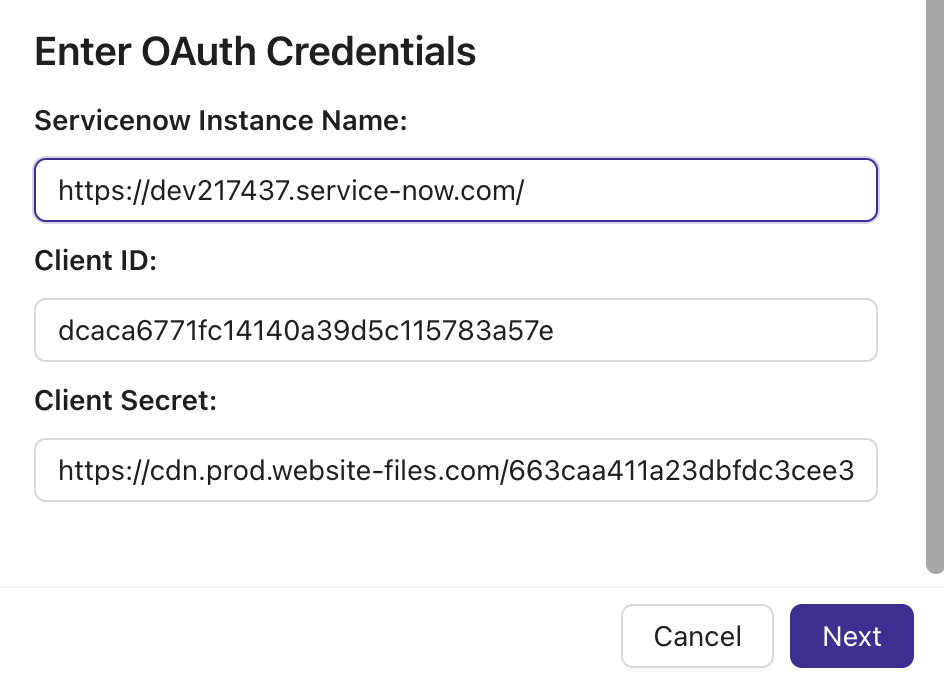
Add a New ServiceNow Instance
Click ‘Add New’ to configure a new ServiceNow instance.
Enter the Client ID, Client Secret, and Instance URL obtained from the ServiceNow OAuth setup.
:::Paragraph{listStyleType="disc" listStart="3" indent="2"} Copy the ‘Enjo Name’, ‘Request’, and ‘Logo URL’ from Enjo to ServiceNow’s OAuth settings to establish the connection. :::
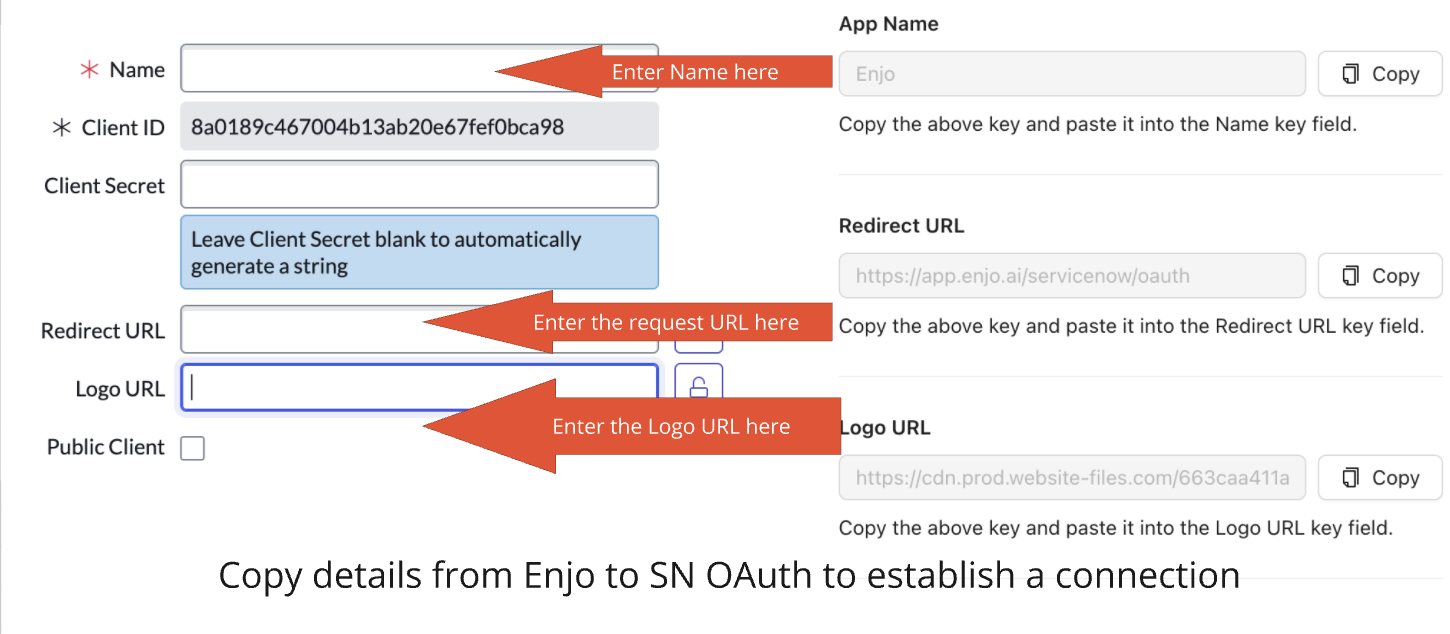
:::Paragraph{listStyleType="disc" listStart="4" indent="2"}
:::
Finalise the Configuration
Configure the connection name and set the visibility of the app connection for specific Enjo AI agents as needed.
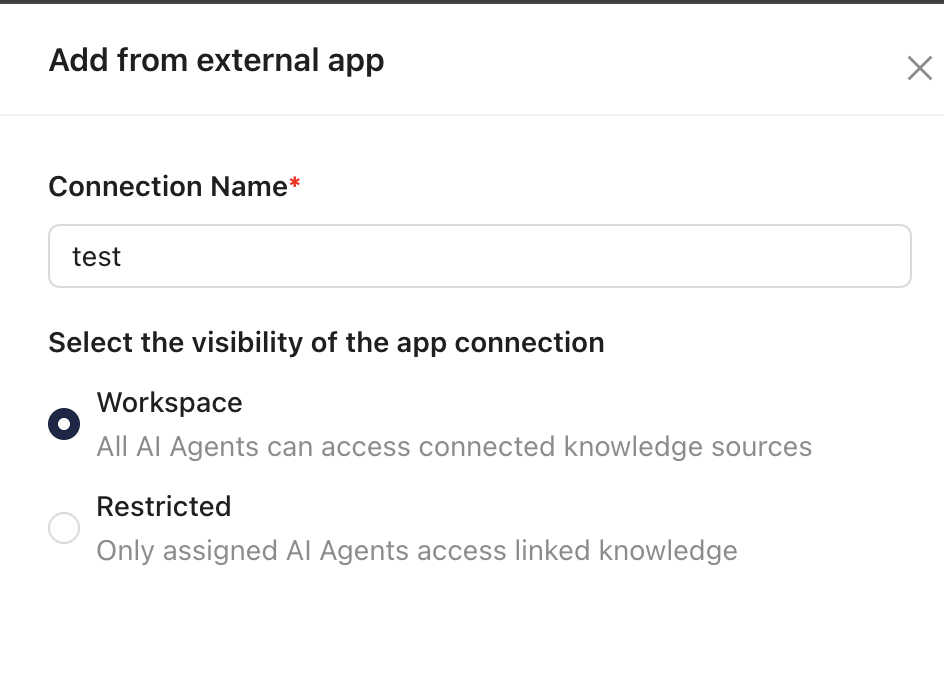
Click ‘Connect’ to complete the setup.
FAQs
Q: Can I use the integration with multiple ServiceNow instances?
A: Yes, you can add and manage multiple ServiceNow instances in the Enjo dashboard. Each instance requires a unique configuration, including its Client ID, Client Secret, and Instance URL.
Q: OAuth is not activated in my ServiceNow instance. What should I do?
A: Follow the steps provided in this guide to activate OAuth in your ServiceNow instance. If OAuth remains unavailable, contact your ServiceNow administrator to enable it.