
Okta
In this article, you'll learn how to connect your Okta account to Enjo so your AI Agent can take actions in Okta, such as unlocking accounts, managing access, and provisioning users.
Before you start
You need Owner or Admin role in Enjo.
You need an active Okta account with permission to generate API keys.
Have your Okta domain name and API key ready before starting.
How to get your Okta API key
Log in to your Okta Admin Console.
Go to Security > API.
Select the Tokens tab.
Click Create Token.
Enter a name for the token and click Create Token.
Copy the token value — this is your API key. Store it securely as it will not be shown again.
⚠️ Okta API tokens inherit the permissions of the admin who creates them. Use a service account with the minimum required permissions when generating the token for Enjo.
Connect Okta
Go to Settings from the left navigation.
Click Apps.
Click Connect Apps.
In the search bar, type Okta and select it from the results.
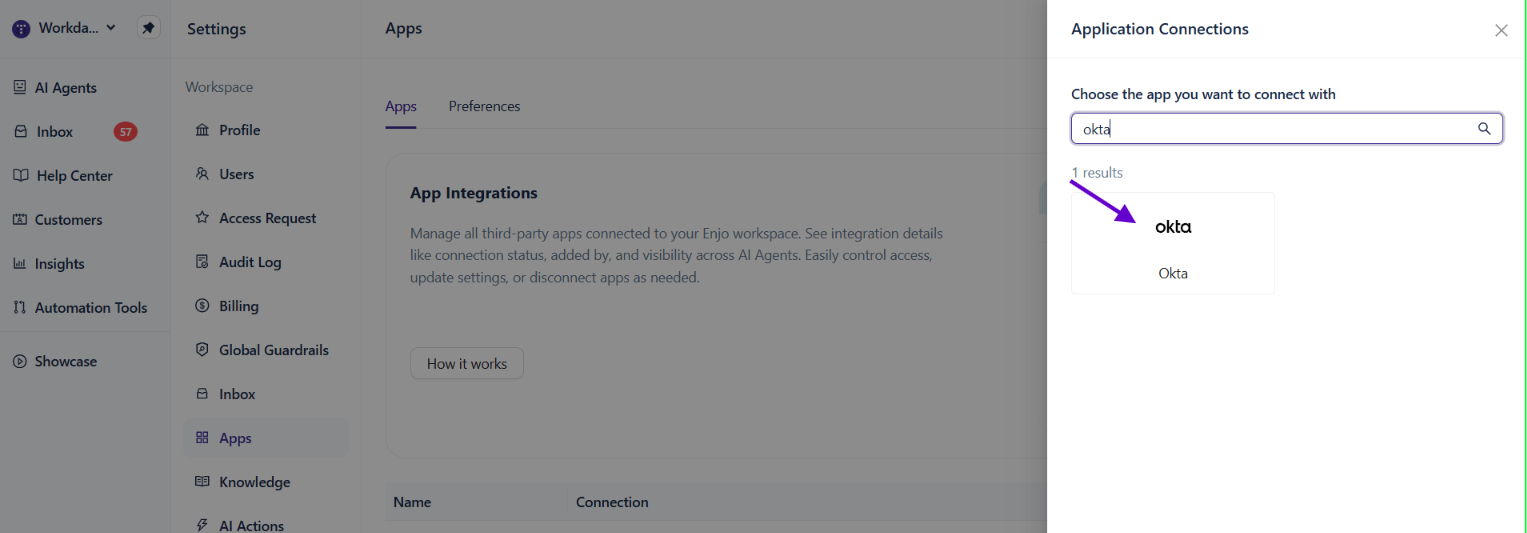
Click Add New.
In the Connection Name field, enter a name for this connection — for example, Okta Production.
Click Connect.
Enter your Okta Domain Name — for example,
yourcompany.okta.com.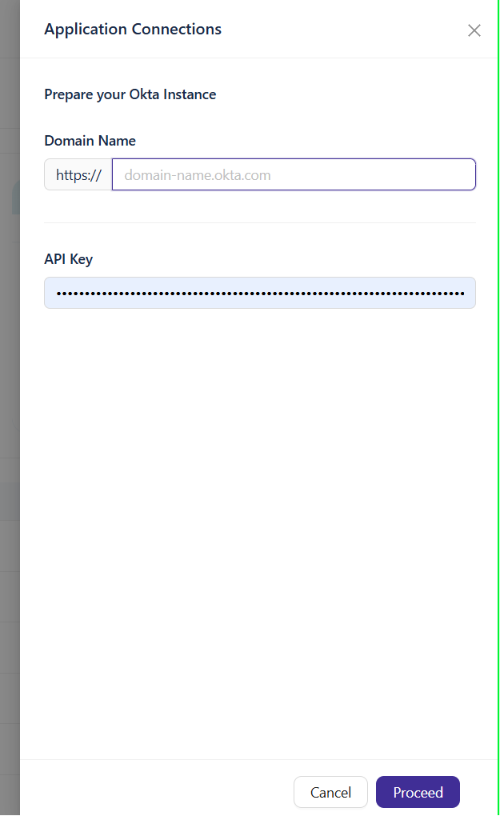
Enter your API Key.
Click Proceed.
Your Okta account is now connected to your Enjo workspace.
Verify the connection
Go to Settings > Apps.
Find your Okta connection in the list.
Confirm the connection status shows as connected.
What's next
Enjo App Integrations — View all apps you can connect to Enjo.
AI Agent AI Actions — Set up AI Actions that use your Okta connection to take actions on behalf of users.
Set Up Your AI Agent — Configure your AI Agent to use connected apps.