
AI Agent AI Flows
In this article, you'll learn how to create AI Flows multi-step workflows that enable your AI Agent to handle complex requests by executing multiple actions in sequence.
Before you start
You must be an Owner, Admin, or AI Agent manager in your Enjo workspace
Your AI Agent must already be created (see Create AI Agent)
All AI Actions your flow will call must be created and connected to your agent first (see AI Actions)
Allow 10–15 minutes to create and test a flow
How it works
An AI Flow is a multi-step conversation sequence that guides your AI Agent through handling requests that require more than a simple knowledge response. Instead of stopping after providing an answer, the flow instructs the agent to ask questions, collect information, call AI Actions, make decisions, and confirm outcomes all in one conversation.
When to use AI Flows:
A request requires gathering information before taking action
Multiple AI Actions need to be called in sequence
The flow follows a predictable path with conditional logic
The same workflow repeats for similar requests
Common use cases:
Device issue intake (ask about issue type → collect device details → create ticket → confirm)
Access request processing (verify identity → check eligibility → grant access → notify)
Onboarding steps (collect employee info → provision accounts → send confirmation)
Account updates (verify identity → fetch account → apply changes → confirm)
Key capabilities:
Sequential execution of multiple AI Actions
Natural language instructions to guide agent behavior
Conditional branching (e.g., premium vs. standard users)
Reuse of AI Actions across different flows
Structured orchestration for specific request types
ℹ️ Note: Each flow is scoped to a specific AI Agent. Flows created for one agent are not available on others.
Select your AI Agent
Click AI Agents in the left navigation.
The AI Agents list opens, showing all agents in your workspace.
Select the agent you want to add a flow to.
The selected agent appears in the top dropdown throughout the AI Agents configuration area. All subsequent configuration steps (including AI Flows) apply to this agent.
Navigate to AI Flows
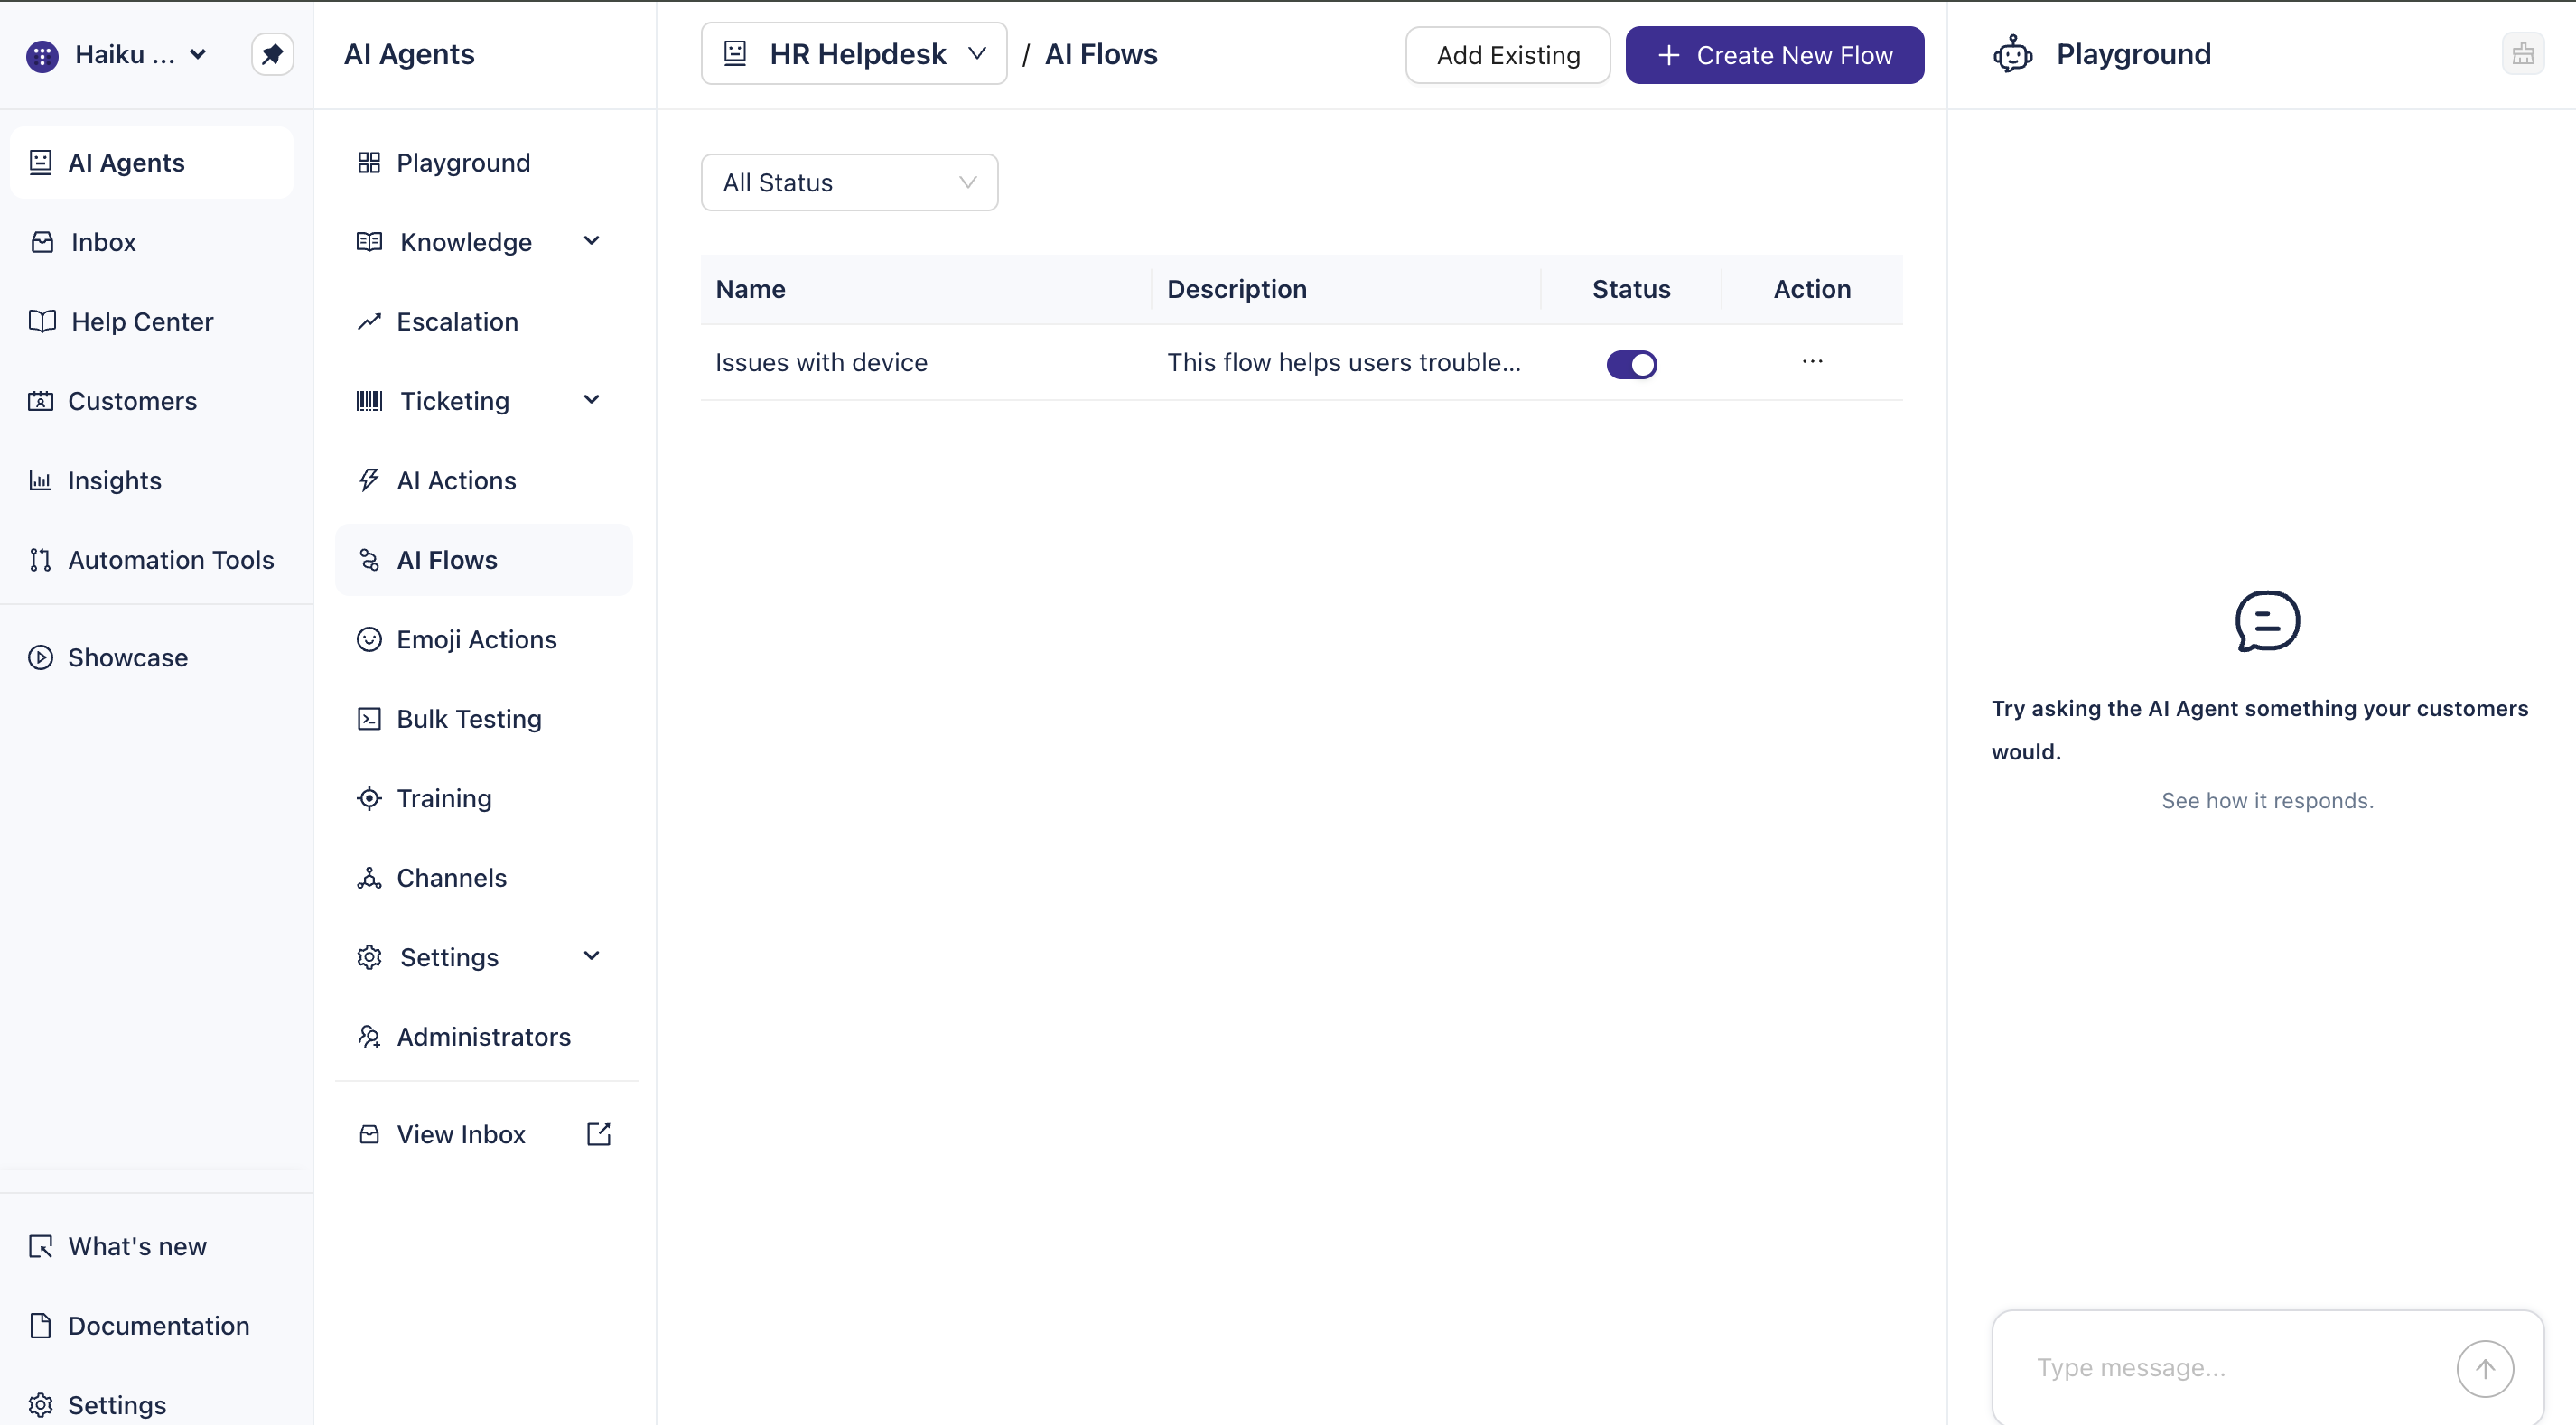
With your agent selected, click AI Flows in the left navigation.
The AI Flows list opens, displaying all existing flows for that agent and their status (active/inactive).
Click + Create New Flow.
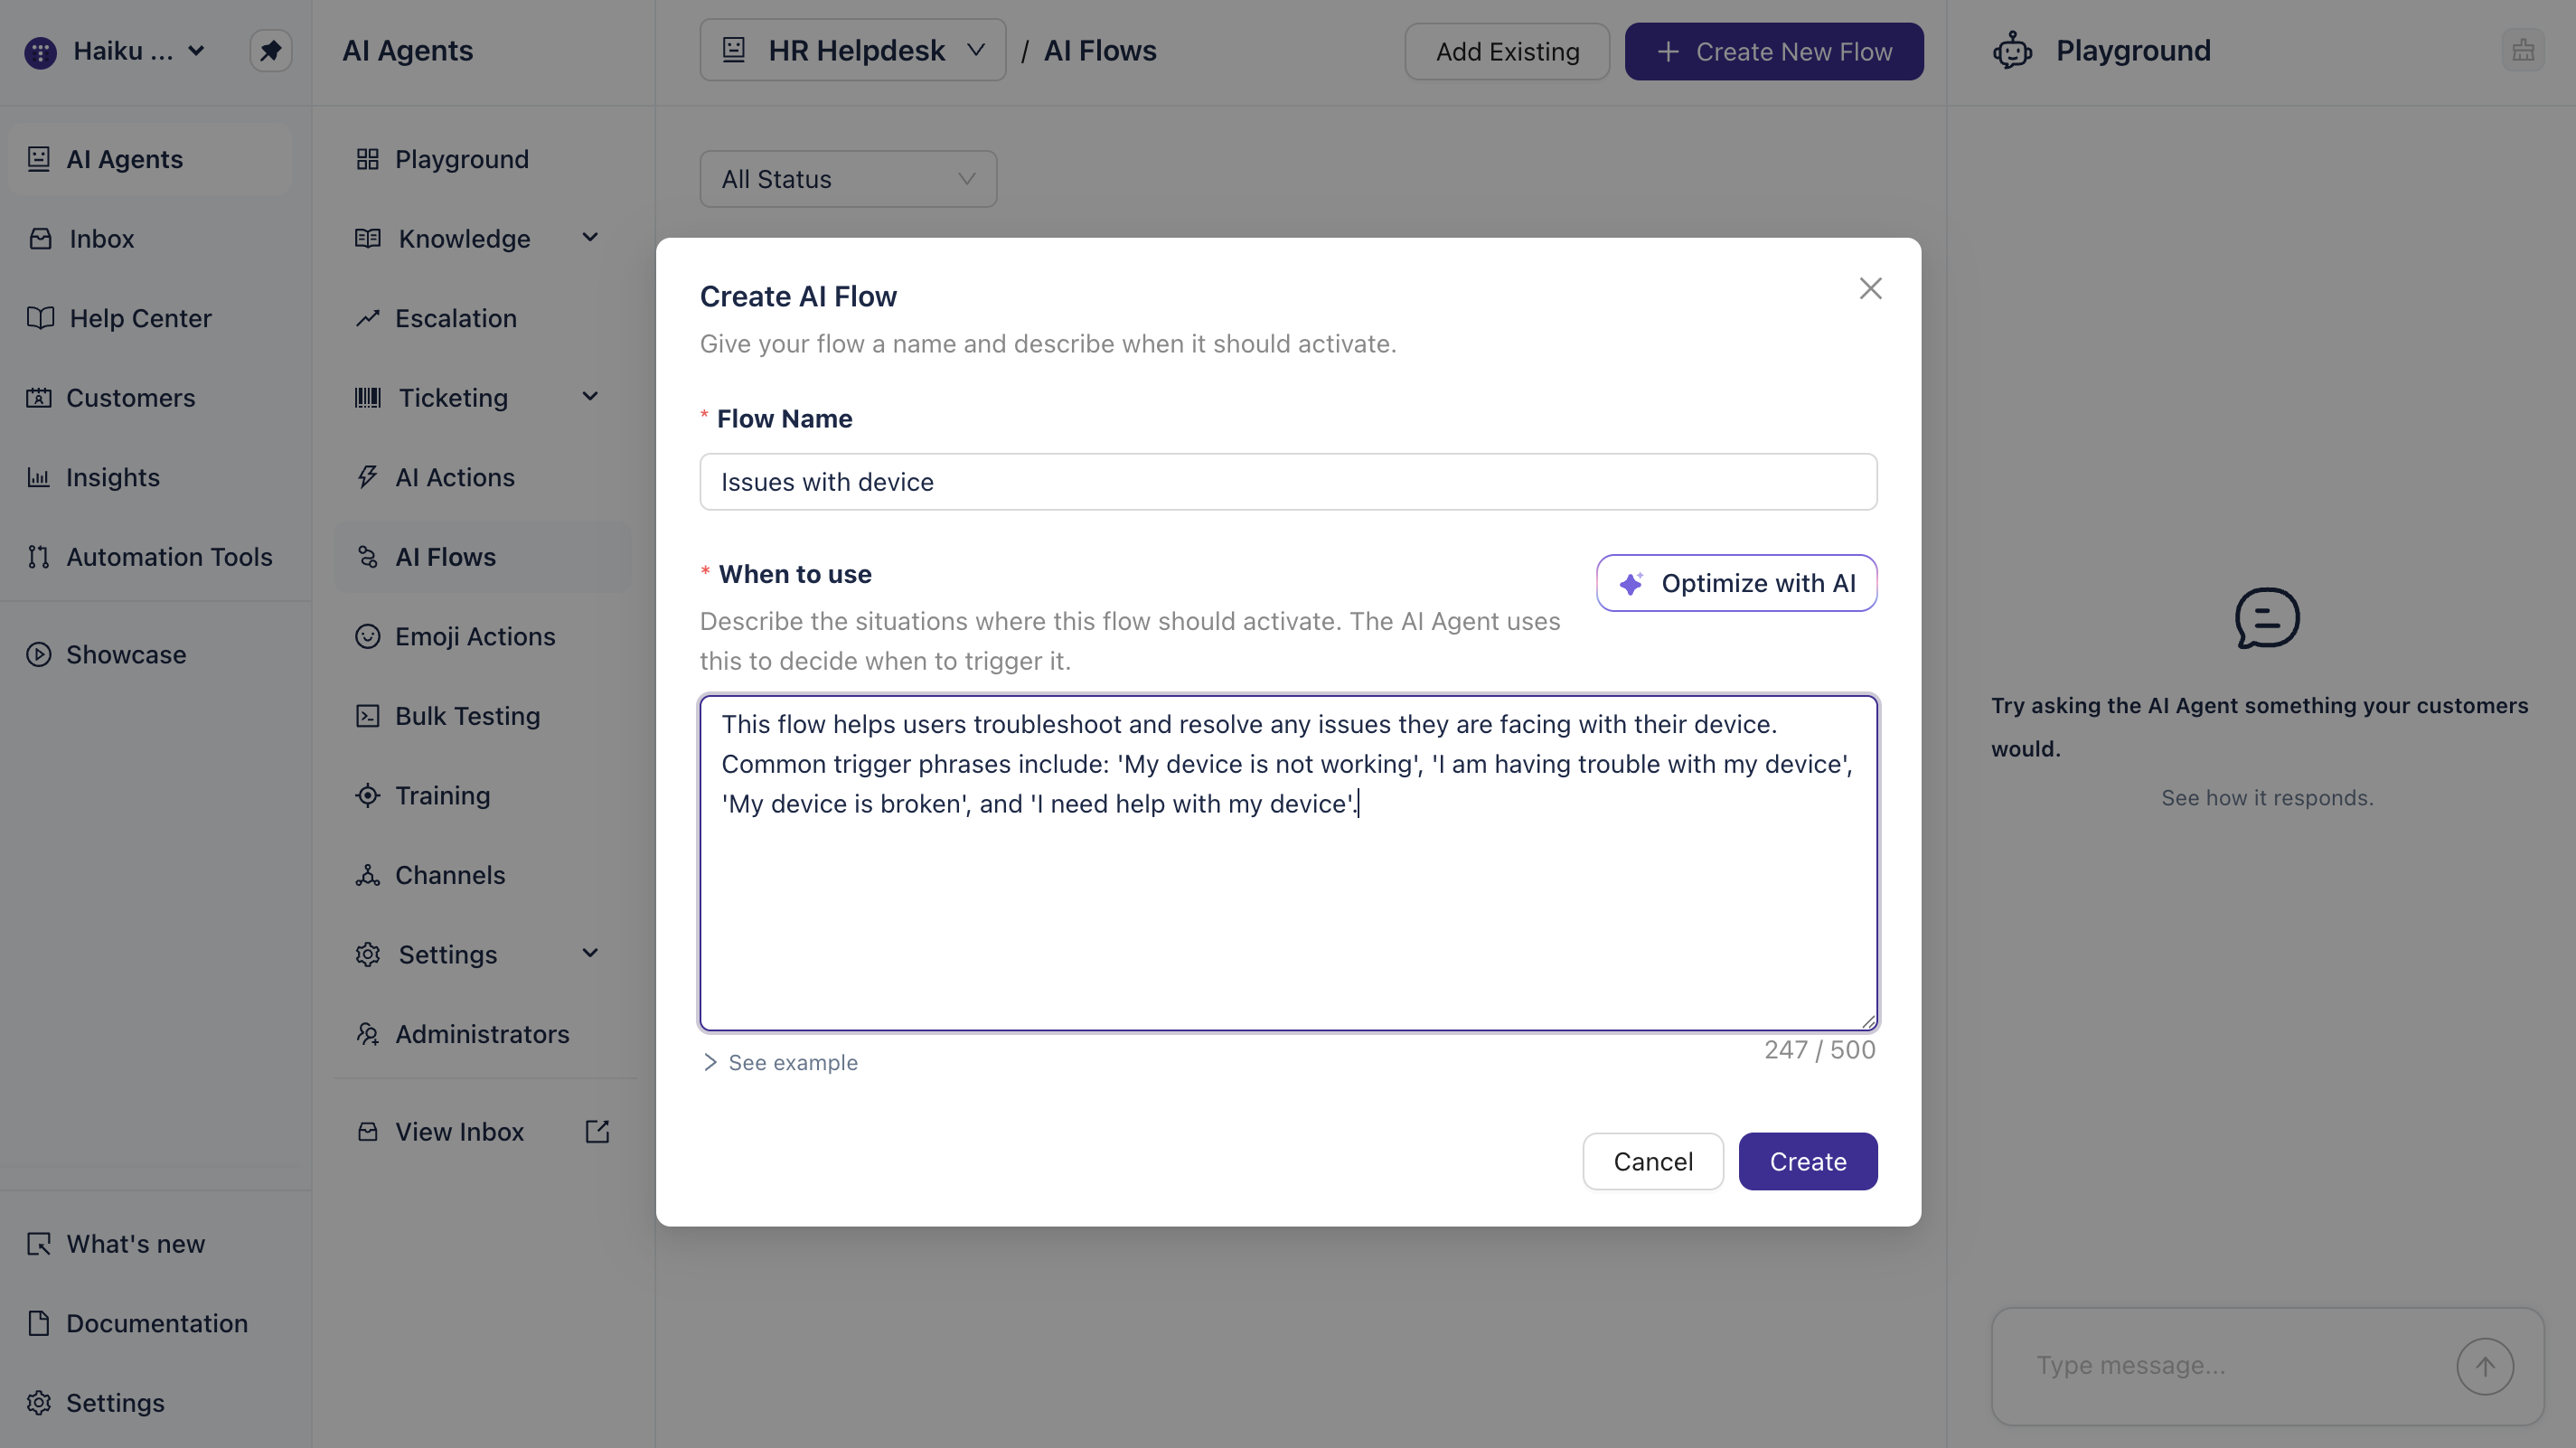
The Create AI Flow modal opens.
Name your flow and set trigger instructions
In the Create AI Flow modal, fill in two required fields:
1. Flow Name
Enter a short, descriptive label for the flow. This is used internally and appears in the flows list.
Examples:
"Device Issue Intake"
"Access Request Processing"
"Password Reset"
2. When to use (Trigger instruction)
Write a plain-language description of when this flow should trigger. The AI Agent reads this instruction at runtime to decide whether to activate the flow when a user message arrives.
Write this as a brief condition statement describing the situation that warrants this flow.
Example:
"When the user is reporting a problem with their device"
"When the user needs to request access to a system or resource"
"When the user needs to change their password"
💡 Tip: Use the Optimize with AI button after entering your initial trigger instruction. Enjo will rewrite and expand it into a more complete trigger definition and suggest example user phrases the agent will learn to match (e.g., "My laptop is broken," "I can't access the printer").
Click Create.
The flow editor opens and you can begin writing flow instructions.
Write flow instructions
In the flow editor, the Instructions field is where you define what the agent does once the flow is triggered. Write these as numbered steps in plain language, as if you're briefing a colleague on how to handle the request.
Each instruction step should tell the agent:
What question to ask the user
What information to collect
What AI Action to call
What decision to make based on user input
What confirmation to provide
Example flow instructions:
1. Ask the user whether the device issue is software-related or hardware-related.
2. Ask the user to provide device details (model, year, and serial number).
3. Ask the user to describe the issue they're experiencing.
4. Call @create_ticket to create a support ticket. Use the issue description as the summary and device details in the description field.
5. Confirm to the user that the ticket has been created and provide the ticket number.
6. Offer to escalate to a specialist if the issue needs urgent attention.
Instruction best practices:
Use numbered steps for clarity
Be specific about what information to collect
Use clear, direct language (the agent uses these instructions to generate responses)
Reference AI Actions using the @action_name format (see next section)
Include conditional logic where needed (e.g., "If the user is a premium member, allow immediate access. Otherwise, escalate.")
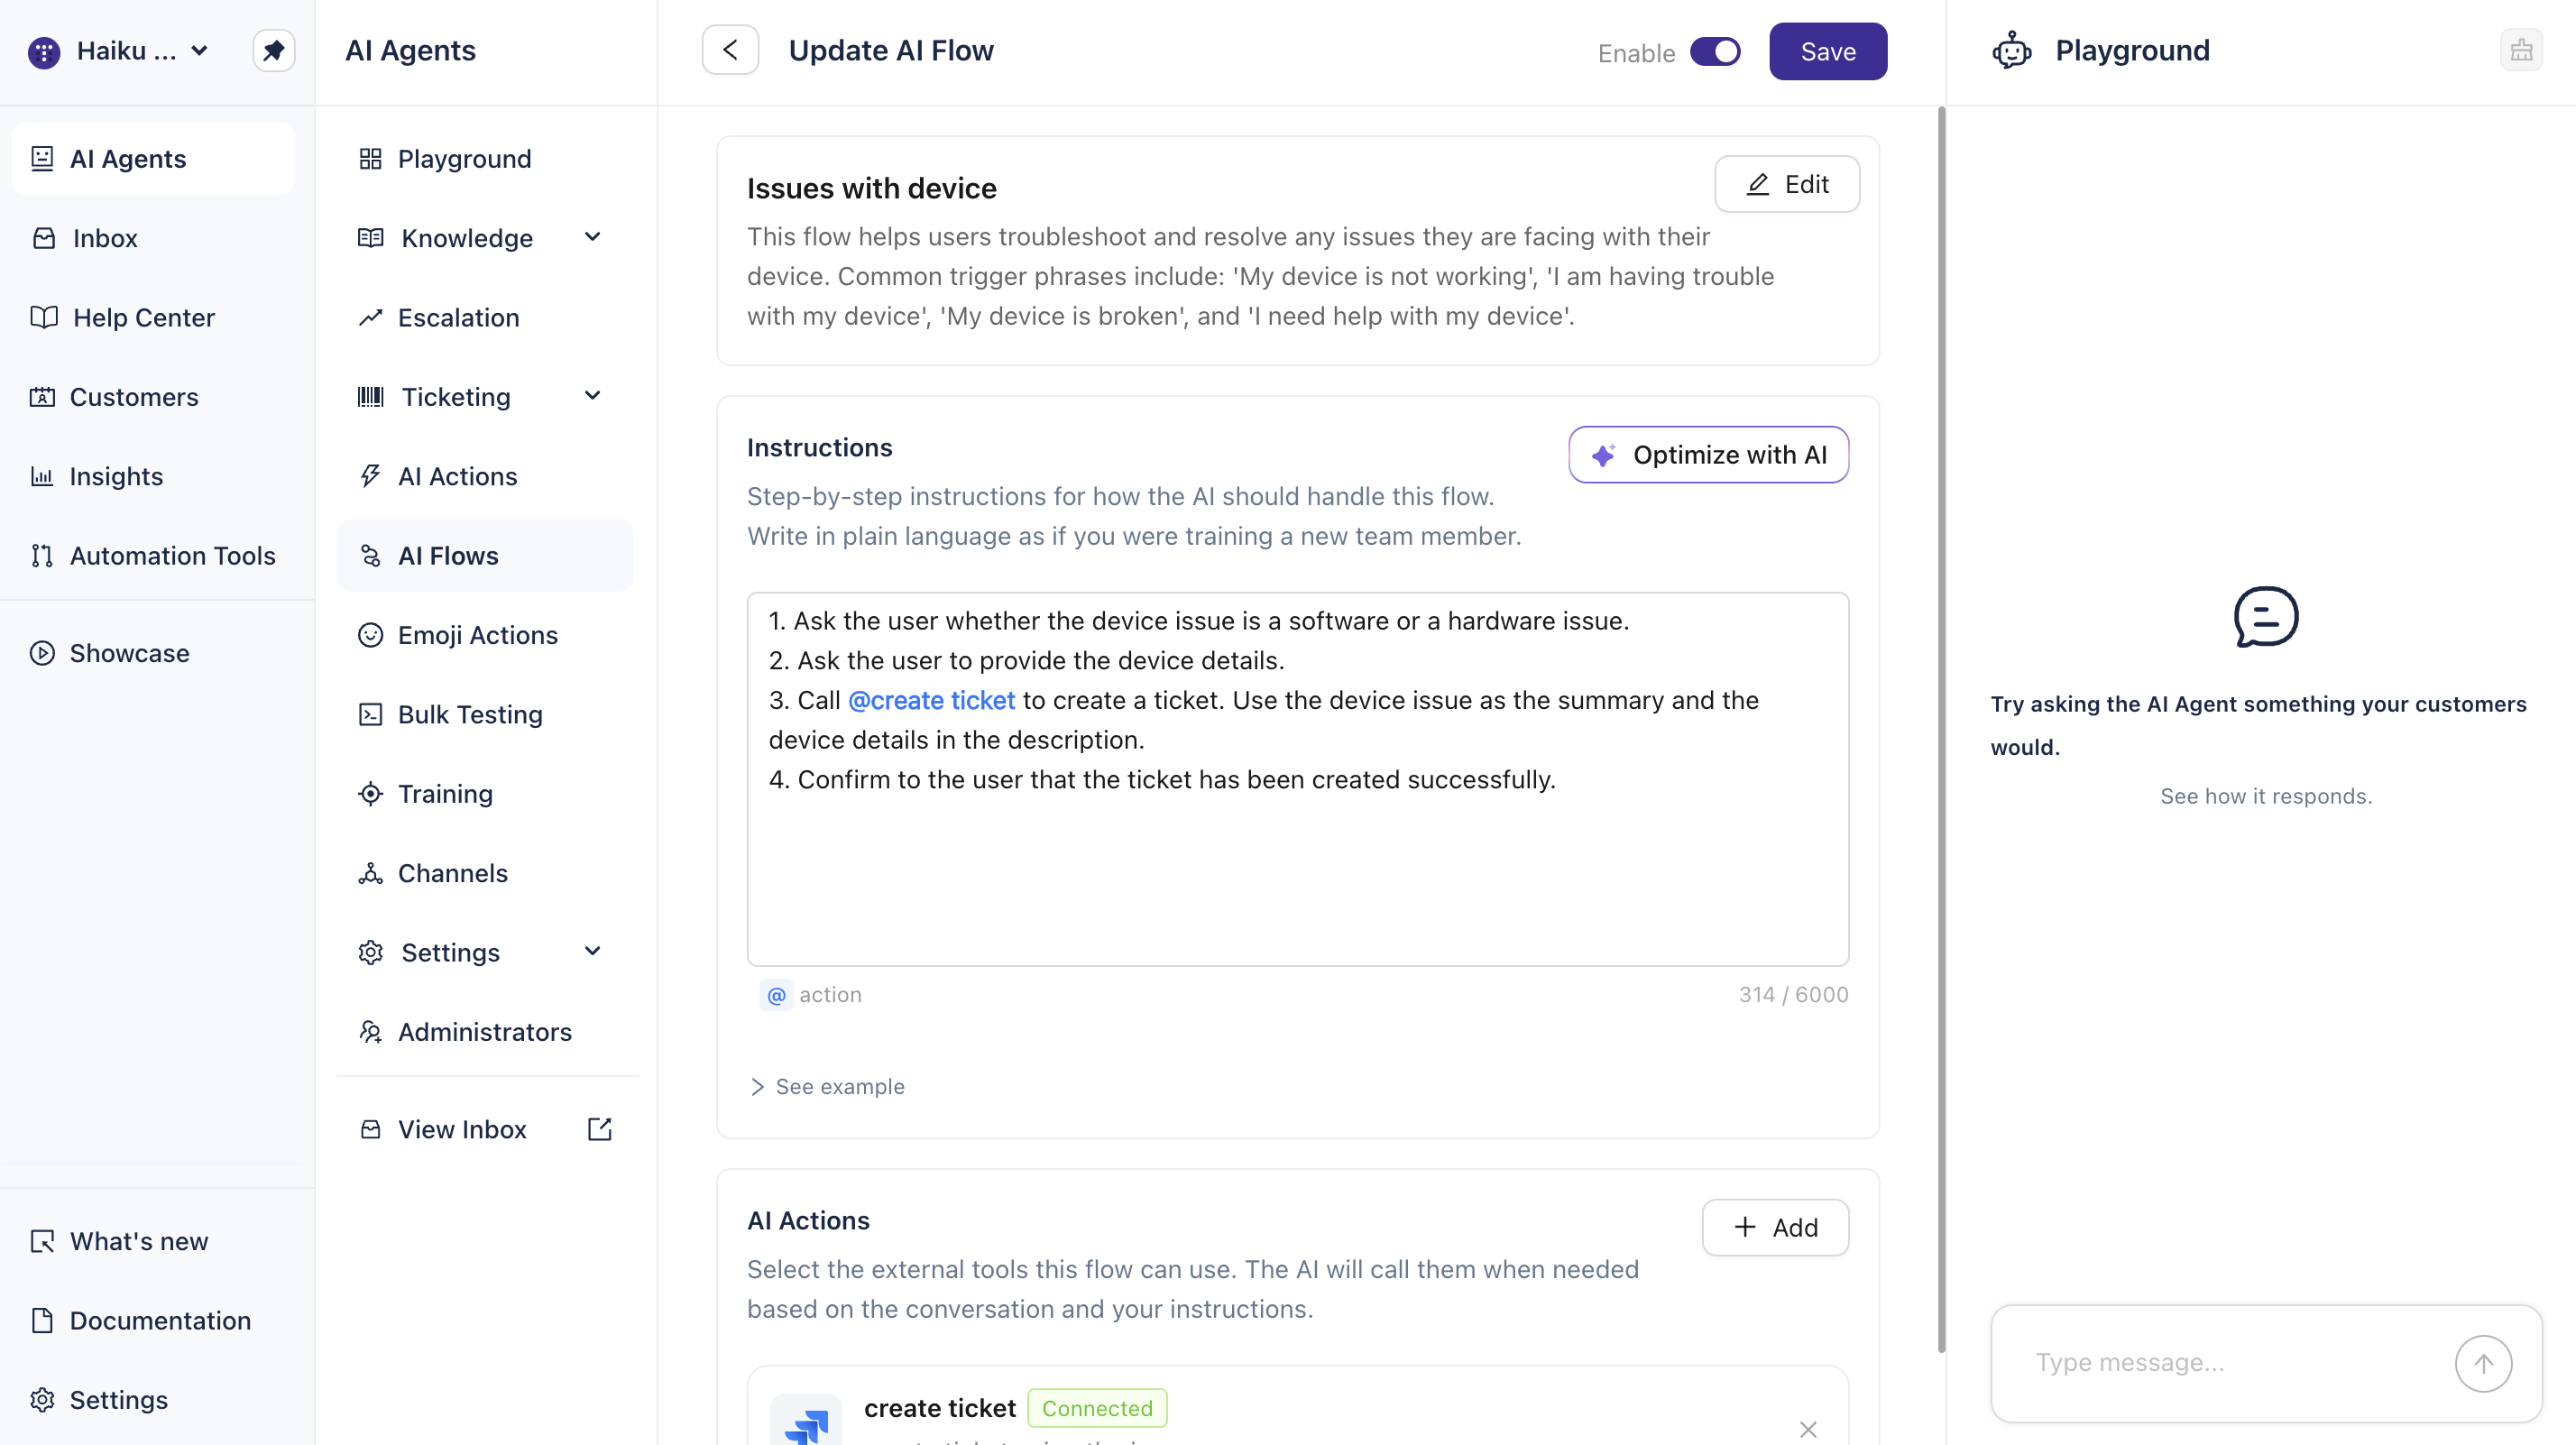
💡 Tip: Use the Optimize with AI button on the Instructions field. Enjo will expand brief notes into well-formed, agent-ready instructions—useful when you want to sketch the flow quickly and let AI refine the language.
Reference AI Actions in your flow
To call an AI Action from inside a flow, reference it in your instructions using the @ symbol followed by the action name (e.g., @create_ticket, @fetch_account, @grant_access).
Important: The AI Action must already be created and connected to your agent before you reference it in a flow. If an action isn't set up, the agent will not be able to execute that step. See AI Actions to create and configure actions first.
When you save the flow, any actions referenced with @ in the instructions are automatically linked and appear in the AI Actions section at the bottom of the editor. This section shows which actions are connected to the flow, confirming they are available for the agent to call during the conversation.
Example action references:
@create_ticket— Creates a support ticket with provided details@fetch_account— Retrieves customer account information@grant_access— Provisions user access to a system@send_notification— Sends email or SMS to user
ℹ️ Note: Action names must match exactly. If the action is named "create_ticket" in your AI Actions, reference it as @create_ticket in the flow instructions.
Save the flow
Click Save to save the flow.
The flow is added to the flows list with its name, description, and current status.
Toggle the flow on (or leave it off) to control whether it's active.
A flow must be active (toggled on) to be triggered during live conversations. You can deactivate flows temporarily without deleting them.
ℹ️ Note: Saving a flow does not activate it immediately. You must toggle the flow on in the flows list before the agent will use it with real users.
Test the flow in Playground
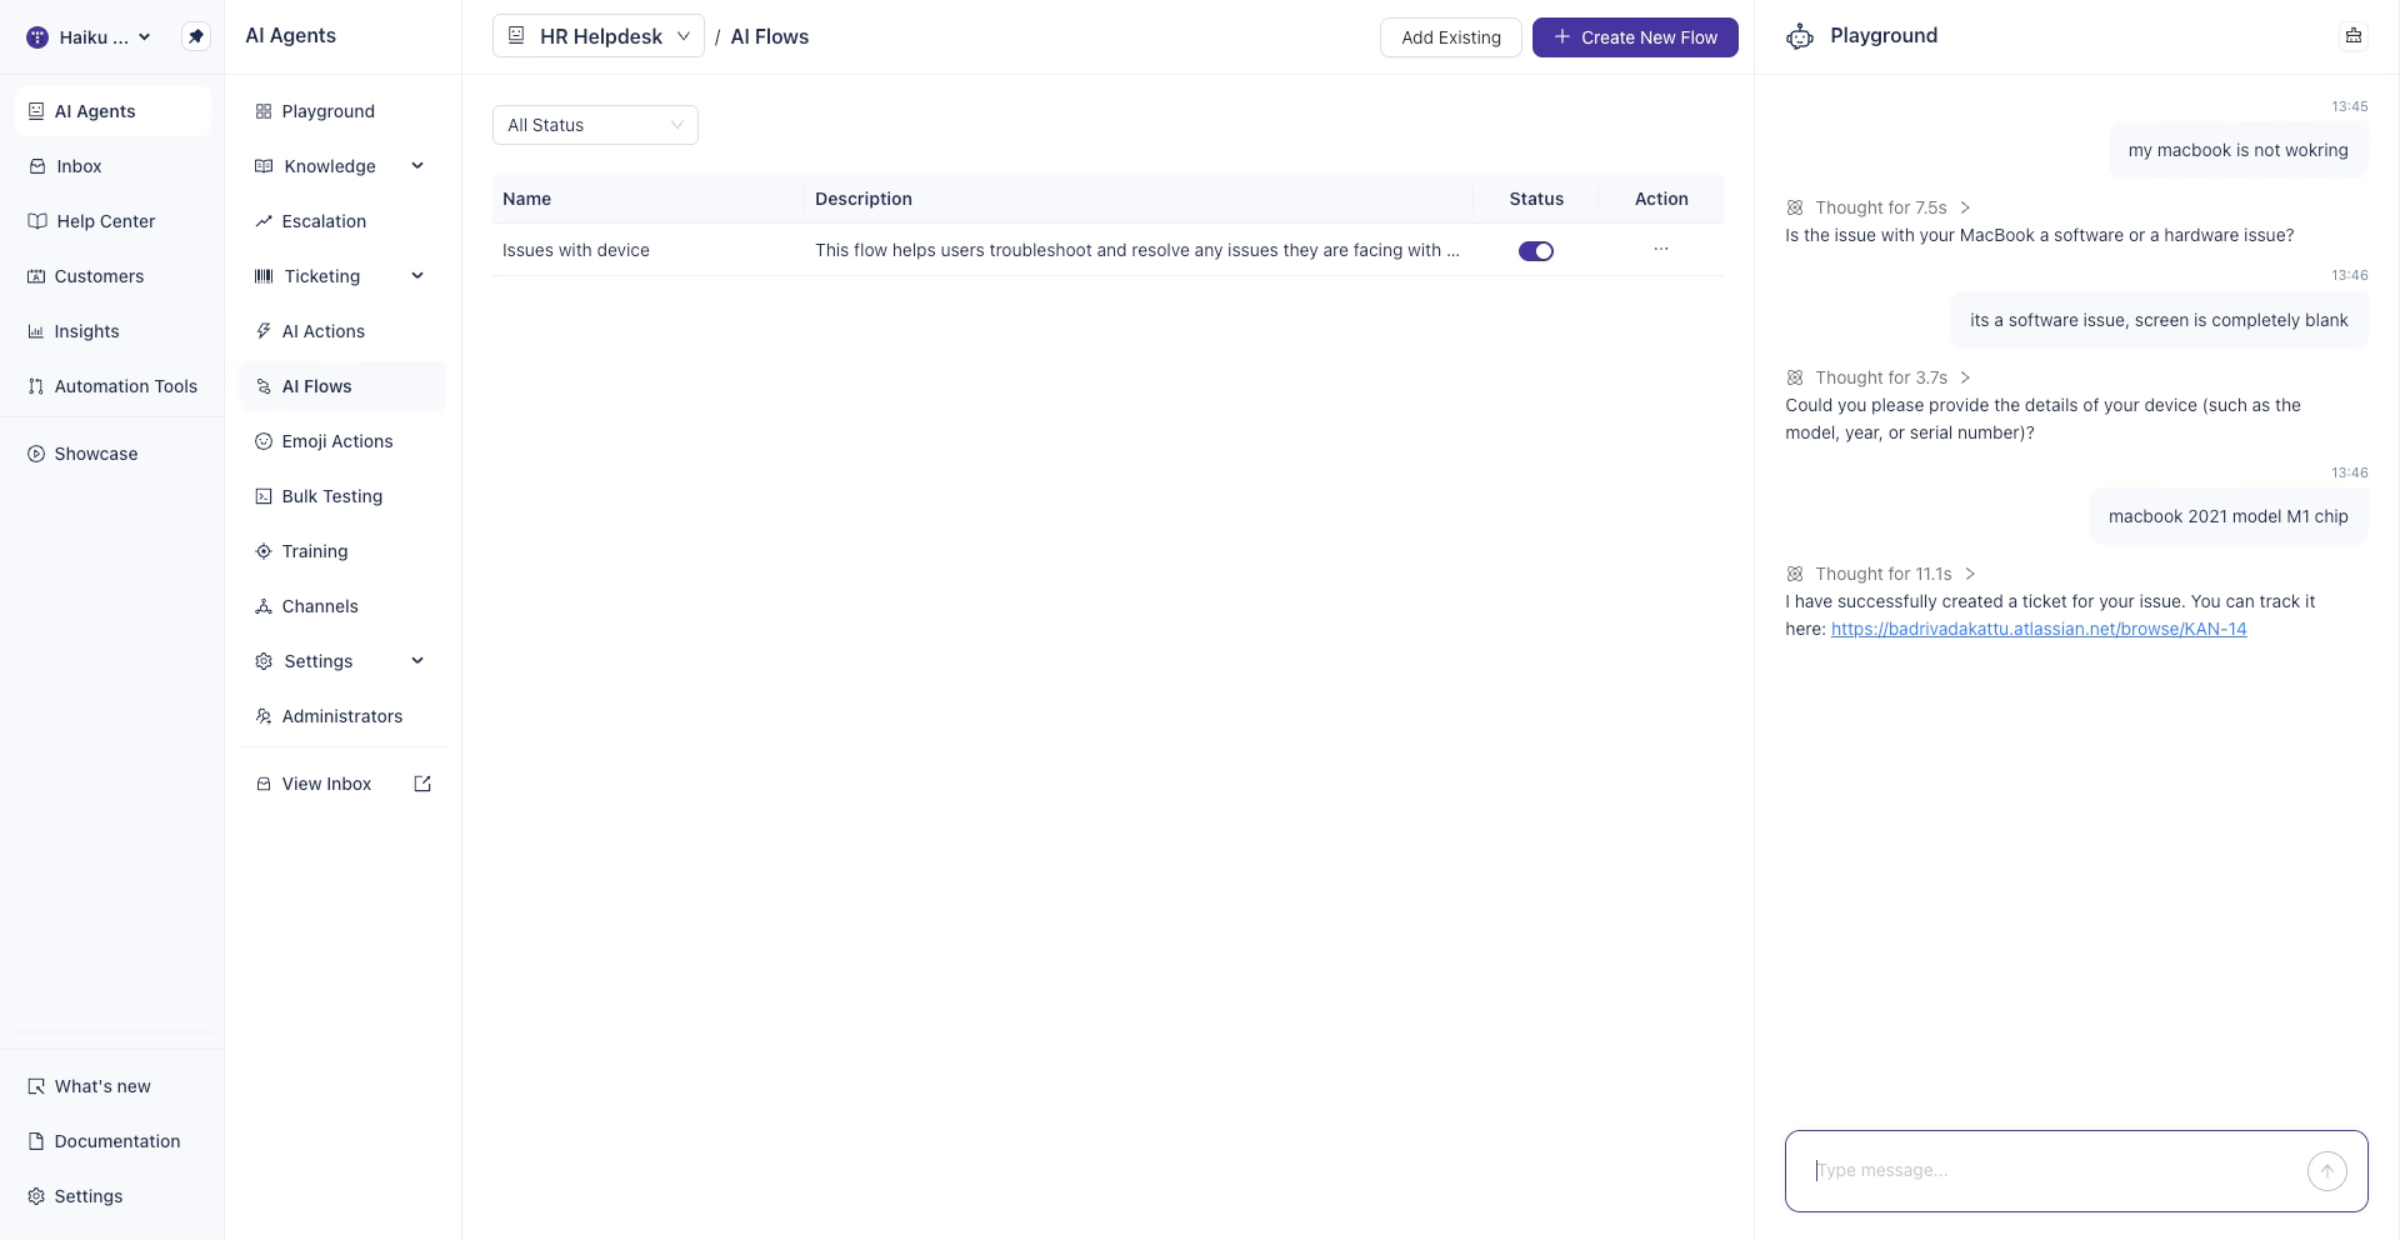
Before enabling the flow for real users, test it in the Playground to verify it behaves as expected.
Click Playground in the left navigation.
The Playground testing environment opens.
Confirm the correct agent is selected in the top dropdown.
This ensures you're testing the flow with the right agent.
Type a message that should trigger your flow.
Example: If you created a device issue intake flow, type "My MacBook is not working" or "I'm having device problems."
Watch how the agent responds and verify:
The agent recognizes the message matches the flow's trigger
The agent follows your instructions in sequence (asks about issue type, then device details, etc.)
When the flow reaches an action step, the agent calls the AI Action (you'll see the action name referenced)
The agent confirms the outcome
If the flow doesn't work as expected:
Return to the flow editor
Revise the trigger instruction or instructions
Re-test in Playground
ℹ️ Note: The Playground shows a "Thinking..." indicator when the agent is working through multi-step logic. This is normal behavior for flows with several instructions or action calls. If the indicator persists longer than expected, the flow may have an issue with action references or conditional logic.
Edit or delete flows
To modify a flow after creation:
Click AI Flows in the left navigation.
Find the flow in the list and click it to open the editor.
Update the trigger instruction, instructions, or AI Action references.
Click Save.
To delete a flow:
Click AI Flows in the left navigation.
Find the flow and click the menu (…) or Delete option.
Confirm deletion.
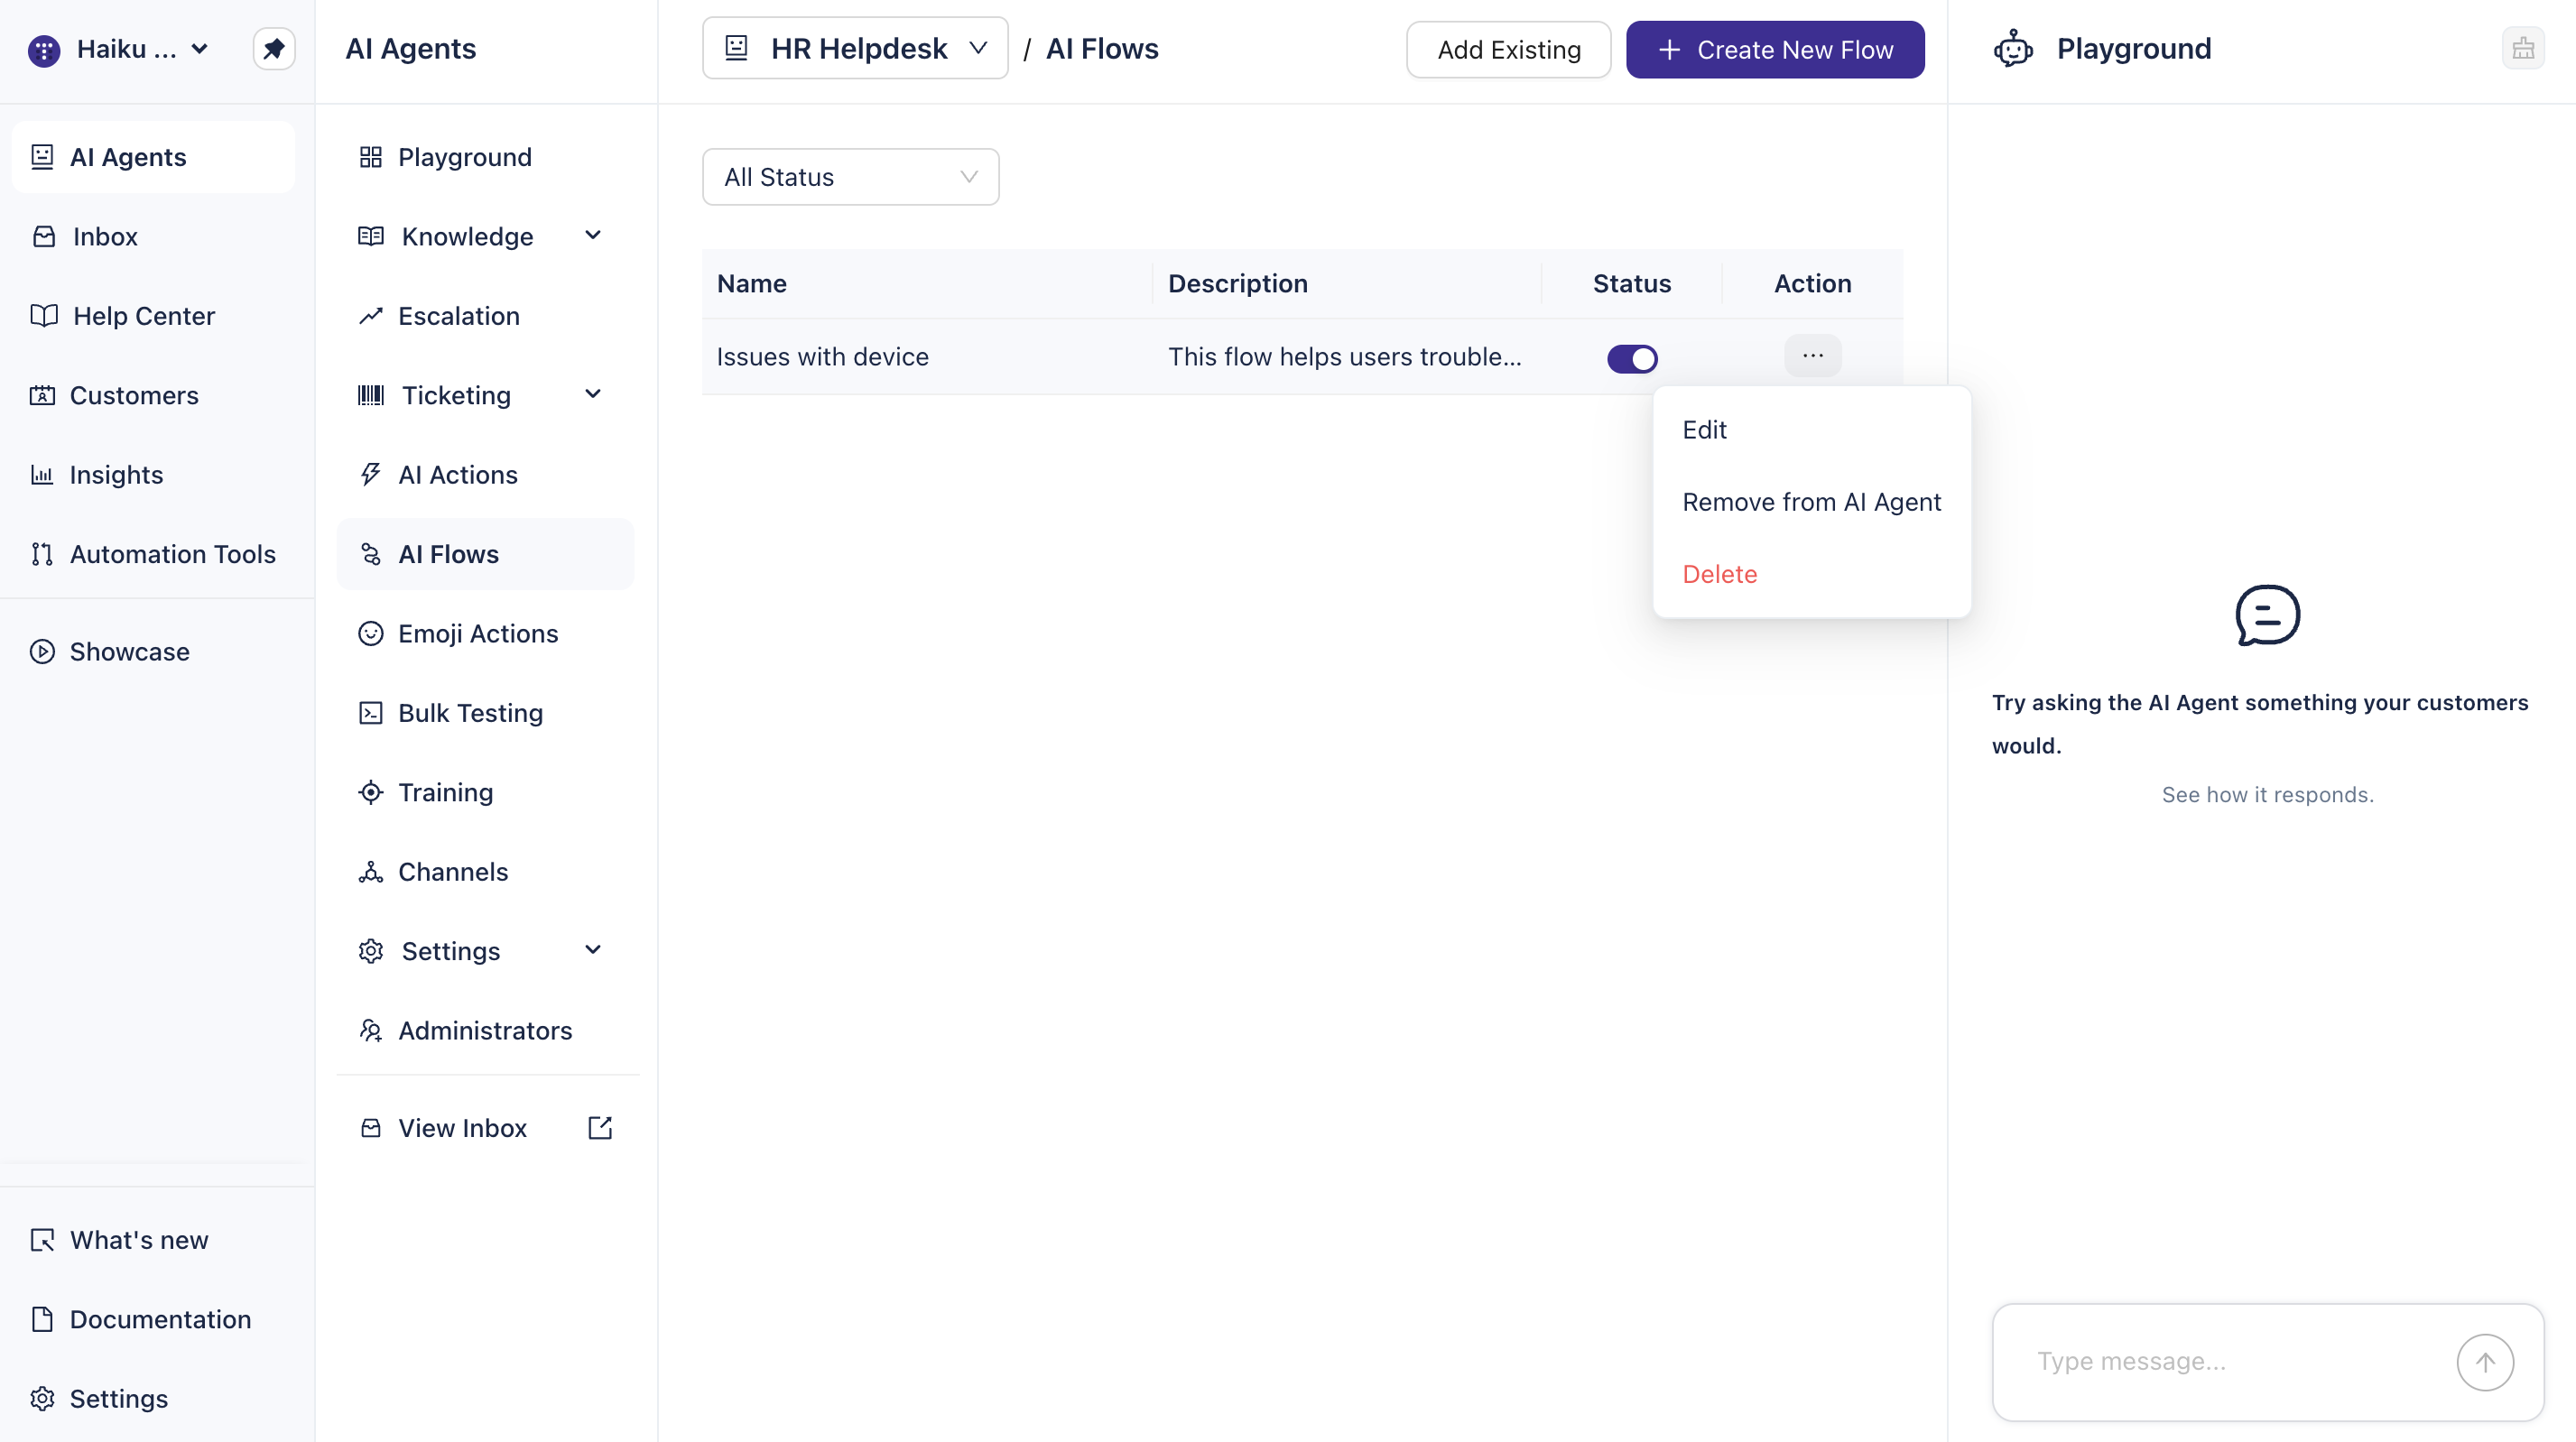
⚠️ Warning: Deleting a flow removes it immediately. If the flow is active, users will no longer be able to trigger it. Deactivate flows first if you might want to re-enable them later.
Best practices
Keep instructions precise — Ambiguous instructions can cause the agent to skip steps or make incorrect decisions. Use clear, specific language.
Test before activating — Always test flows in Playground with realistic user queries before toggling them live.
Use conditional logic explicitly — For branching flows (e.g., "If the user is a premium member, do X. Otherwise, do Y."), state the condition clearly.
Validate AI Action references — Ensure action names in your @ references match the exact names in your AI Actions configuration.
Reuse well-tested actions — Build a library of reliable AI Actions and reference them across multiple flows.
Keep flows focused — Design flows for specific request types. Don't try to handle too many different scenarios in one flow.
Document trigger conditions — Write "When to use" instructions that are specific enough to avoid unintended triggering.
Monitor flow performance — Check Insights to see how often flows are triggered and whether users complete them successfully.
Why this matters
AI Flows enable your AI Agent to handle complex, multi-step requests without human intervention. By automating request intake, information gathering, and action execution, flows reduce resolution time, lower escalation rates, and improve user satisfaction. They transform your AI Agent from a simple Q&A system into an end-to-end workflow automation tool.
What's next
AI Agent AI Actions: Set up the AI Actions your flows can call during a conversation, including ticketing, API lookups, and custom integrations.
AI Agent Escalation: Define how the agent hands off requests to your team when a flow cannot resolve them.
Bulk Testing: Validate your AI Agent's responses across a range of scenarios to confirm flows behave as expected before going live.