
Request View Customization
In this article, you'll learn how to customize how the AI Agent displays request details in Slack — controlling which fields appear on request cards and in the request view.
How this works
Two settings in Request Handling control how request details appear in Slack:
Request card customization controls how Enjo shows Jira requests in Slack — the request card.
Request view customization controls how Enjo shows request details when viewing a request in connected apps.
Both let you choose which fields to display by either showing a selected set of fields or hiding specific ones. You can include standard fields and any custom fields from your ticketing project.
Before you start
You need access to an AI Agent with Ticketing configured.
A connected ticketing project (for example, a Jira project) must be available.
ℹ️ If you haven't set up request card customization yet, follow Customize the Request Card first.
Request view customization
Go to AI Agents > Ticketing > Request Handling.
In the Request view customization row, select Customize.
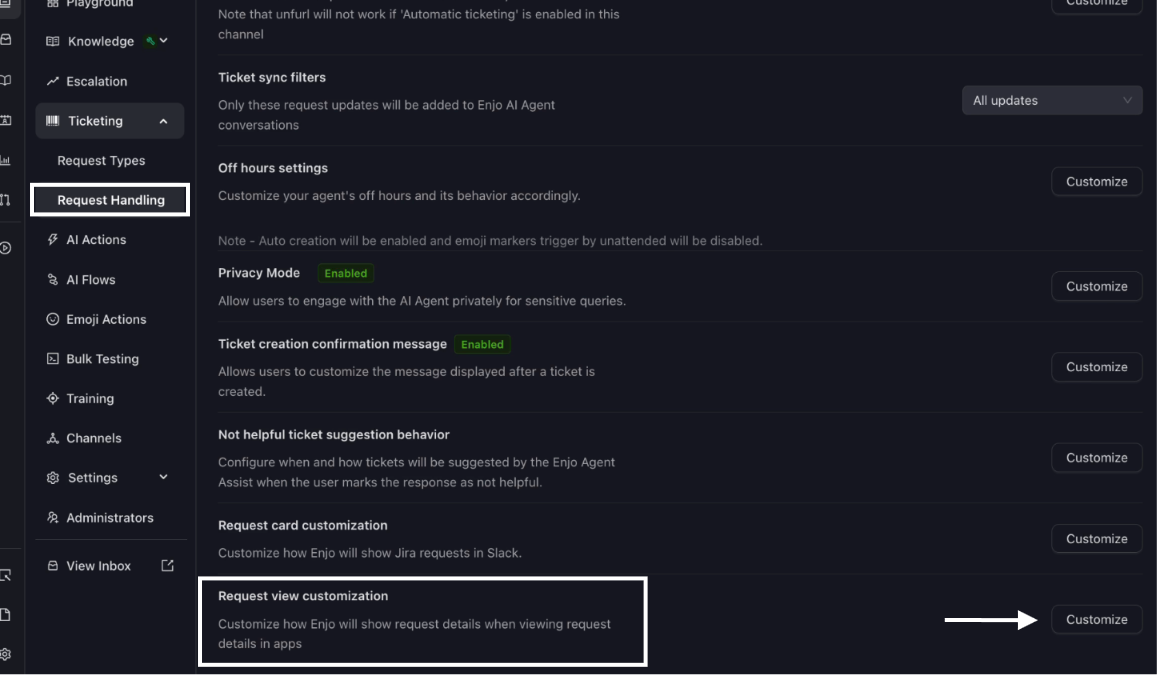
Turn on Enable Request View Customization.
Under Customize fields, choose how to control fields:
Show Fields — Display only the fields you select.
Hide Fields — Display all fields except the ones you select.
Select the standard fields, and any custom fields from the dropdown.
Select Update.
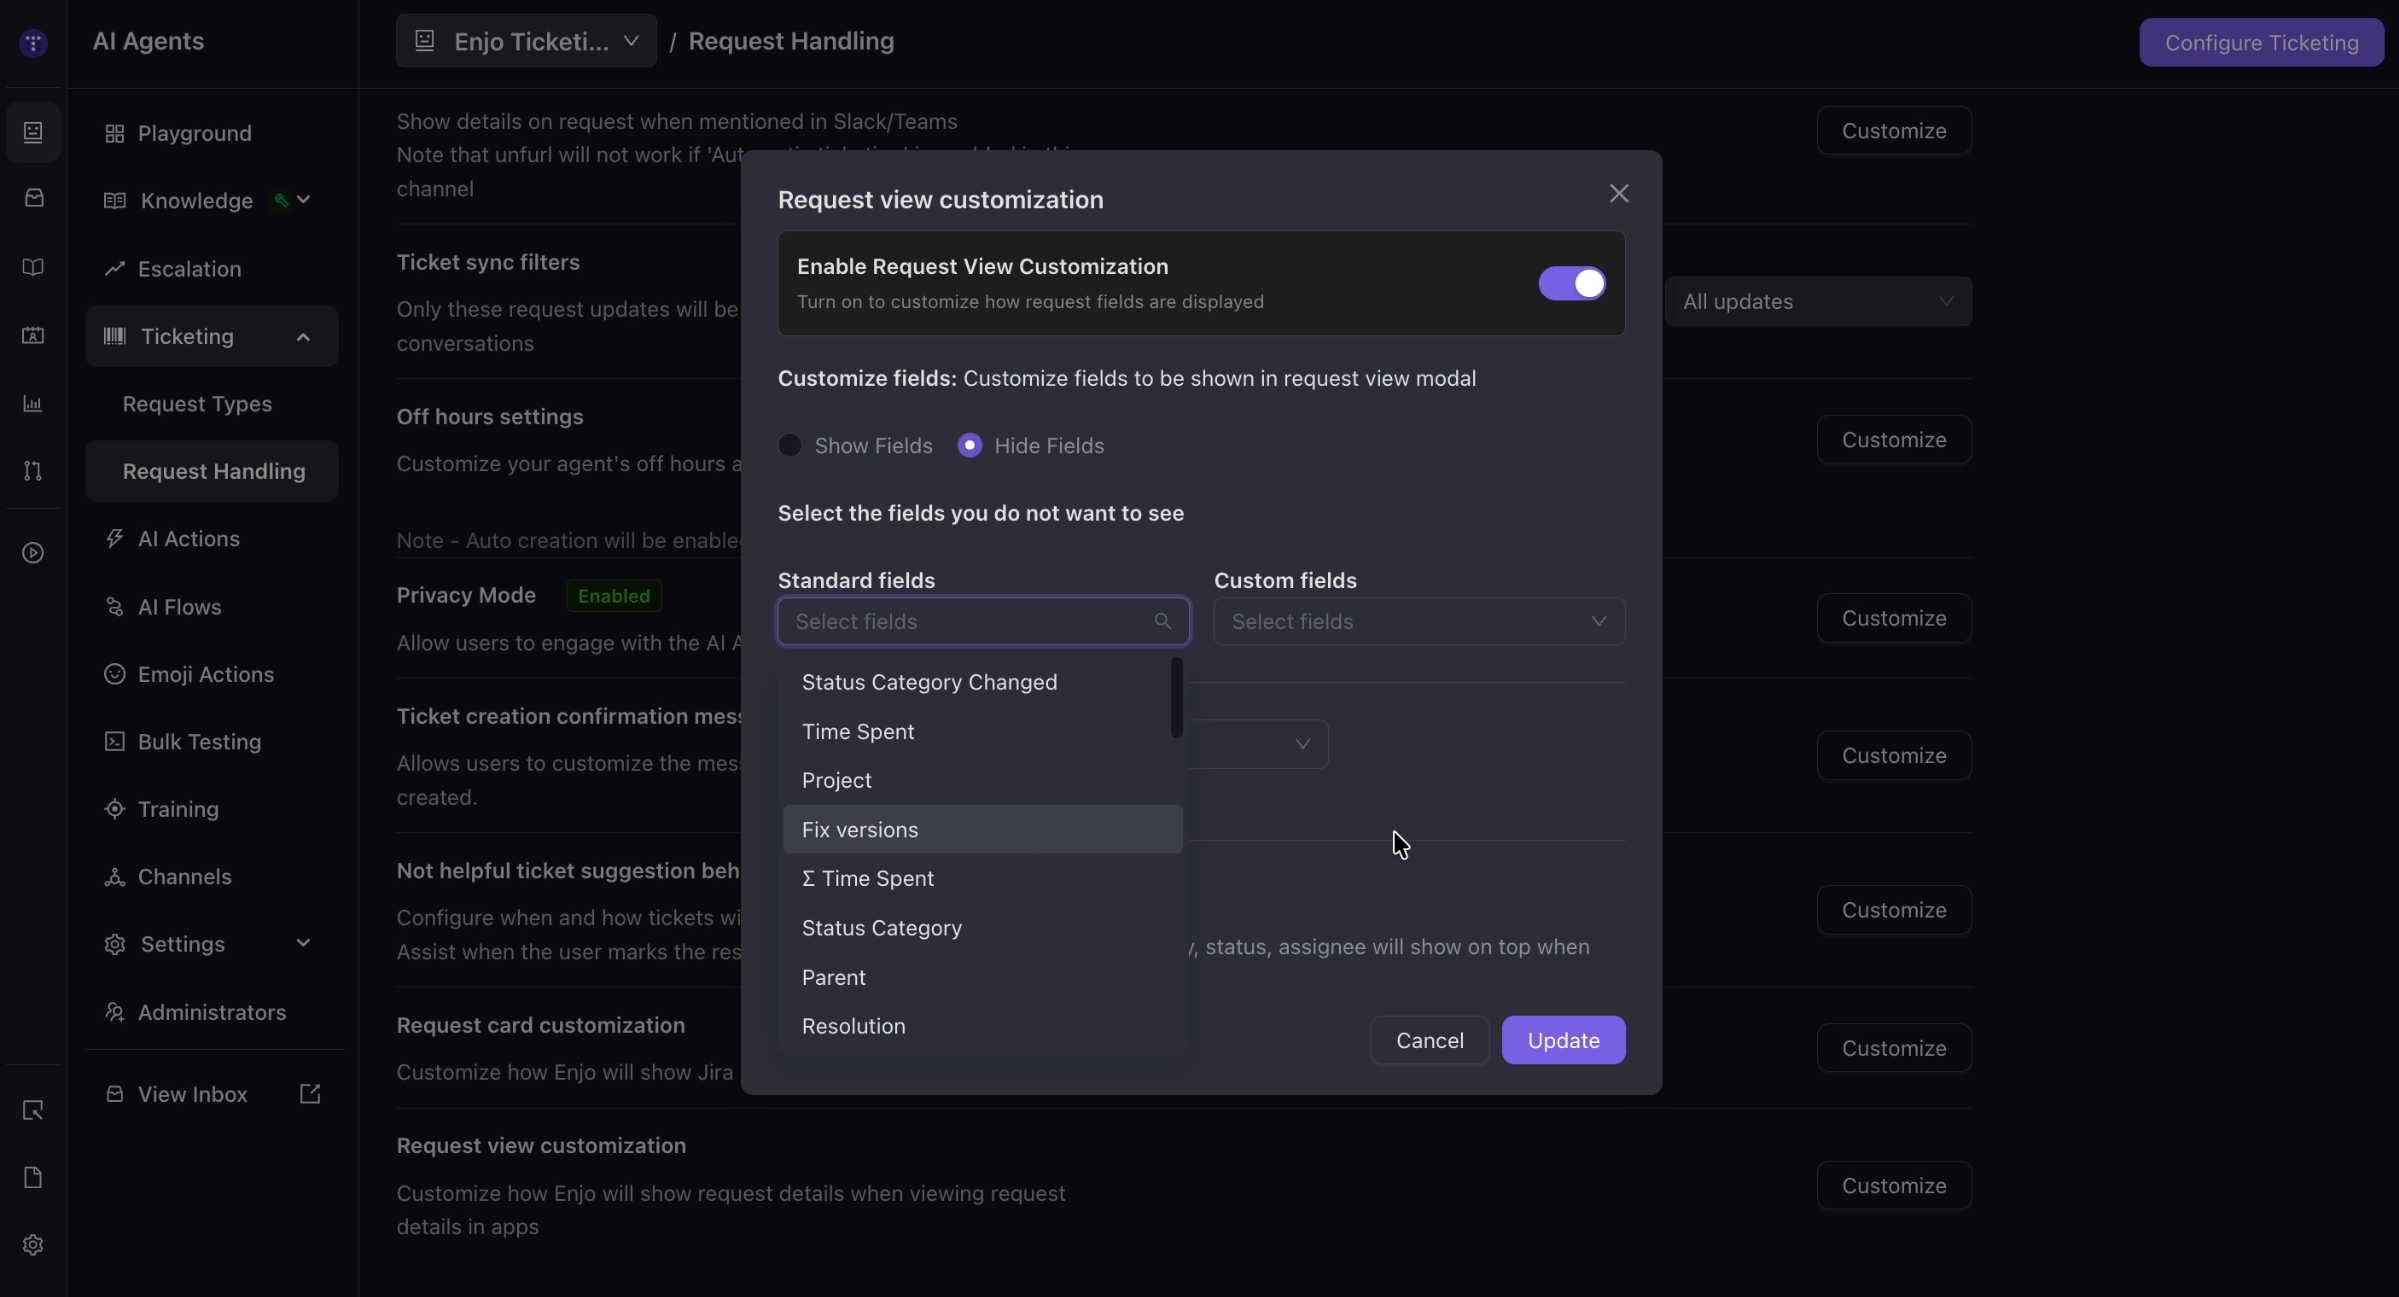
💡 Use Hide Fields when you want most fields to appear and only need to remove a few. Use Show Fields when you want a short, fixed set of fields.
What's next
Configure Request Handling — Configure assignment, feedback, attribution, and sync settings.
Configure and Manage Request Types — Define the request types your agent can create.
Channels — Connect Slack, Microsoft Teams, and web chat to your agent.