
Jira DC
This guide walks you through connecting Enjo to a self-hosted Jira Data Center instance. By the end, you will have:
Whitelisted the required Enjo IP addresses on your Jira host
Created an application link in Jira and connected it to Enjo
Configured user mapping, guest facilitation, and personal account settings
Optionally set up Jira DC as a knowledge source for your AI Agent
💡 Tip: If you are using Jira Cloud instead of Jira Data Center, use the Jira Cloud connection guide. The setup steps are different.
Pre-requisite: Whitelist Enjo IP addresses
Your Jira DC host must be able to communicate with Enjo's servers in both directions. Add the following IP addresses to your network allowlist before starting the connection steps.
For Inbound from Enjo Server(s)
44.228.165.179
For outbound to Enjo Servers (for webhook)
52.33.191.85 443
💡 Tip: If your IT or network team manages firewall rules, share this list with them before you proceed. The connection will fail if either address is blocked.
Connection Steps
Step 1: Log in to Enjo dashboard - Go to Settings - Apps - +Connect Apps - Choose Jira: L
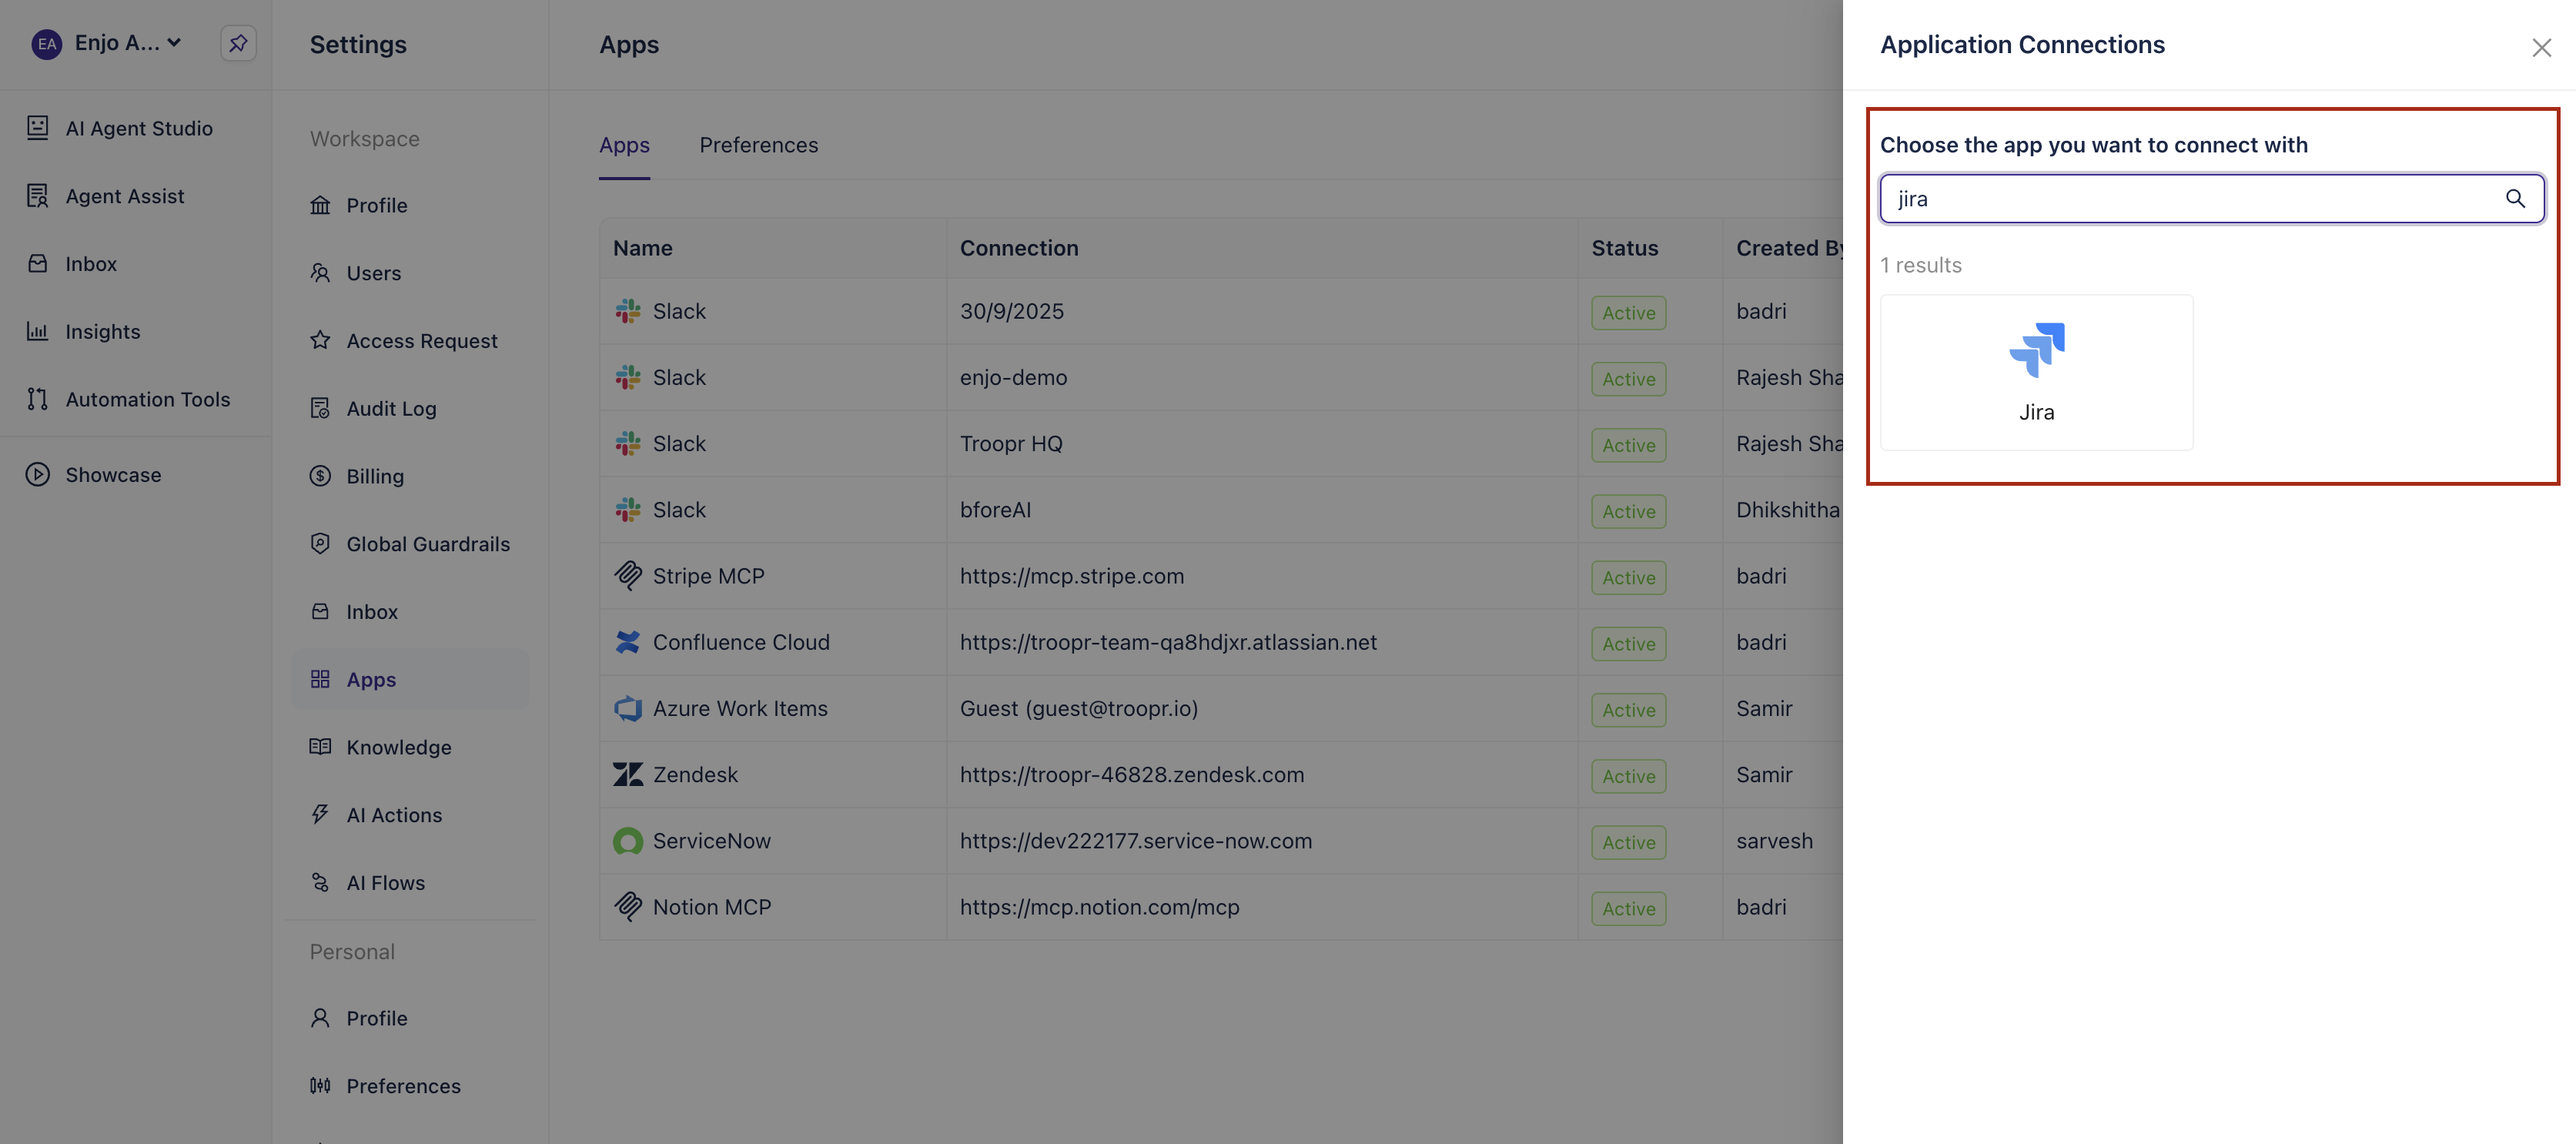
Step 2: Click on "Add New" and Select 'Jira Server' from the dropdown. Please note, that all the existing Jira connections will show up in the list, so if the Jira is already connected in any of the Enjo AI agents, you can simply choose the same.
Step 3: Enter your Jira URL and click next.
Step 4: In this step, you will have to create a Jira App link from your domain to https://app.enjo.ai. Go to the link provided on the screen under 'Create an application link'.
Step 5: On the Jira page, enter the Application URL and click on the 'Create Link' button. Click on 'Continue' in the Configure Application URL form.
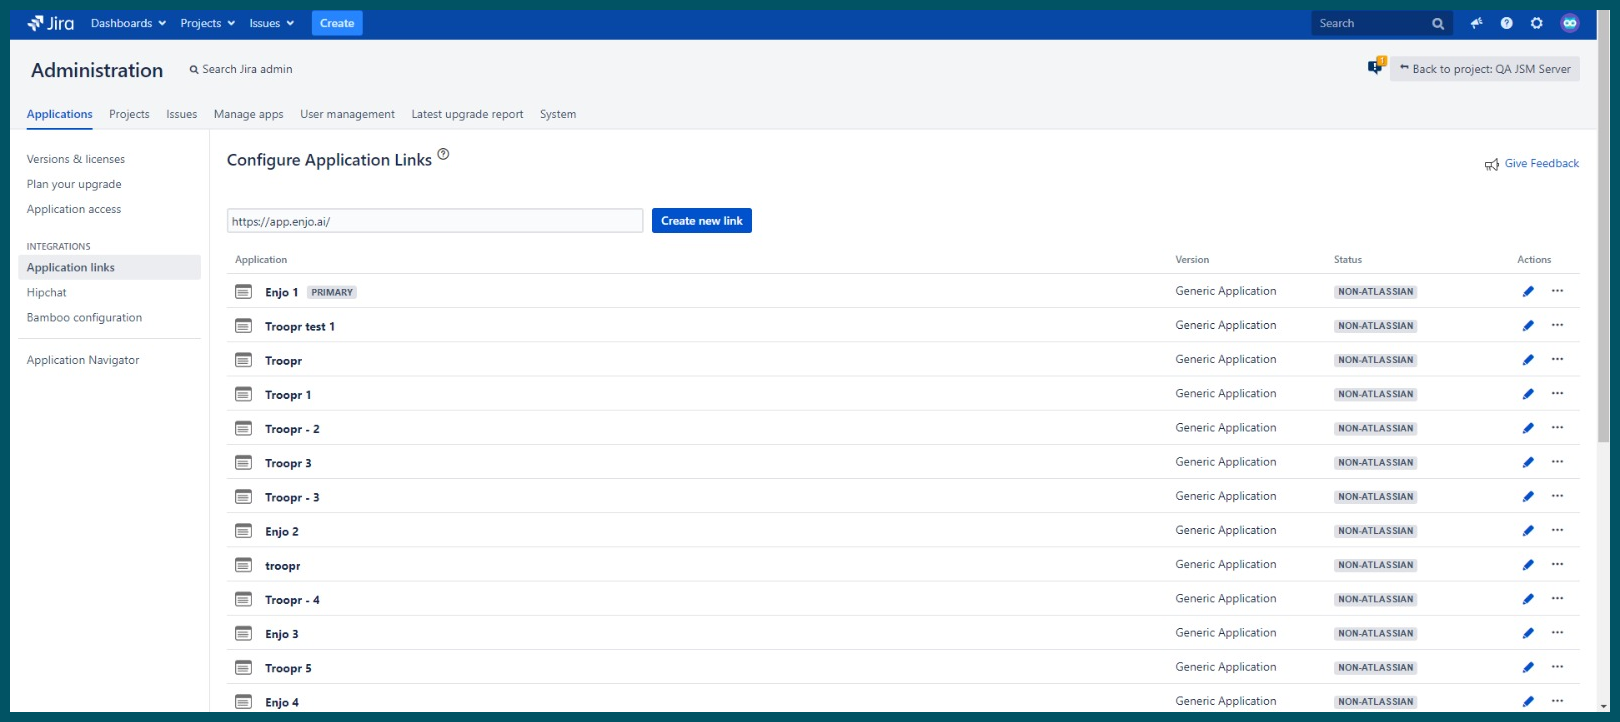
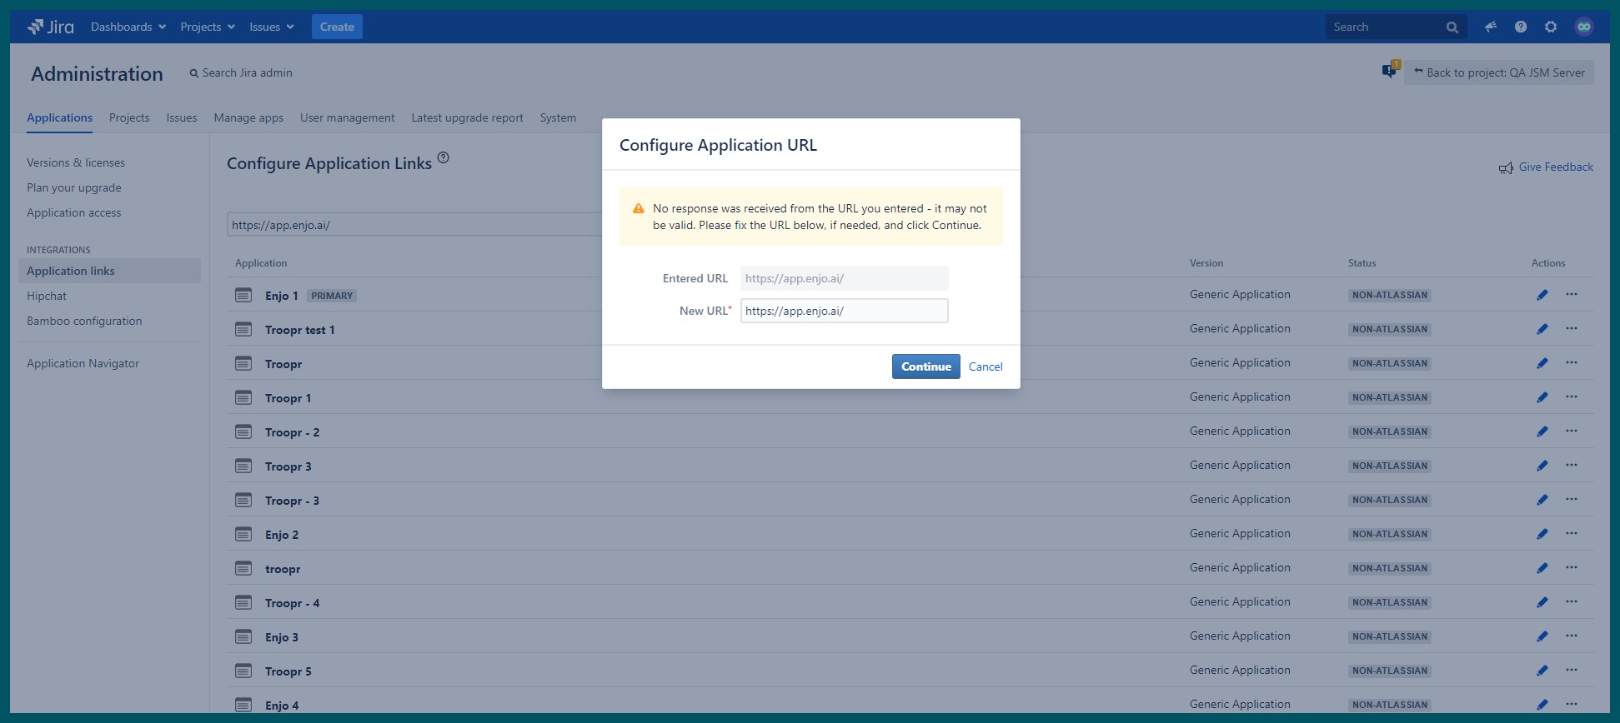
Step 6: In the Link Application form on the Atlassian screen, copy and paste the Application name provided in the Enjo screen. Scroll down to select the 'Create application link' checkbox and click 'Continue'.
Step 7: Next, add the Consumer key, Consumer name, and Public key from the Enjo screen to the Atlassian form and click 'Continue'.
Step 8: In the Enjo screen, click the 'I acknowledge that I have completed the above steps' checkbox and click Connect.
Now the Jira DC account is connected to Enjo.
Settings
Overview
View your connected Jira workspace and delete the connection if needed.
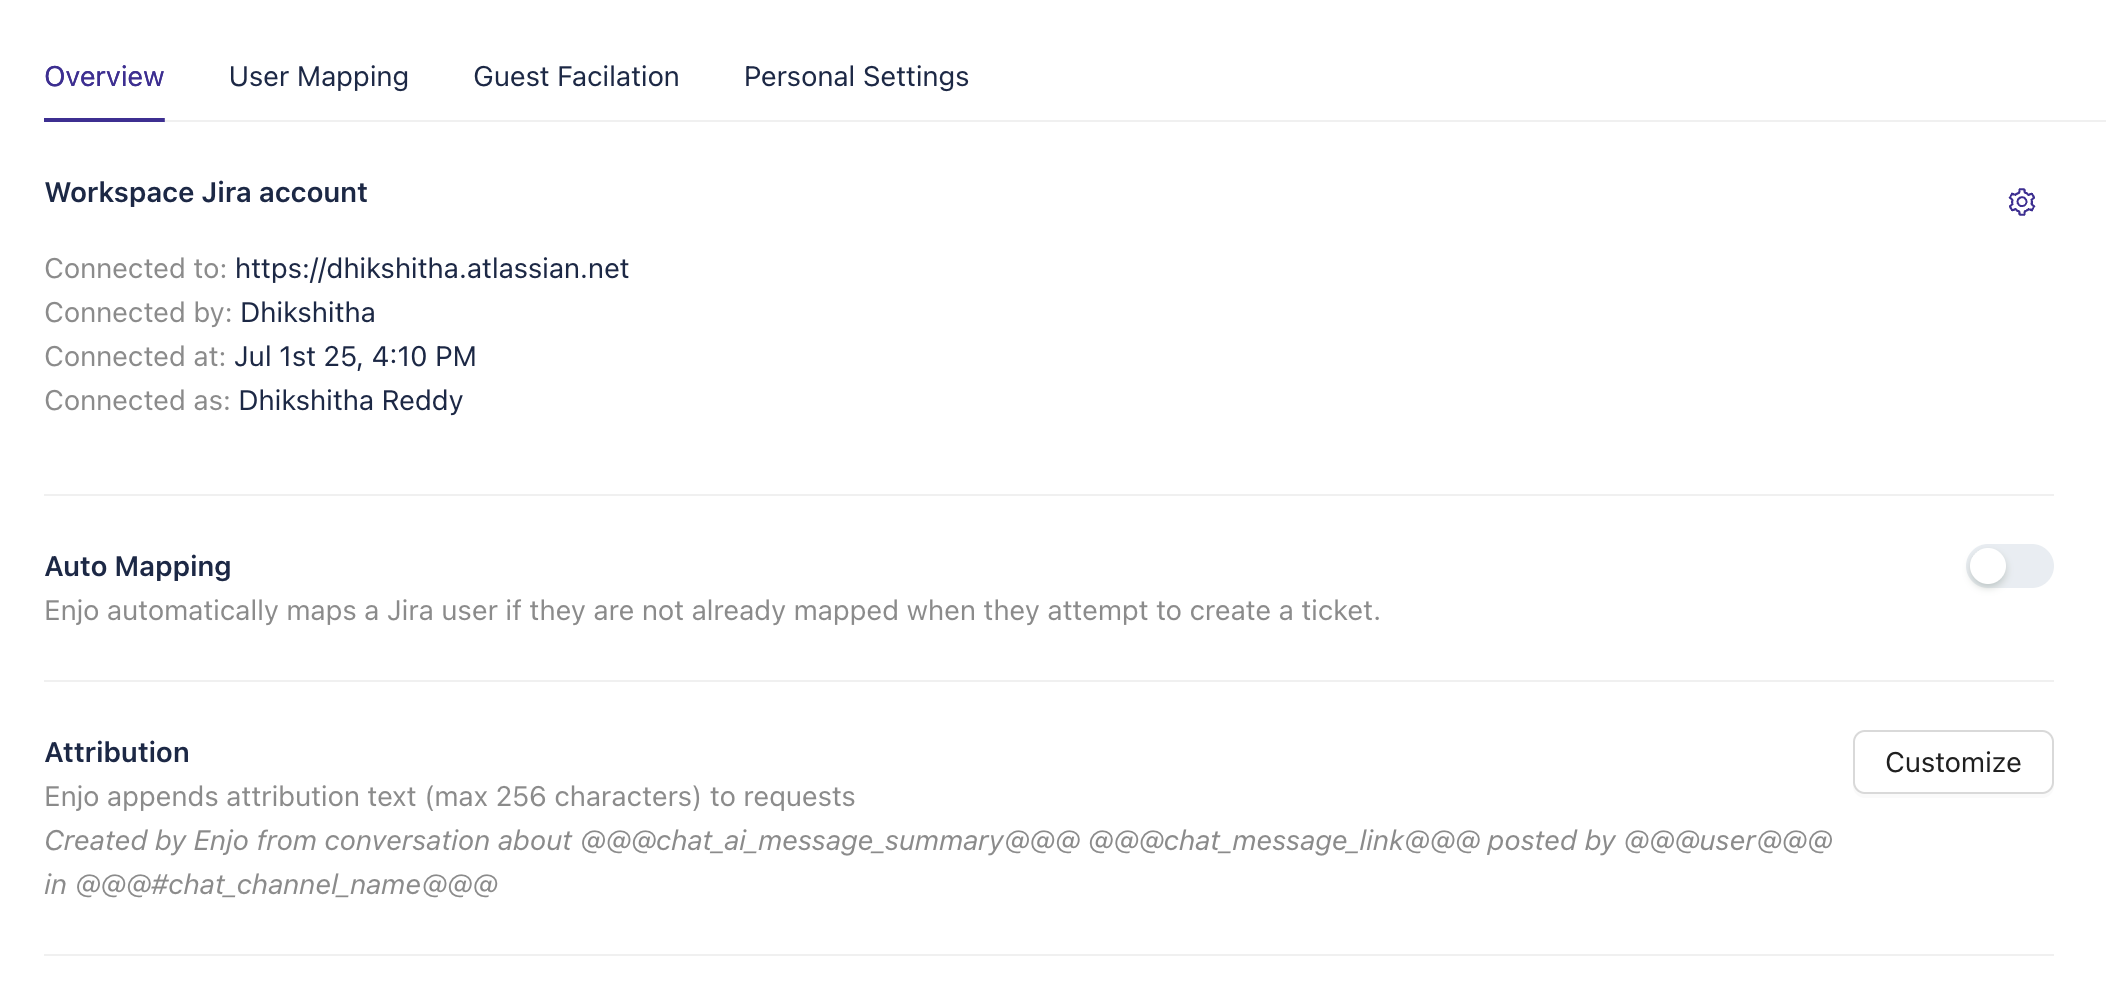
Attribution
When a Jira request is created from Slack or Microsoft Teams, Enjo appends the following attribution to the request description:
Created by Enjo from @@@slack_message_link@@@ posted by @@@user@@@ in @@@#slack_channel_name@@@
User Mapping
Map Enjo users to Atlassian accounts so Enjo knows which Atlassian identity to act on behalf of when a team member creates or updates a request.
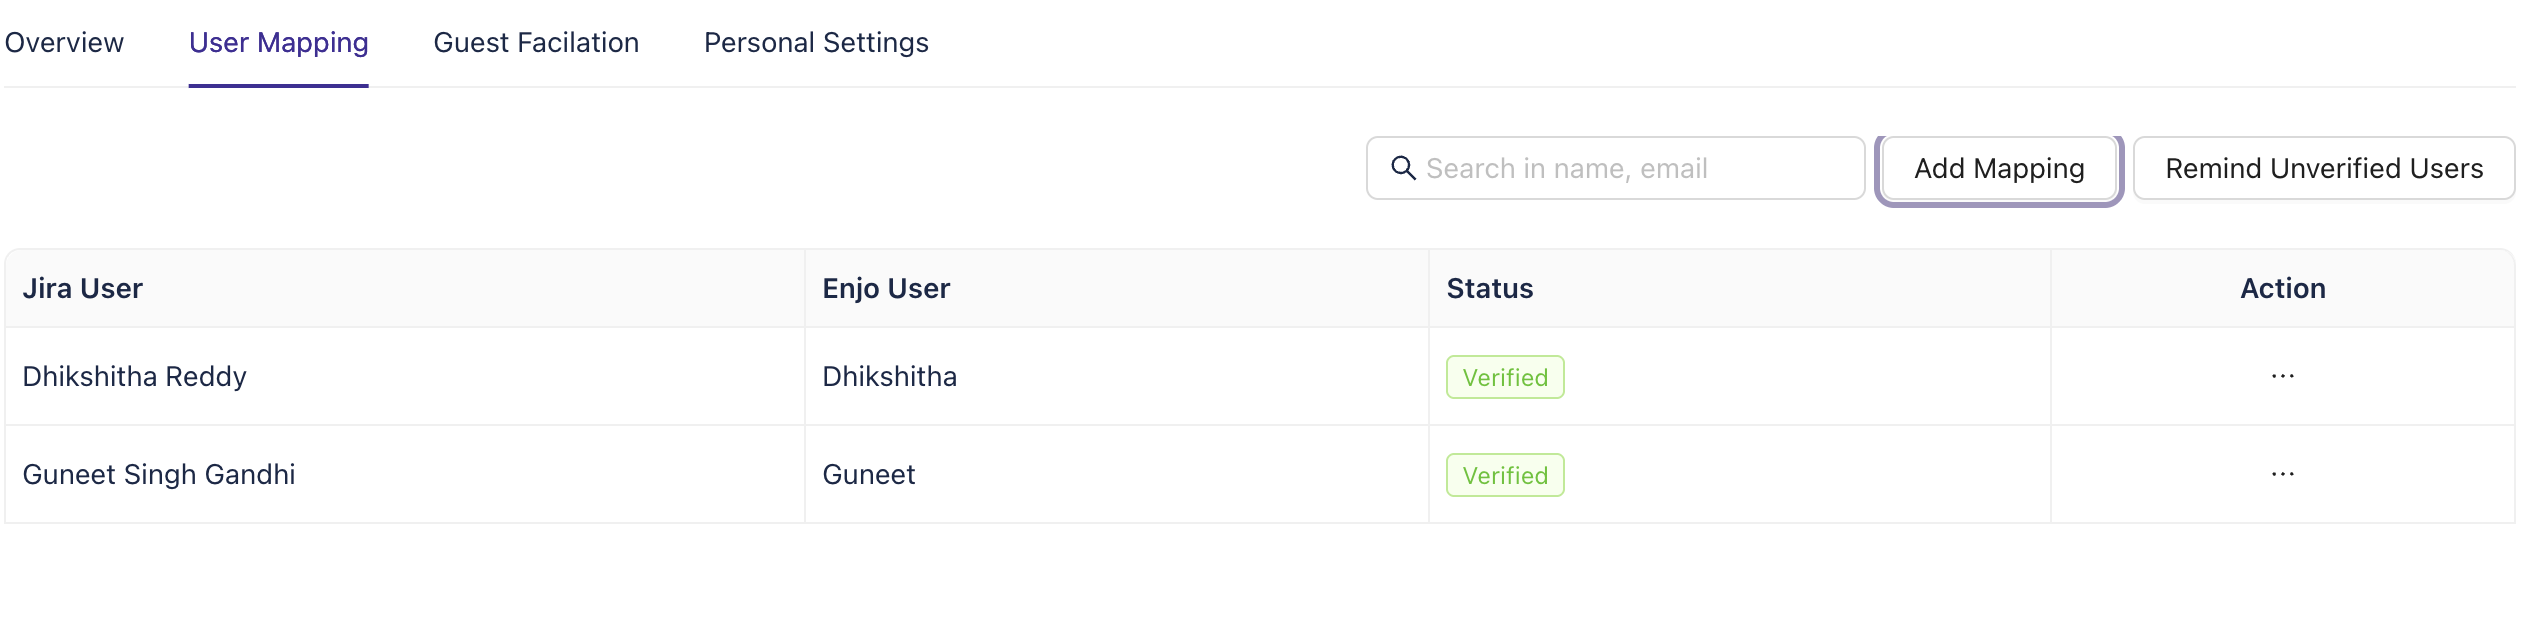
Go to Settings → Apps → Jira → Configure → User mapping.
To add or update a mapping, click Add Mapping, match the Enjo user to their Atlassian email, and submit. Repeat for each team member you want to map.
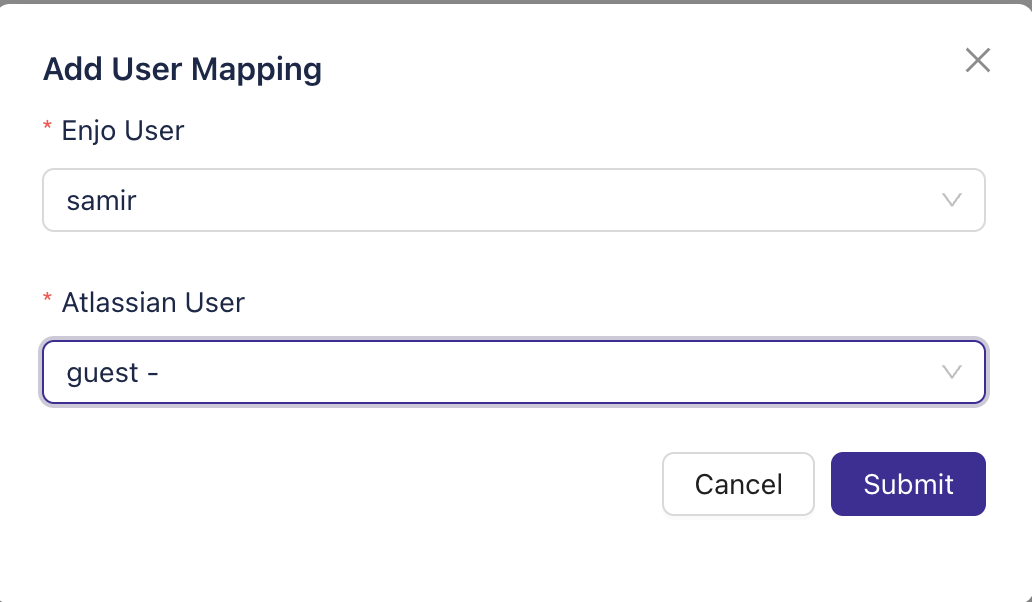
Repeat for every team member you want to map.
Automatic Mapping of Users
When your workspace is connected to your Jira domain, Enjo attempts to automatically match Jira accounts to Enjo accounts based on profile data. Depending on your Jira setup, Enjo may map up to 100% of accounts. Automatically mapped accounts appear as unverified on the User Mapping page until confirmed.
Guest Facilitation
Allow unverified users (those who haven't linked their Jira account) to create and update Jira requests. When guest facilitation is enabled, an authorized Jira account acts on behalf of unverified users. Verified users continue to use their own accounts.
Set up guest facilitation:
Go to Settings → Apps → Jira → Configure → Guest Facilitation.
Click Authorize and select the Jira account to use as the facilitator.
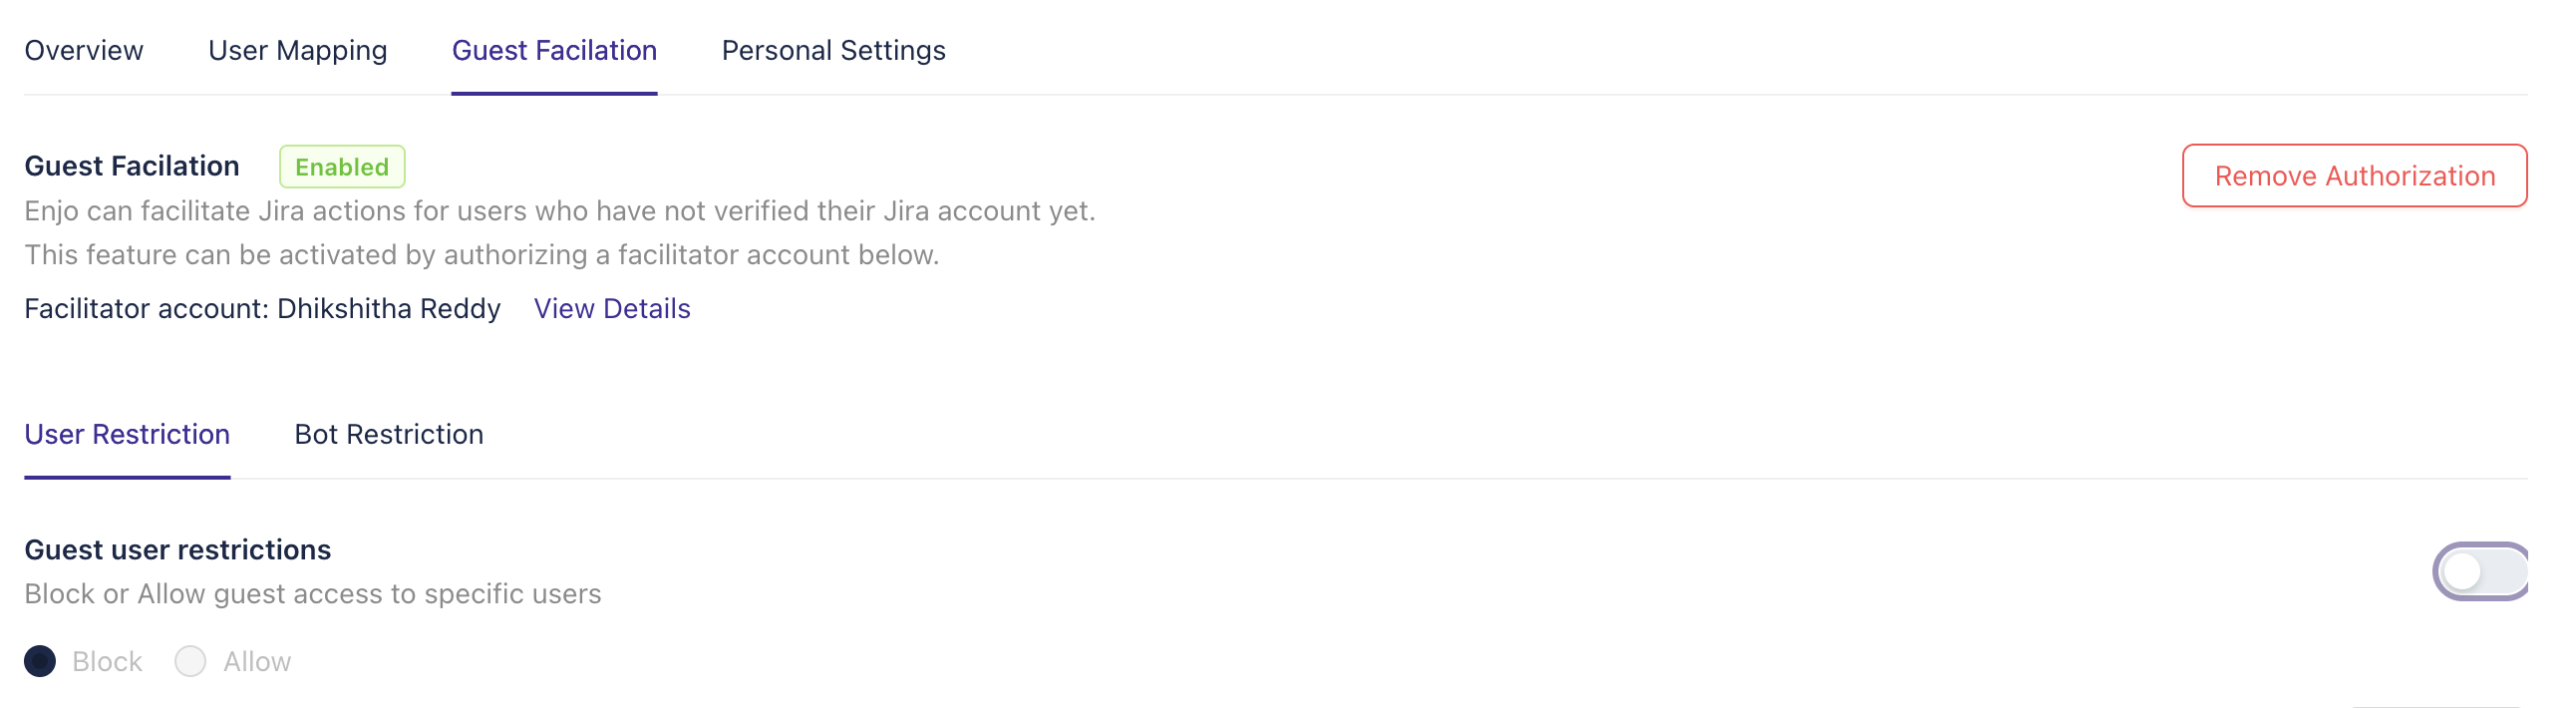
Personal settings
Linking your personal Jira account lets you create and update requests from Slack or Microsoft Teams under your own Jira identity.
Go to Settings → Apps → Jira connection → Configure → Personal settings.
Click Login and complete the verification flow.
Once verified, your account details appear in the My Account section. To switch accounts, unlink your current account and repeat the steps above.

Once you complete the verification process, you will see your Jira account information in the "My Account" section.
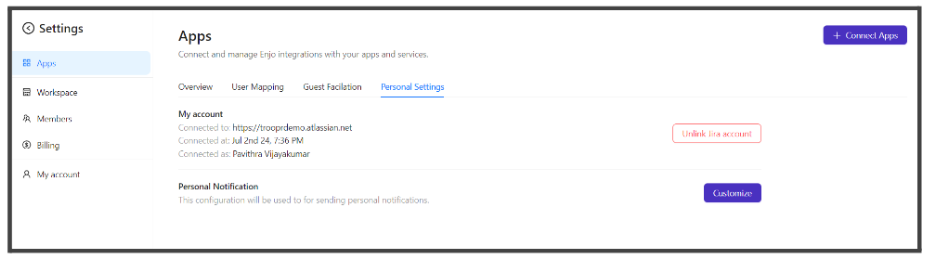
You can link a different Jira account by unlinking first and following the same steps for linking the new account.
Use Jira DC as a knowledge source
You can connect Jira DC as a knowledge source so your AI Agent can draw on past Jira tickets when answering requests. Enjo ingests tickets daily and uses them to improve response accuracy.
To set this up, go to Settings → AI Agents → Knowledge → Add Source → Jira.
Tip: This is separate from the system actions connection above. You can use Jira DC for actions only, as a knowledge source only, or both.
Supported use cases
Slack: Create and update Jira requests directly from Slack conversations using AI Actions and slash commands. Configure Slack notifications to alert your team when requests are created or updated.
Microsoft Teams: Create and update Jira requests from Teams using the same AI Actions and notification setup as Slack.
Web chat: Create and update Jira requests from the Enjo web widget for teams using web-based support channels.