
Agent Assist Integration and Configuration
Configure Agent Assist
In this article, you'll learn how to integrate and configure Agent Assist across Salesforce, Jira, ServiceNow, and Zammad — including appearance, AI recommendations, chat behavior, and AI Agent routing.
💡 This article covers configuration only. For usage instructions once Agent Assist is set up, see Using Agent Assist in Your Helpdesk.
Before you start
You need Owner or Admin role in Enjo.
Agent Assist must be installed in your helpdesk before configuration. See Install Agent Assist if you haven't completed installation yet.
The platform you want to configure (Salesforce, Jira, ServiceNow, or Zammad) must be connected to your Enjo workspace. See Integrations.
Connect a platform to Agent Assist
Agent Assist supports Salesforce, Jira, ServiceNow, and Zammad. Each platform needs to be connected before it can be configured.
Jira
Go to Agent Assist from the left navigation.
Open the Jira configuration section.
Select the Jira domain you want to connect.
Enter the sub-domain and click Add.
Salesforce
Open the Salesforce configuration section.
Select the Salesforce domain to connect.
Enter the sub-domain and click Add.
ServiceNow
Open the ServiceNow configuration section.
Select the ServiceNow domain.
Enter the sub-domain and click Add.
Zammad
Open the Zammad configuration section.
Select the Zammad account you want to use from the list.
Click Add.
💡 Each Zammad account can only be connected to one workspace. If you attempt to connect the same account to more than one workspace, an error will appear indicating the account is already configured elsewhere.
Configuration sections
Once a platform is connected, four configuration sections become available:
General — visibility and appearance of the widget
Recommendations — case summary, AI answers, sources, and knowledge generation
Chat — conversation starters, question context, and customer context
Agent Mapping — routing rules that determine which AI Agent handles which cases
General
Manage the overall visibility and appearance of the Agent Assist widget.
Setting | What it does |
|---|---|
Enable Agent Assist | Toggle Agent Assist on or off. When disabled, the widget does not appear in the connected ticketing system. |
Logo | Upload a custom logo to display in the widget interface. |
Name | Set the display name shown to agents within the widget. |
Launch Button Text | Customise the text on the button that opens the widget. |
Enjo Branding | Show or hide Enjo branding in the widget interface. |
Recommendations
Control how Agent Assist generates summaries, AI answers, and knowledge content from cases.
Case Summary
Enable or disable case summary generation.
Choose the summary length : Detailed or Concise.
Select which case fields (including custom fields) to use as input for generating the summary.
AI Answer
Enable or disable AI answer generation.
Toggle source visibility on or off to control whether agents can see the sources used to generate the AI answer.
💡 The AI Agent used to generate answers is configured in the Agent Mapping section. See Agent Mapping below.
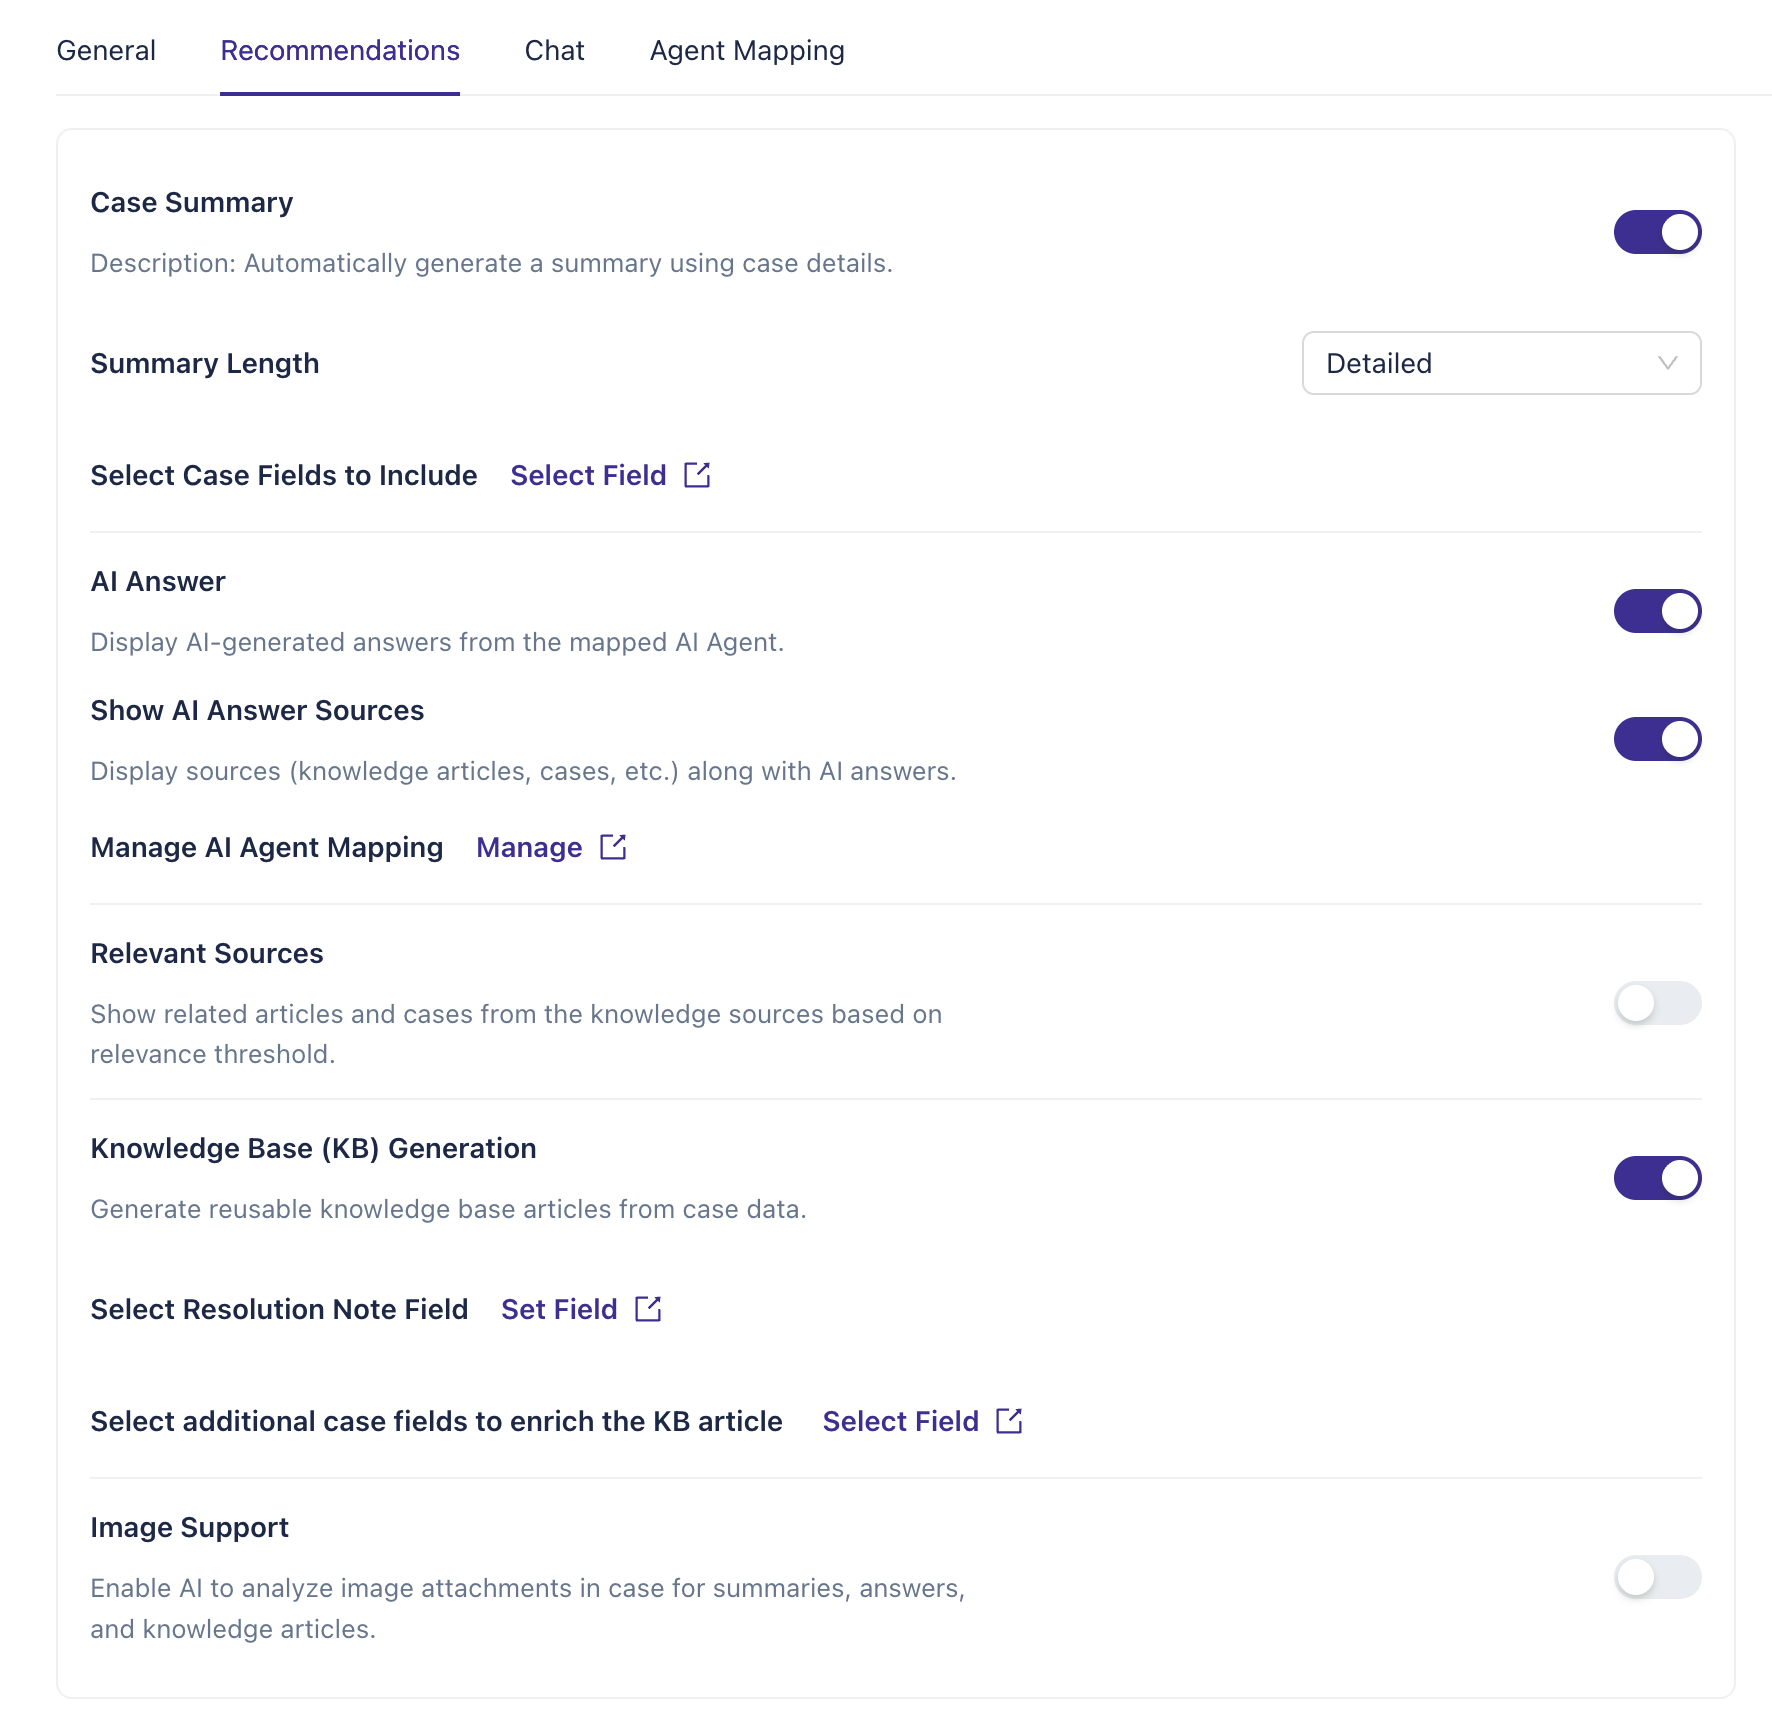
Relevant Sources
💡 Relevant Sources is available for Salesforce only.
When enabled, Agent Assist retrieves relevant indexed knowledge sources including Salesforce Knowledge Base articles and past Salesforce cases and surfaces them alongside the AI answer.
Knowledge Generation
Enable KB generation to automatically create knowledge blocks from case or ticket context.
Select the Resolution Note Field — the field containing resolution details used to generate the knowledge article.
Add Additional Case Fields to include more context in the generated article.
Enable Image Support to allow images attached in case fields or custom fields to be converted to text and incorporated into summaries, AI answers, and knowledge generation.
Chat
Configure how agents interact with Agent Assist during live support workflows.
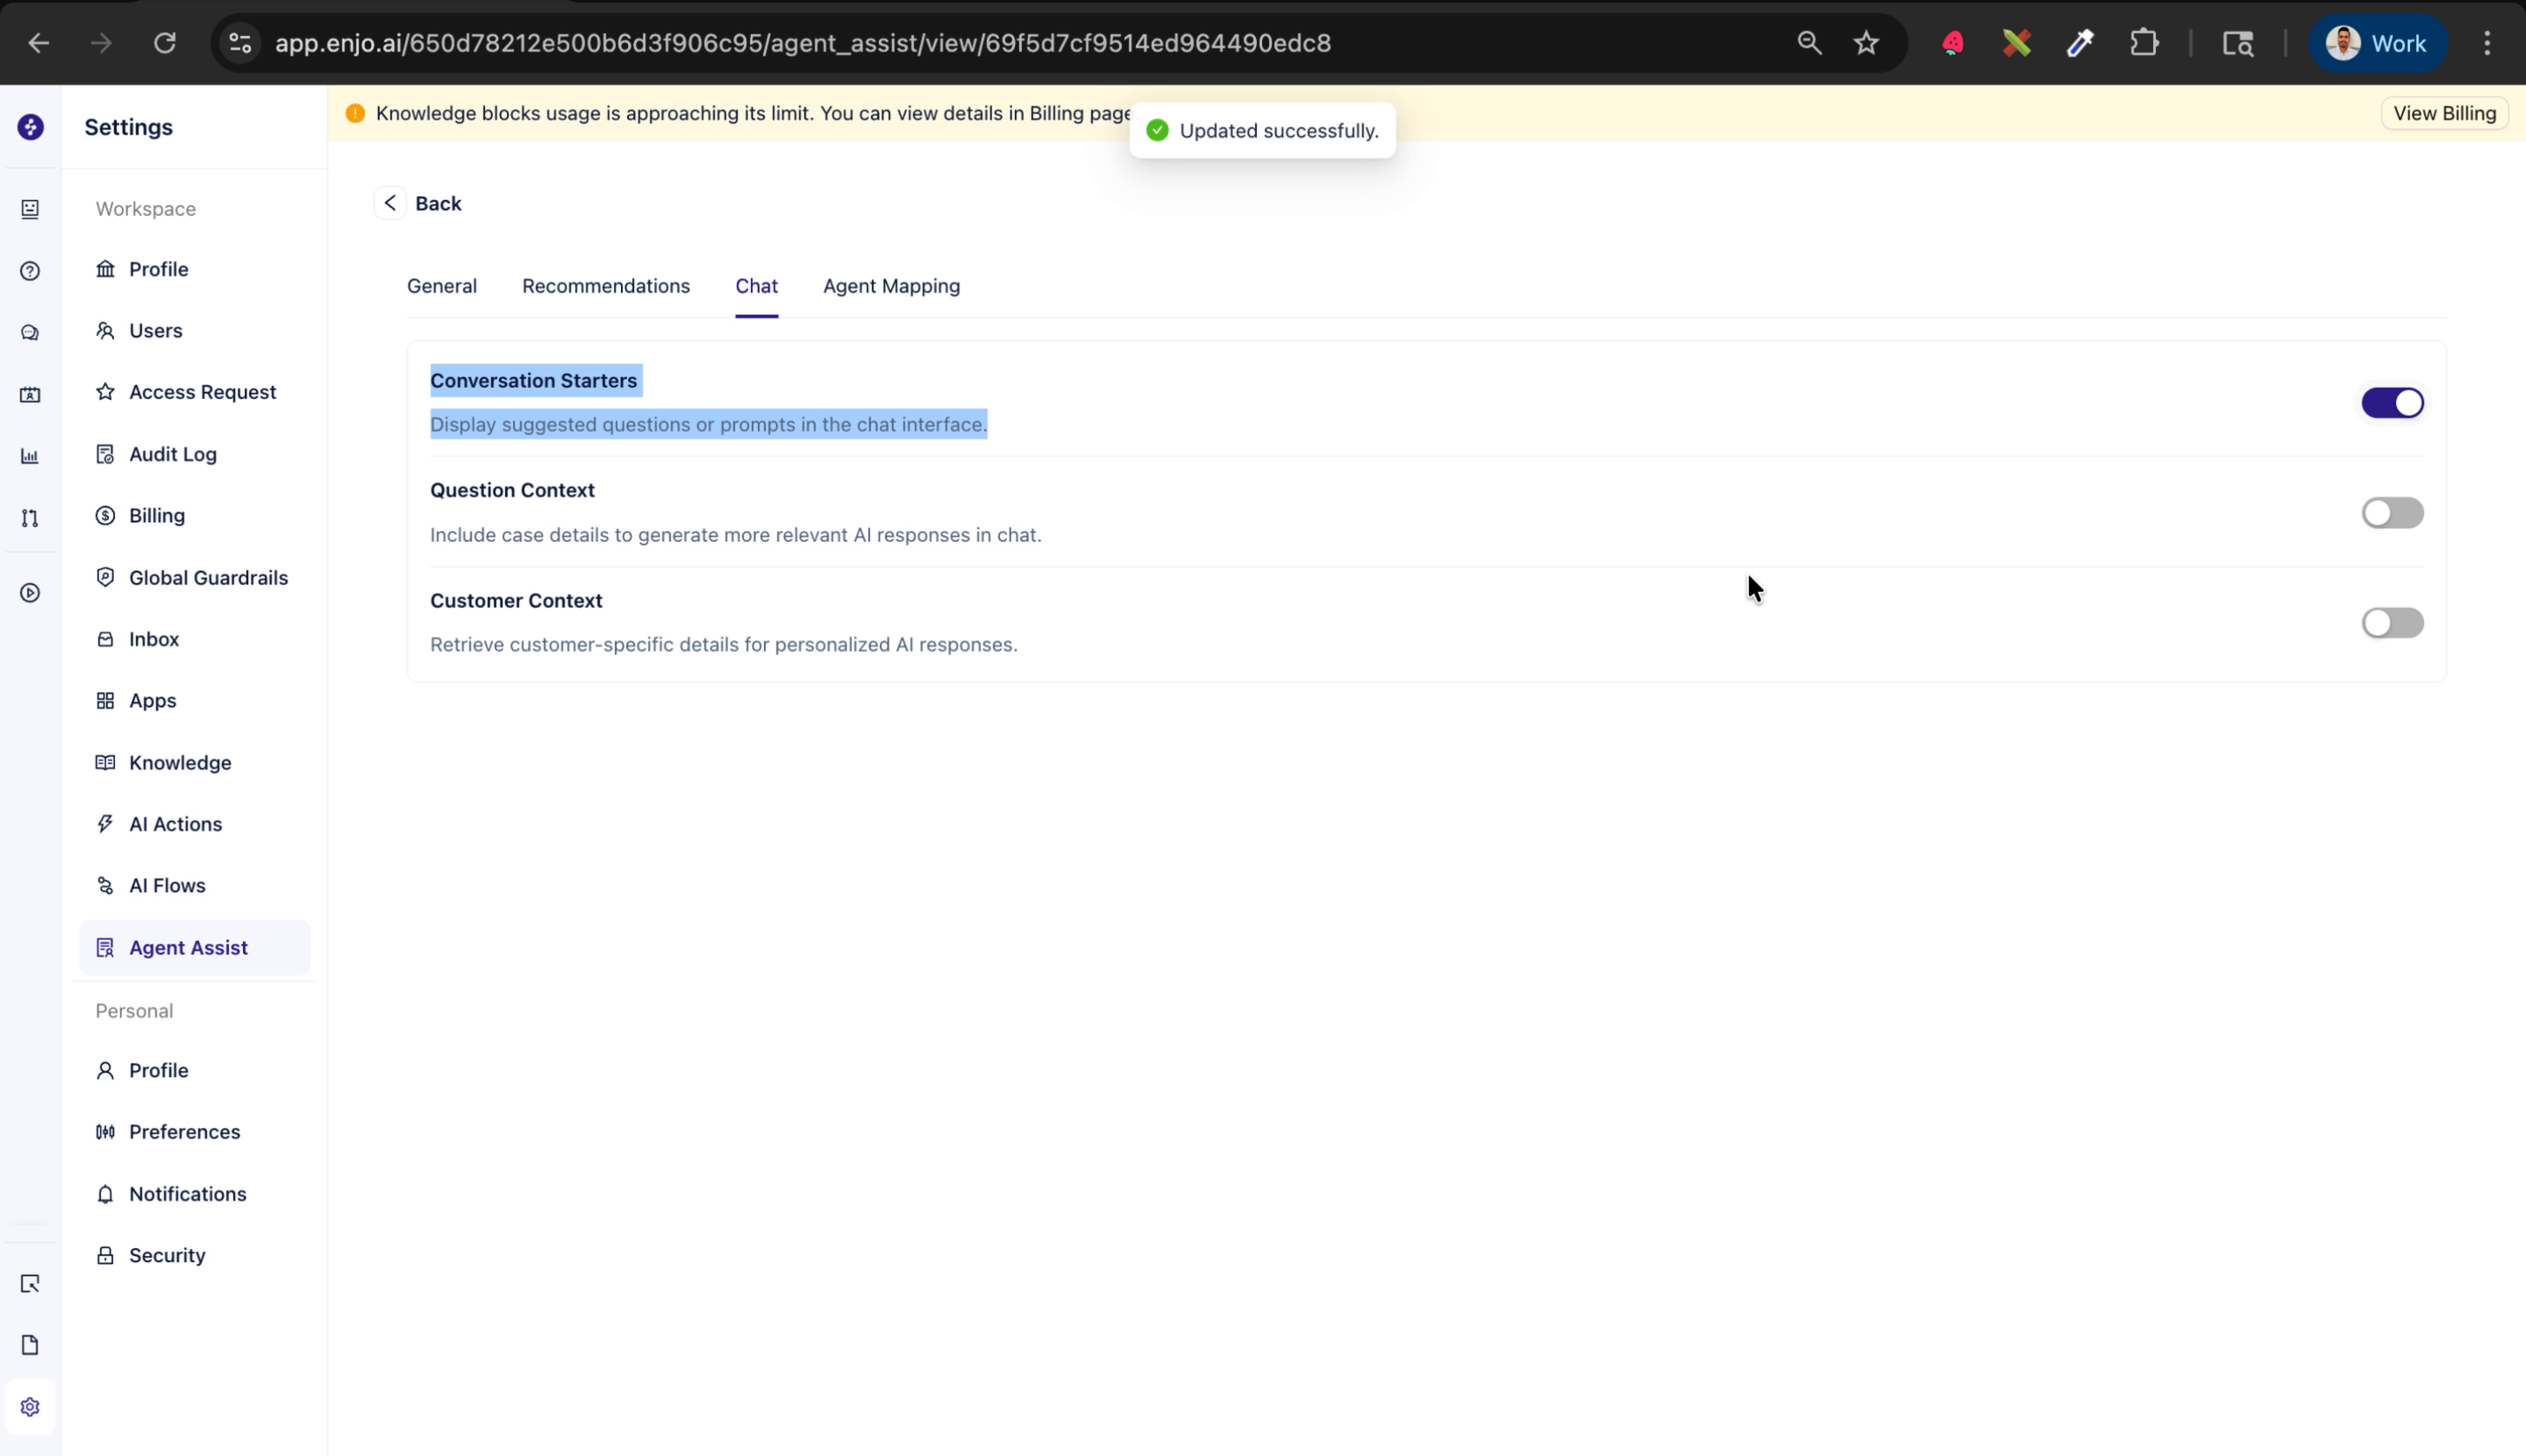
Conversation Starters
Define predefined prompts that appear when an agent opens the chat. These help agents ask more focused or advanced questions based on common issues.
Question Context
Include specific case fields in AI prompts to improve the relevance of responses.
Select the case fields you want to include as context.
Rename each field to match your organisation's terminology if needed — for example, rename "Account ID" to "Customer Account Number".
Click Save to apply the changes.
Renamed fields are reflected across AI Answers, Case Summary, and generated knowledge articles.
💡 Renaming fields to match your internal terminology helps the AI generate more relevant and accurate responses for your team.
Customer Context
Select the customer's name and email fields from their profile data. Agent Assist uses this information to personalise AI-generated replies.
Agent Mapping
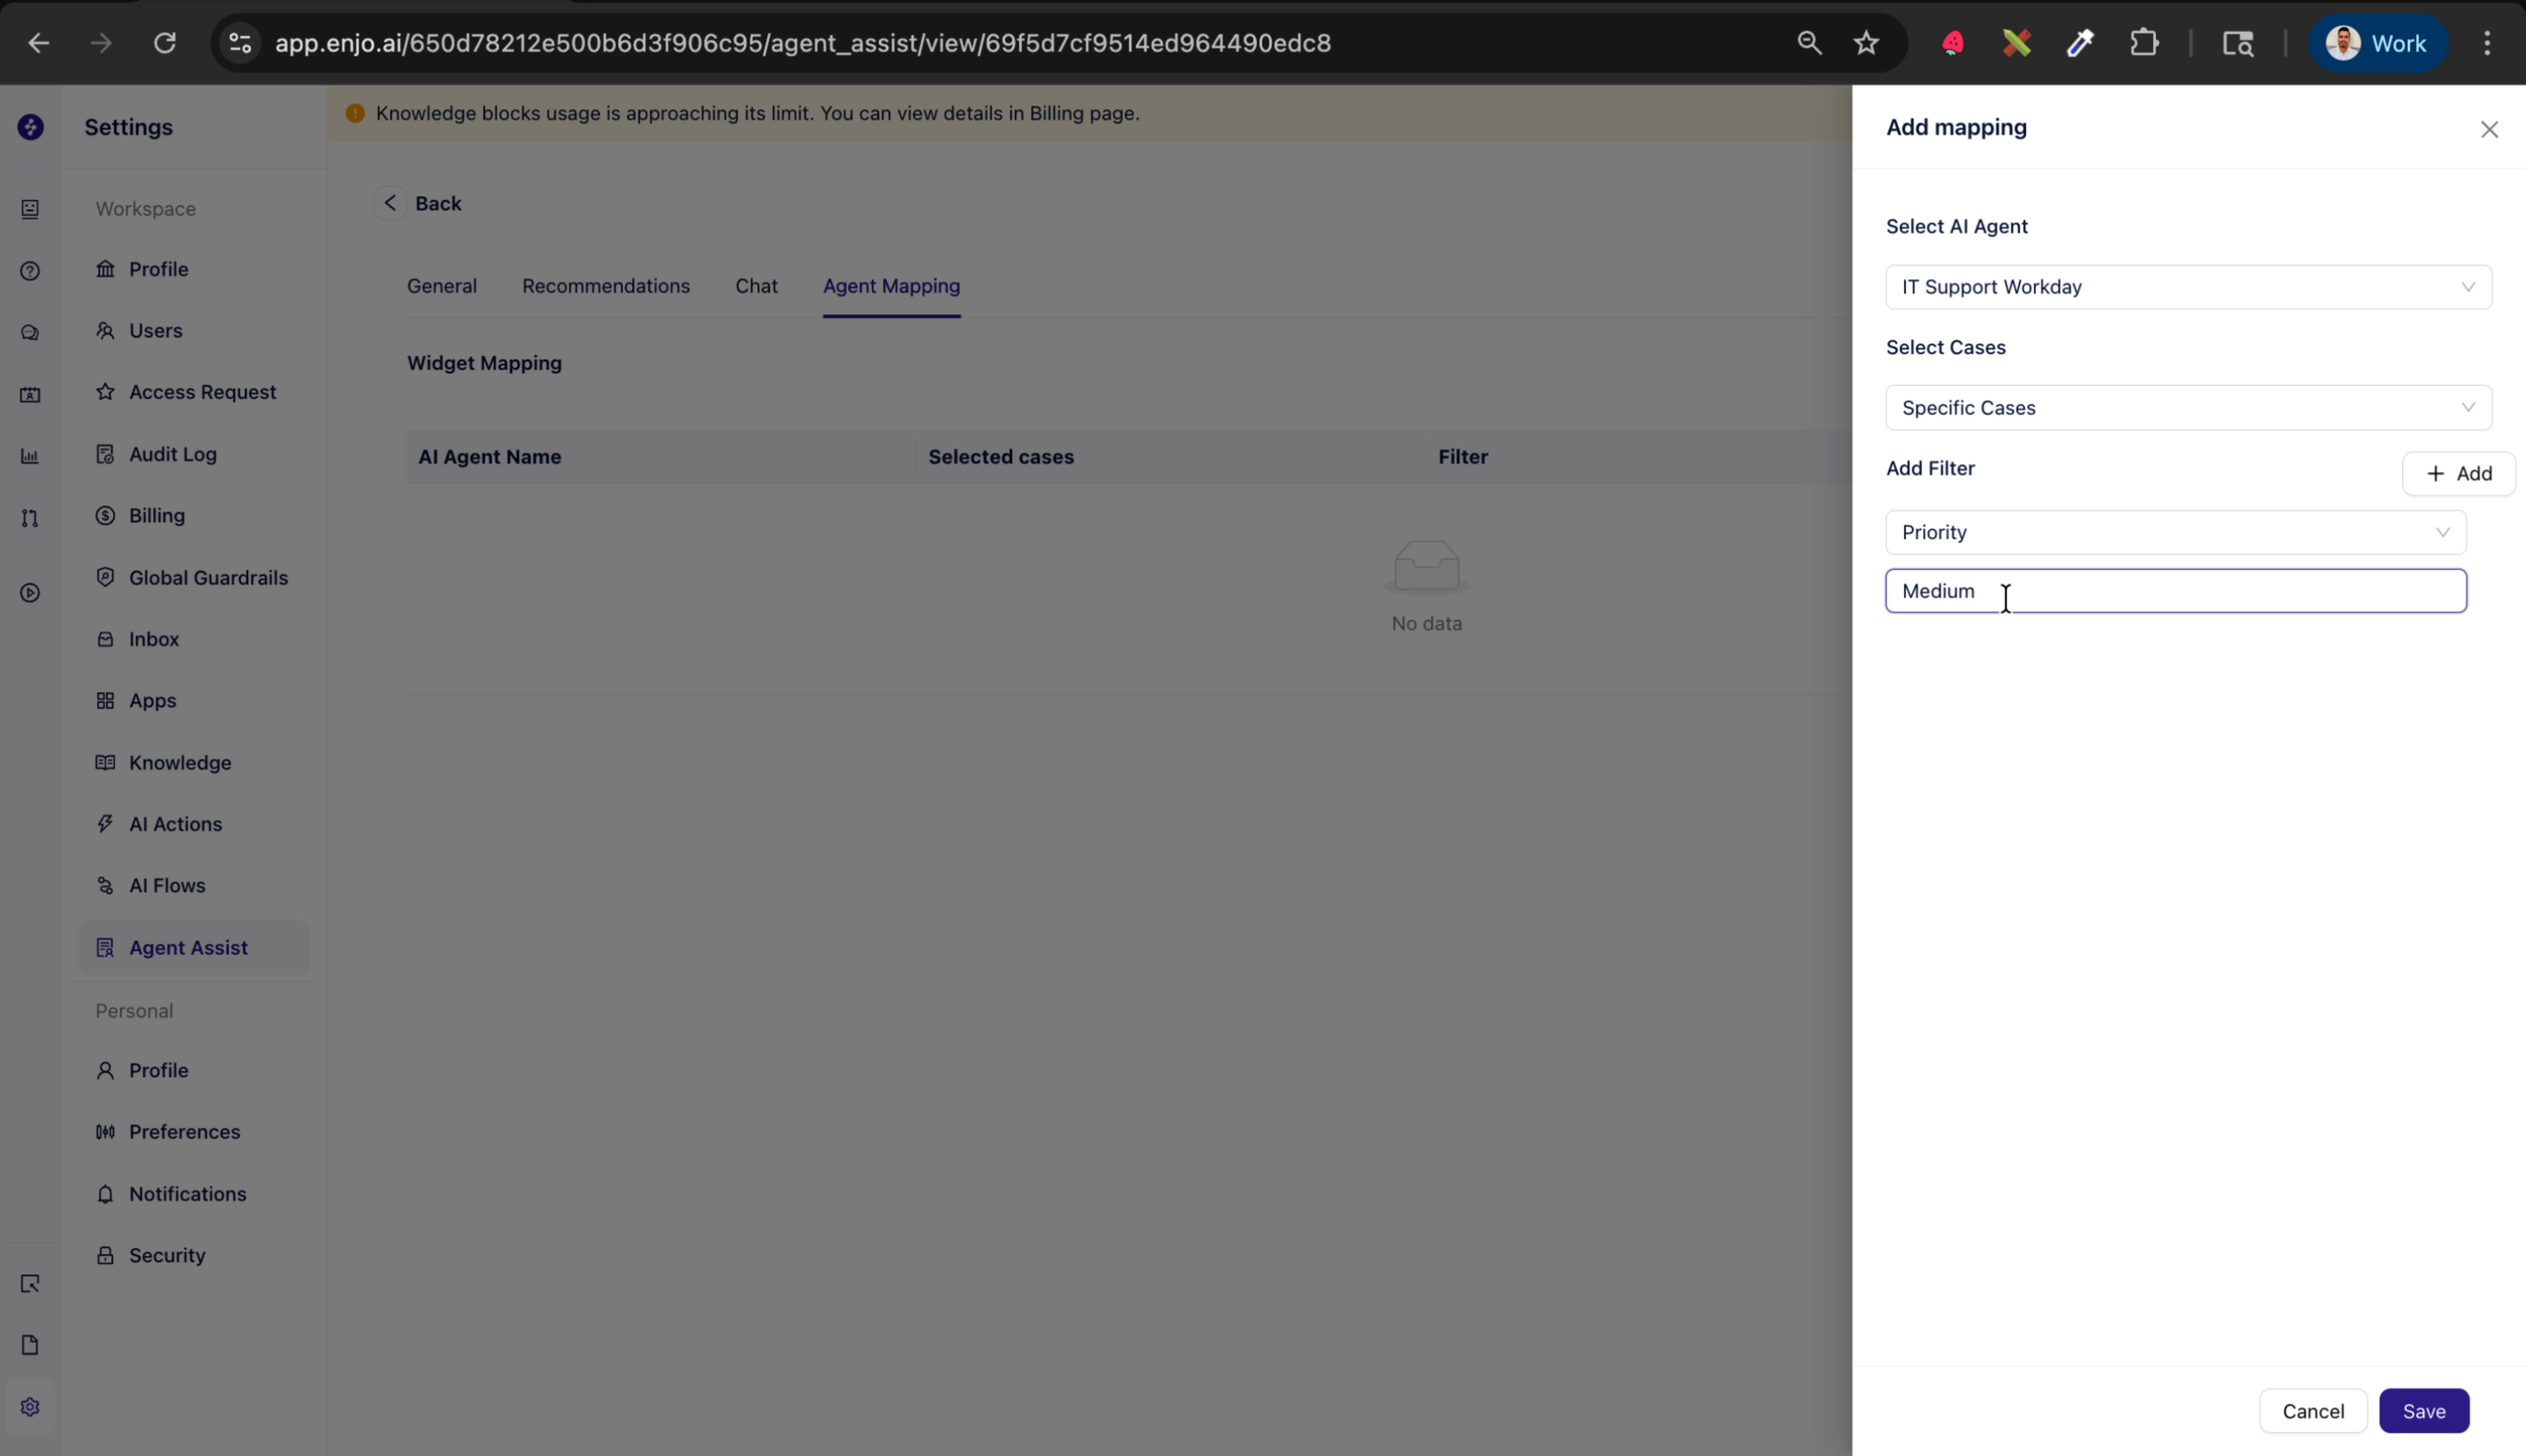
Assign specific AI Agents to handle certain types of cases based on filters and rules.
To create a mapping:
Click Add Mapping
Select the AI Agent to be used.
Select if you want to enable Agent Assist for all cases or specific cases
Define filters (e.g., issue type, priority) to control when the widget appears
Click Save
You can create multiple mappings to handle different routing logic based on ticket or case fields.But you can only map one AI Agent for one widget setup.
What's next
Using Agent Assist in Your Helpdesk — Learn how to use Agent Assist features during live support work.
AI Agent Knowledge — Configure the knowledge sources your mapped AI Agent queries.