
Salesforce KB
Connecting your Salesforce Knowledge Base (KB) to Enjo lets your AI Agent draw on your existing KB articles when generating responses. Once connected, Enjo indexes the articles and makes them available as a knowledge source across any AI Agent in your workspace.
Use this guide to connect Salesforce KB at the workspace level or restrict it to specific AI Agents.
Before you begin
You must have Admin access in your Enjo workspace.
You need a Salesforce account with permission to authorize third-party app connections.
Decide whether the connection should be available to all AI Agents in your workspace (Workspace visibility) or only to specific ones (Restricted visibility).
Step 1: Open App Integrations in Settings
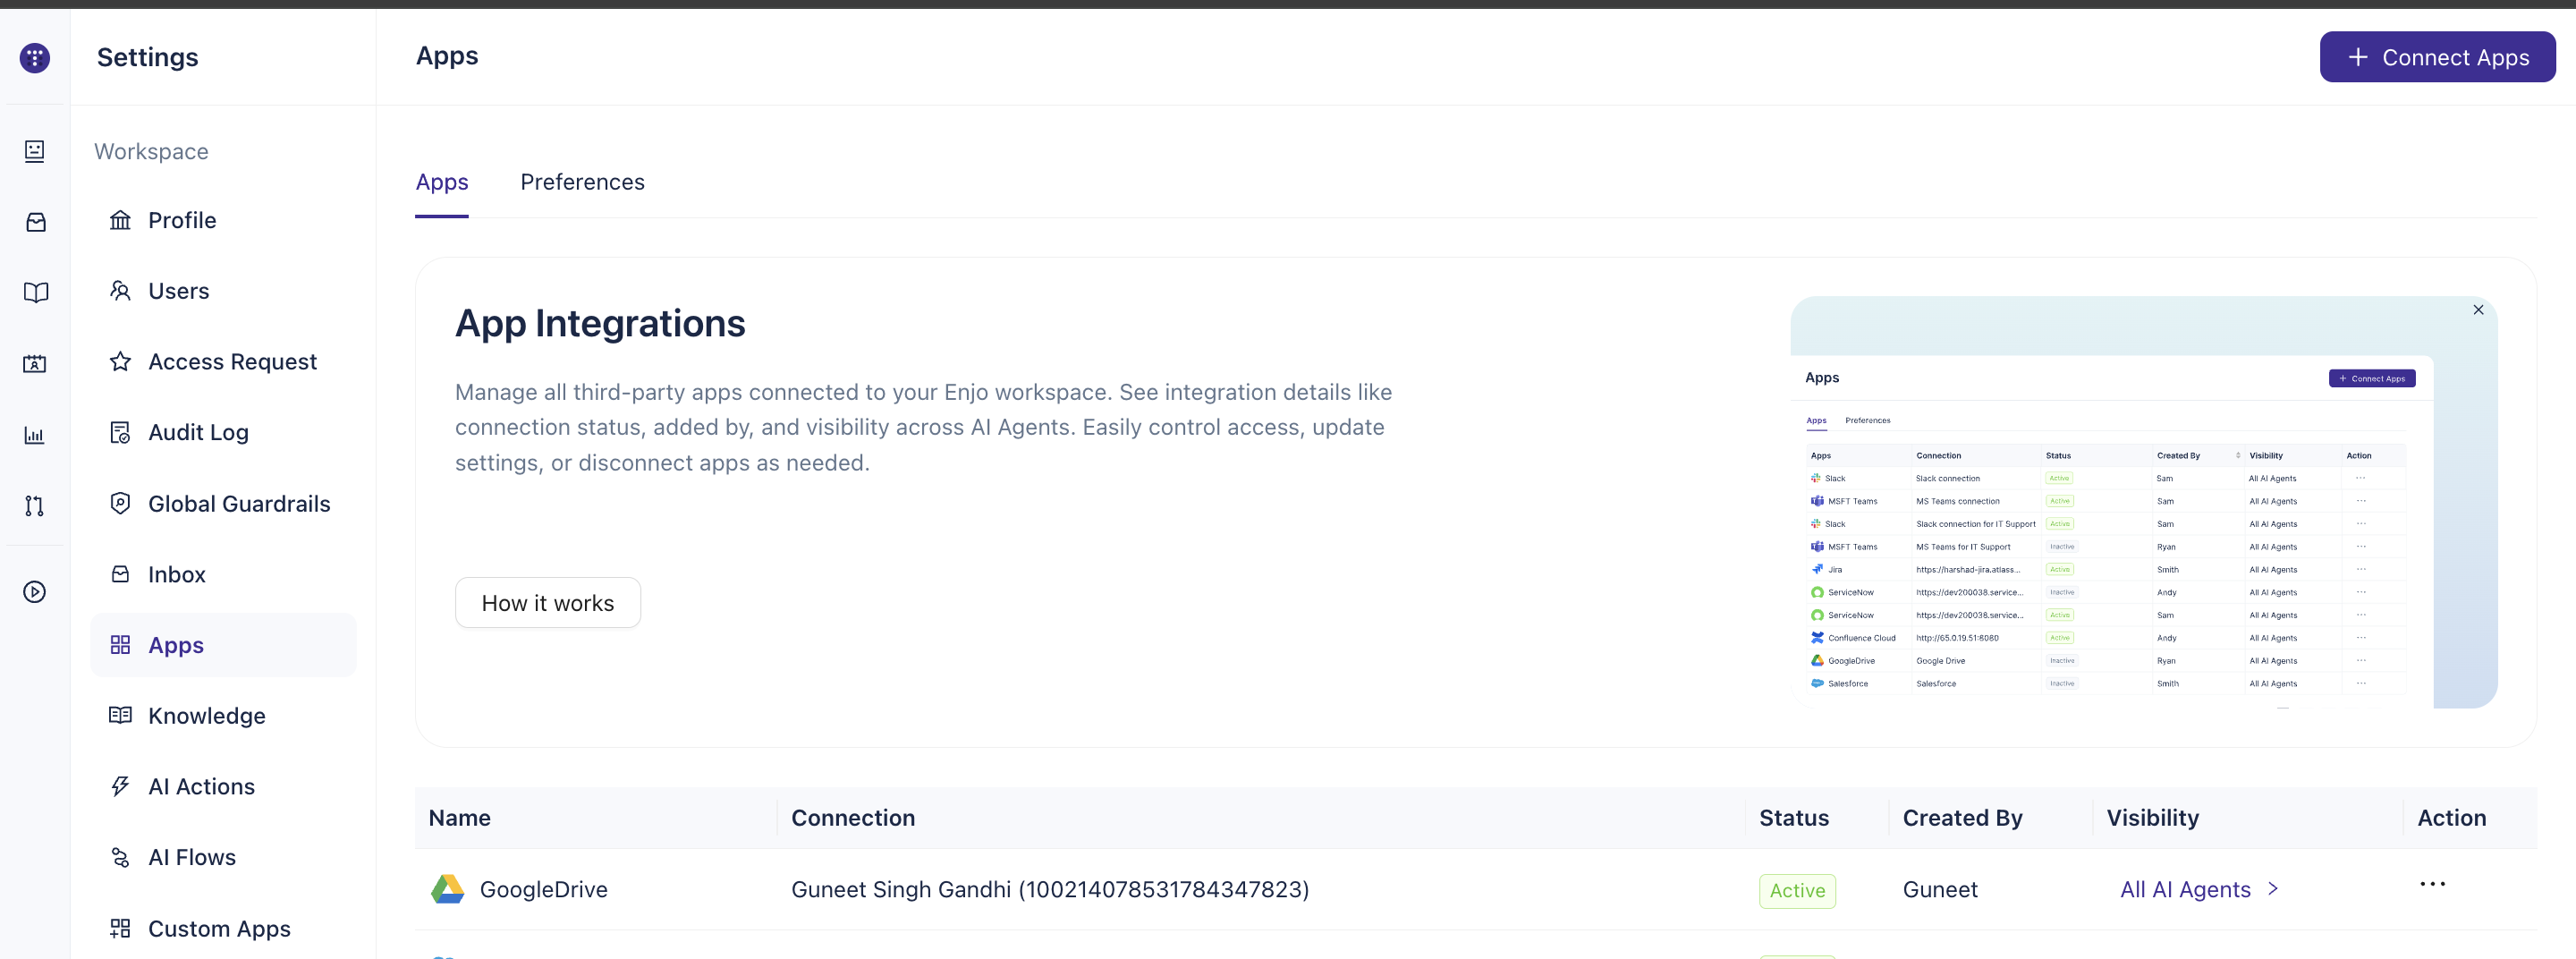
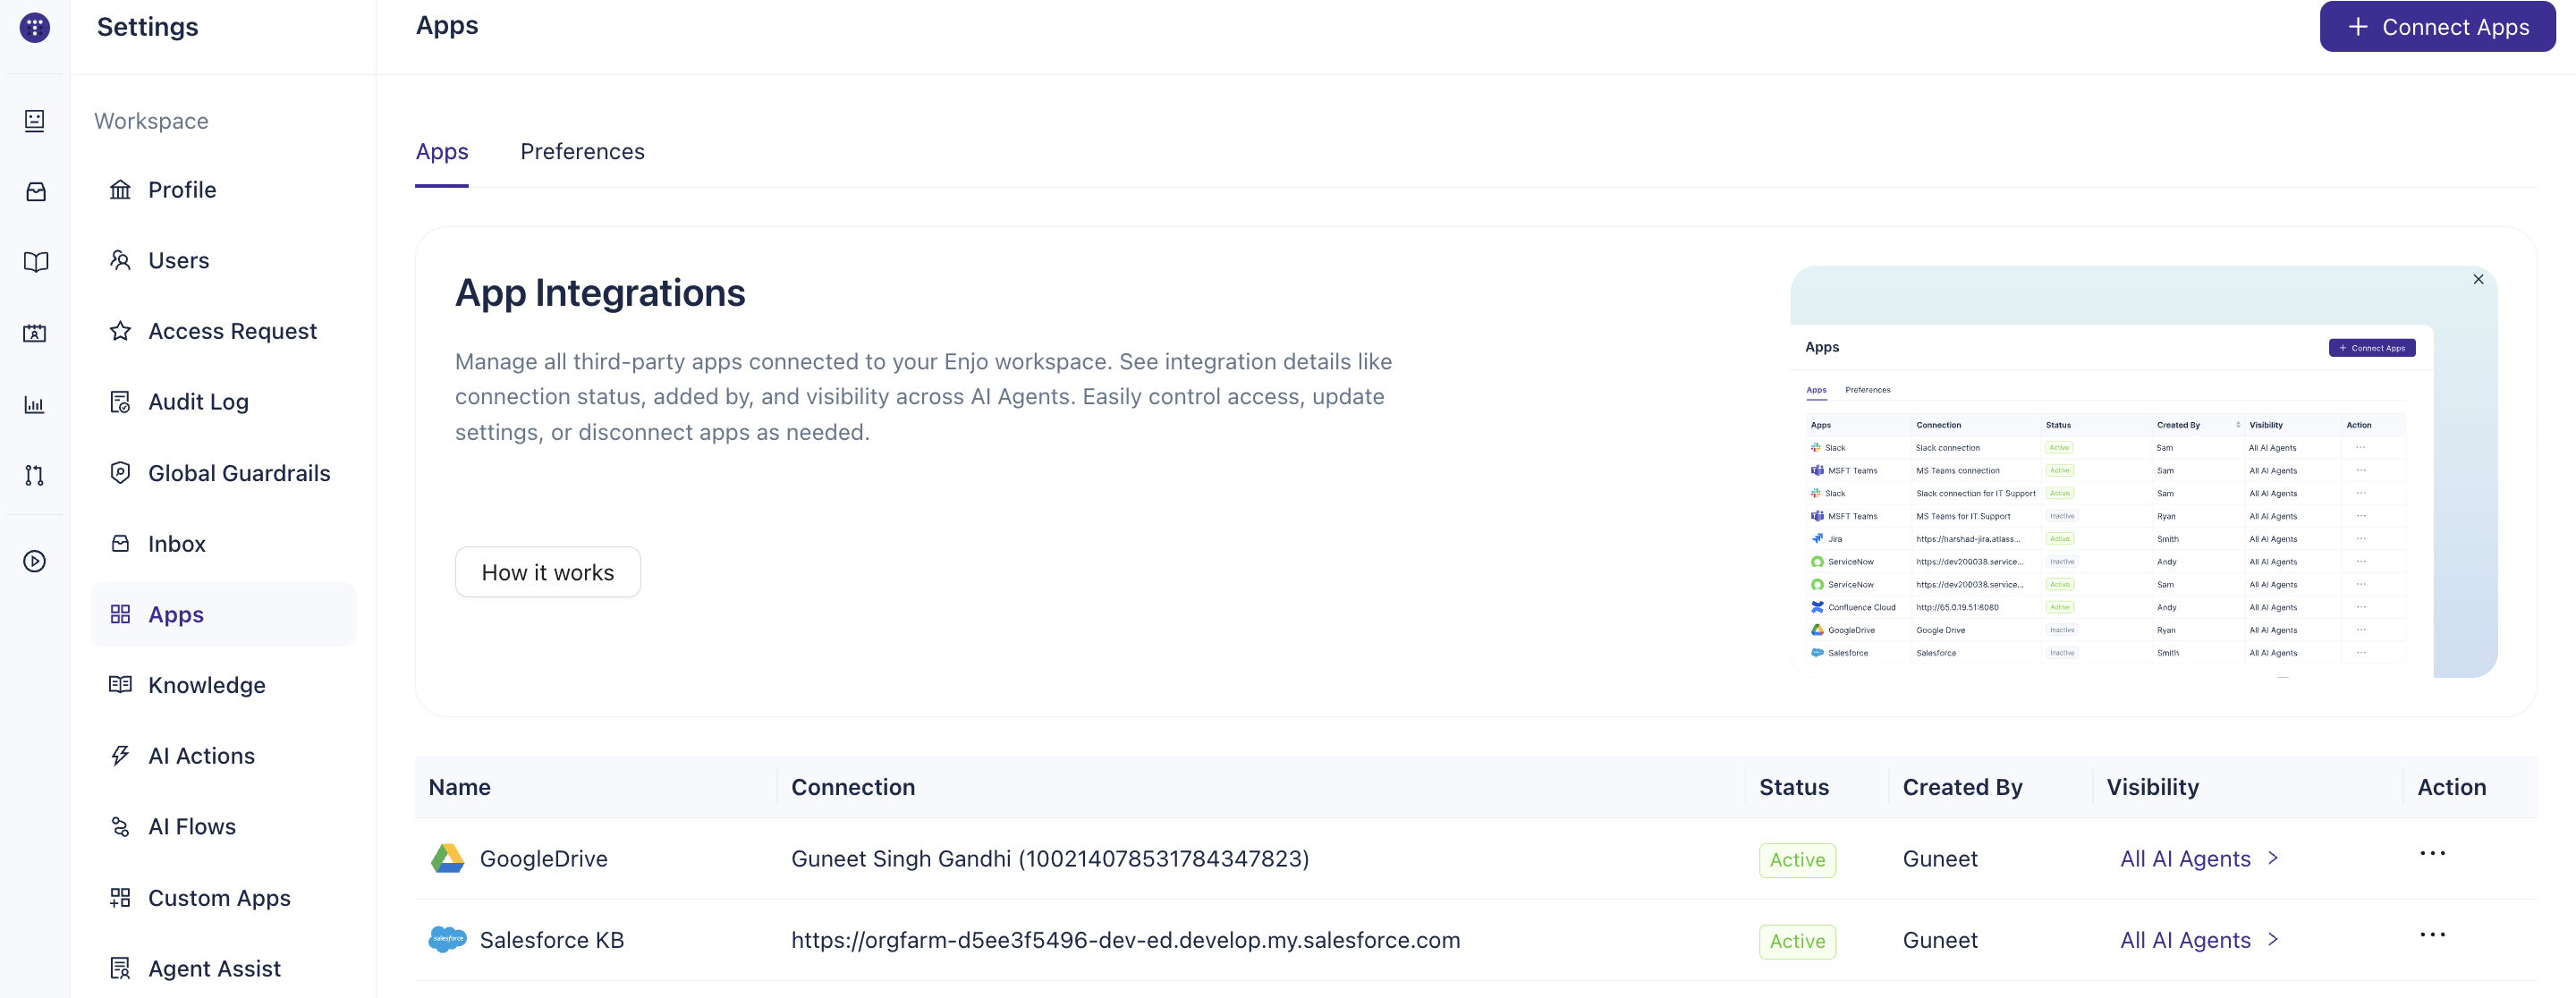
Navigate to Settings using the sidebar, then select Apps under the Workspace section.
You'll land on the App Integrations page, which lists all third-party apps currently connected to your Enjo workspace.
Step 2: Add a new Salesforce KB connection
Click + Connect Apps in the top-right corner of the App Integrations page.
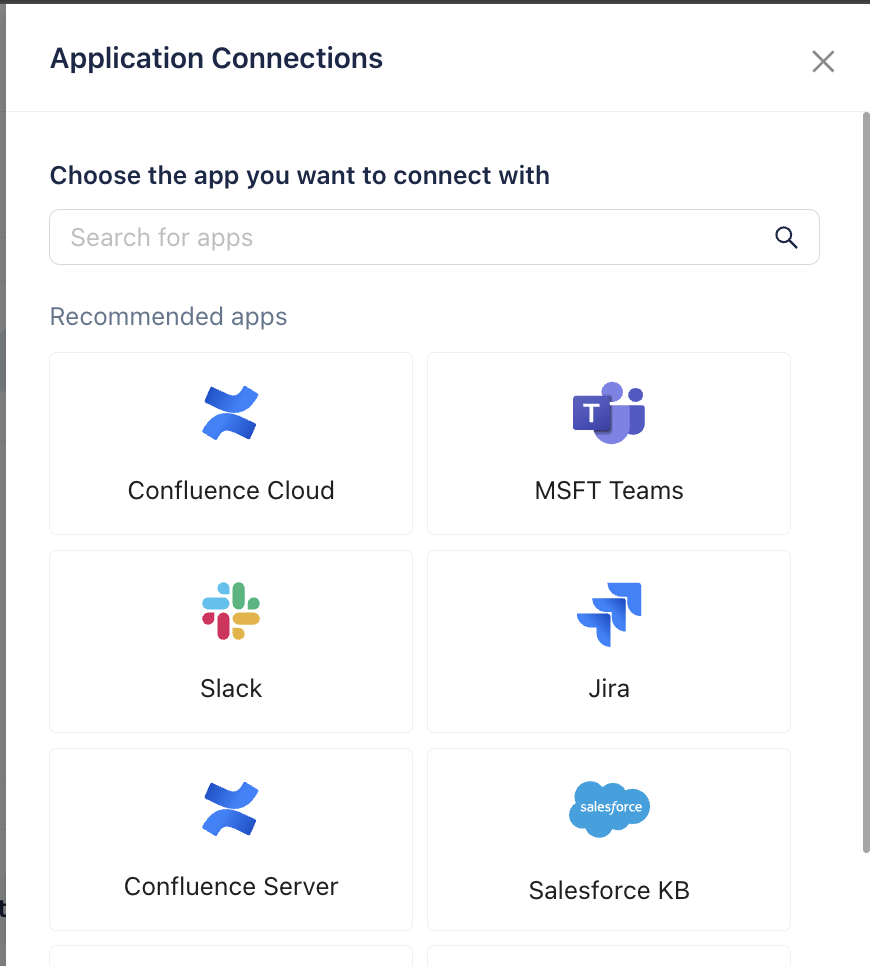
From the list of available apps, select Salesforce KB.
A side panel opens titled Application Connections.
Step 3: Enter your Salesforce URL
In the Application Connections panel, enter your Salesforce instance URL.
You can use either:
Your production URL (e.g.,
https://yourcompany.salesforce.com)Your sandbox URL (e.g.,
https://yourcompany--sandbox.sandbox.salesforce.com)
Click + Add new to confirm the URL before proceeding.
Note: Use your sandbox URL only if you want to connect a non-production Salesforce environment. For most deployments, use your production URL.
Step 4: Name the connection and set visibility
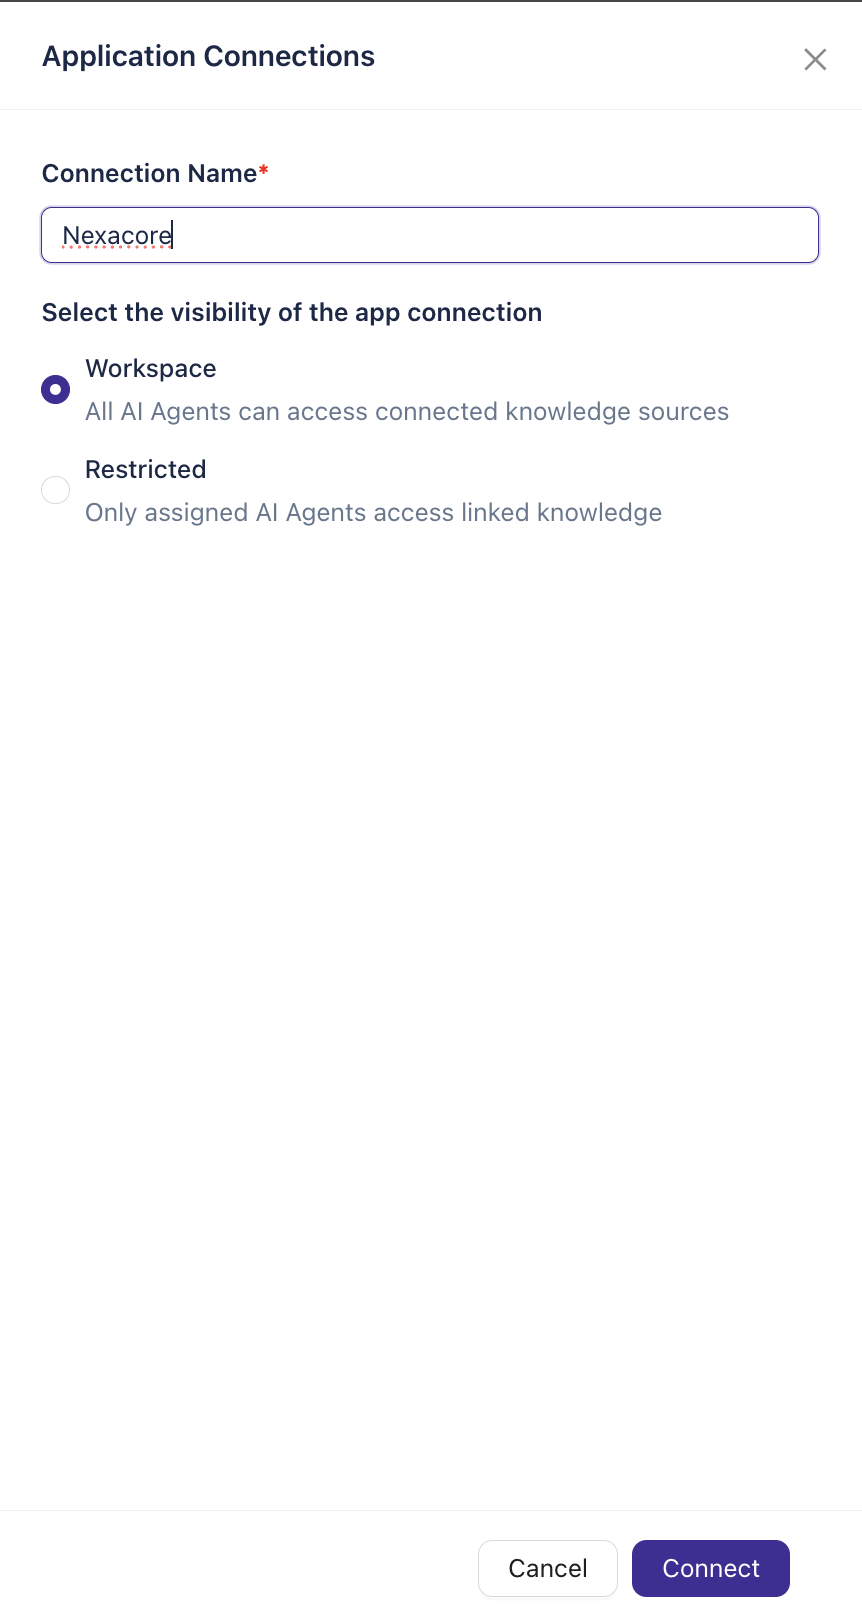
Enter a Connection Name. This is a label to identify the connection within Enjo — use something recognisable, such as your company or team name.
Then choose the visibility for this connection:
Workspace — All AI Agents in your workspace can access the connected Salesforce KB articles.
Restricted — Only AI Agents you explicitly assign will have access to this knowledge source.
Select your preferred option and click Connect.
Tip: If you're unsure, start with Workspace visibility. You can change this later from the App Integrations page.
Step 5: Authorise access in Salesforce
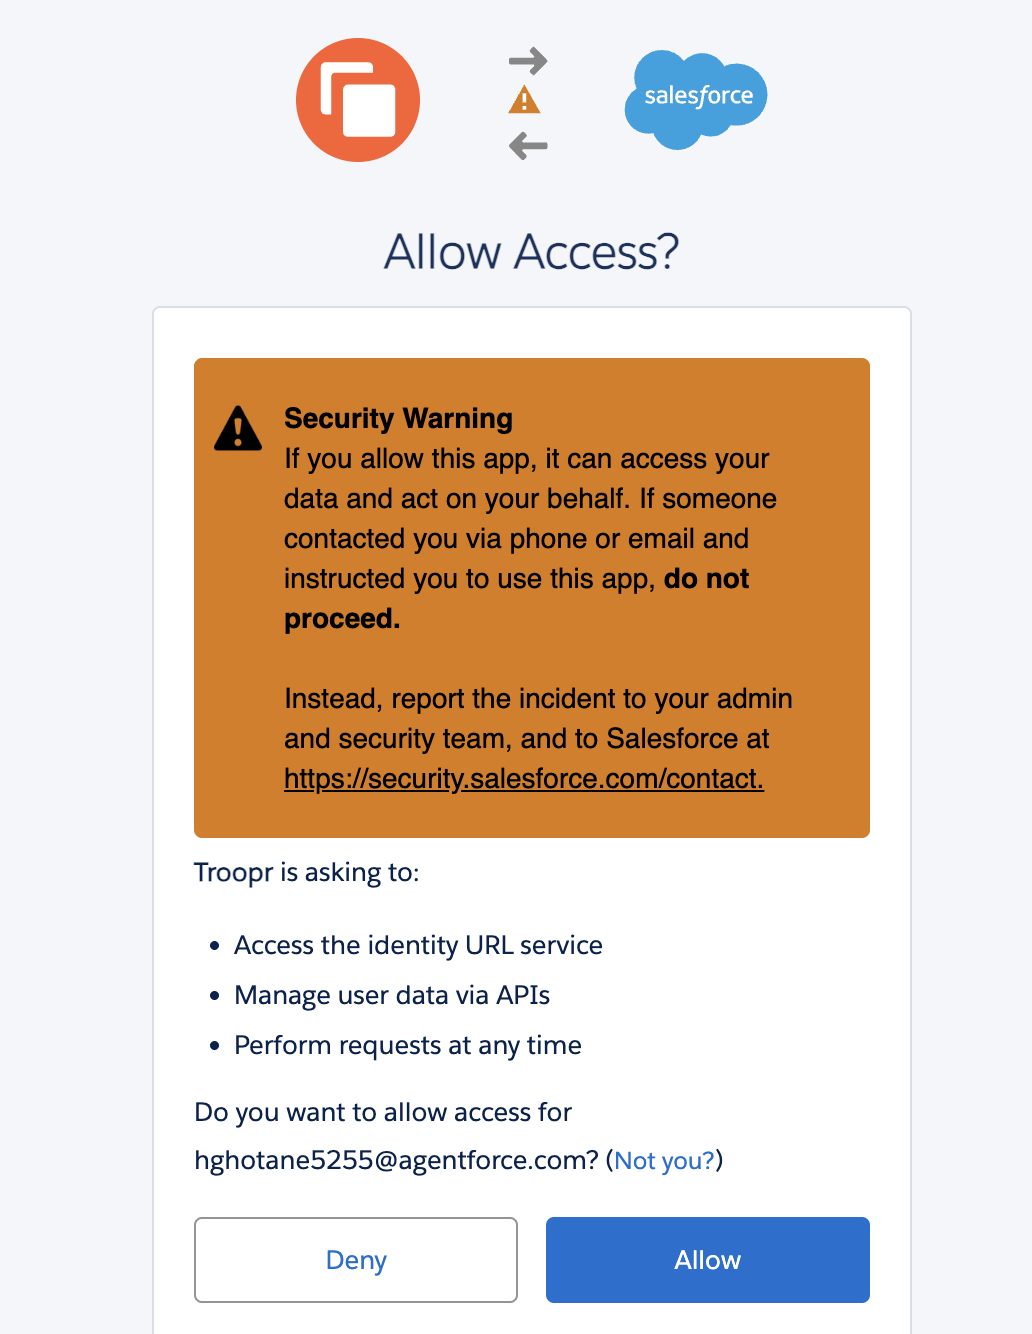
After clicking Connect, you'll be redirected to Salesforce to authorise the connection.
On the Salesforce authorisation screen, review the permissions being requested by Troopr (Enjo's parent company):
Access the identity URL service
Manage user data via APIs
Perform requests at any time
Click Allow to grant access.
Important: Only proceed if you initiated this connection yourself from within Enjo. If someone contacted you by phone or email and asked you to authorise this app, do not proceed — report the incident to your admin and security team.
Step 6: Confirm the connection is active
Once you click Allow, Salesforce redirects you back to the Enjo App Integrations page.
You should see Salesforce KB listed with a status of Active in your connected apps table. The connection row will also display the Salesforce URL you entered and the visibility setting you chose.
What's next
After connecting Salesforce KB, you may want to:
AI Agent Knowledge - connect Confluence, Google Drive, SharePoint, or other content repositories
Set up AI Actions for Salesforce — enable your AI Agent to look up or update Salesforce cases and records in real time, in addition to using KB articles as a knowledge source