Request Handling
In this article, you'll learn how to configure request handling for your AI Agent's ticketing — the settings that control how tickets are created, how requests are attributed, how feedback is collected, and how updates sync between Slack or Microsoft Teams and Jira.
How this works
Request handling settings apply to tickets your AI Agent creates in a connected ticketing project such as Jira. They control assignment and reporting, the feedback message sent after a request closes, the attribution text added to tickets, emoji reactions on chat messages, preview behavior for Jira links, two-way sync of ticket updates, off-hours messaging, privacy, and confirmation messages.
Before you start
You need access to an AI Agent with Ticketing configured.
A connected ticketing project (for example, a Jira project) must be available.
All settings below live on the same screen. To reach it, open your agent and go to AI Agents > Ticketing > Request Handling.
Set assignment and reporting
Go to AI Agents > Ticketing > Request Handling.
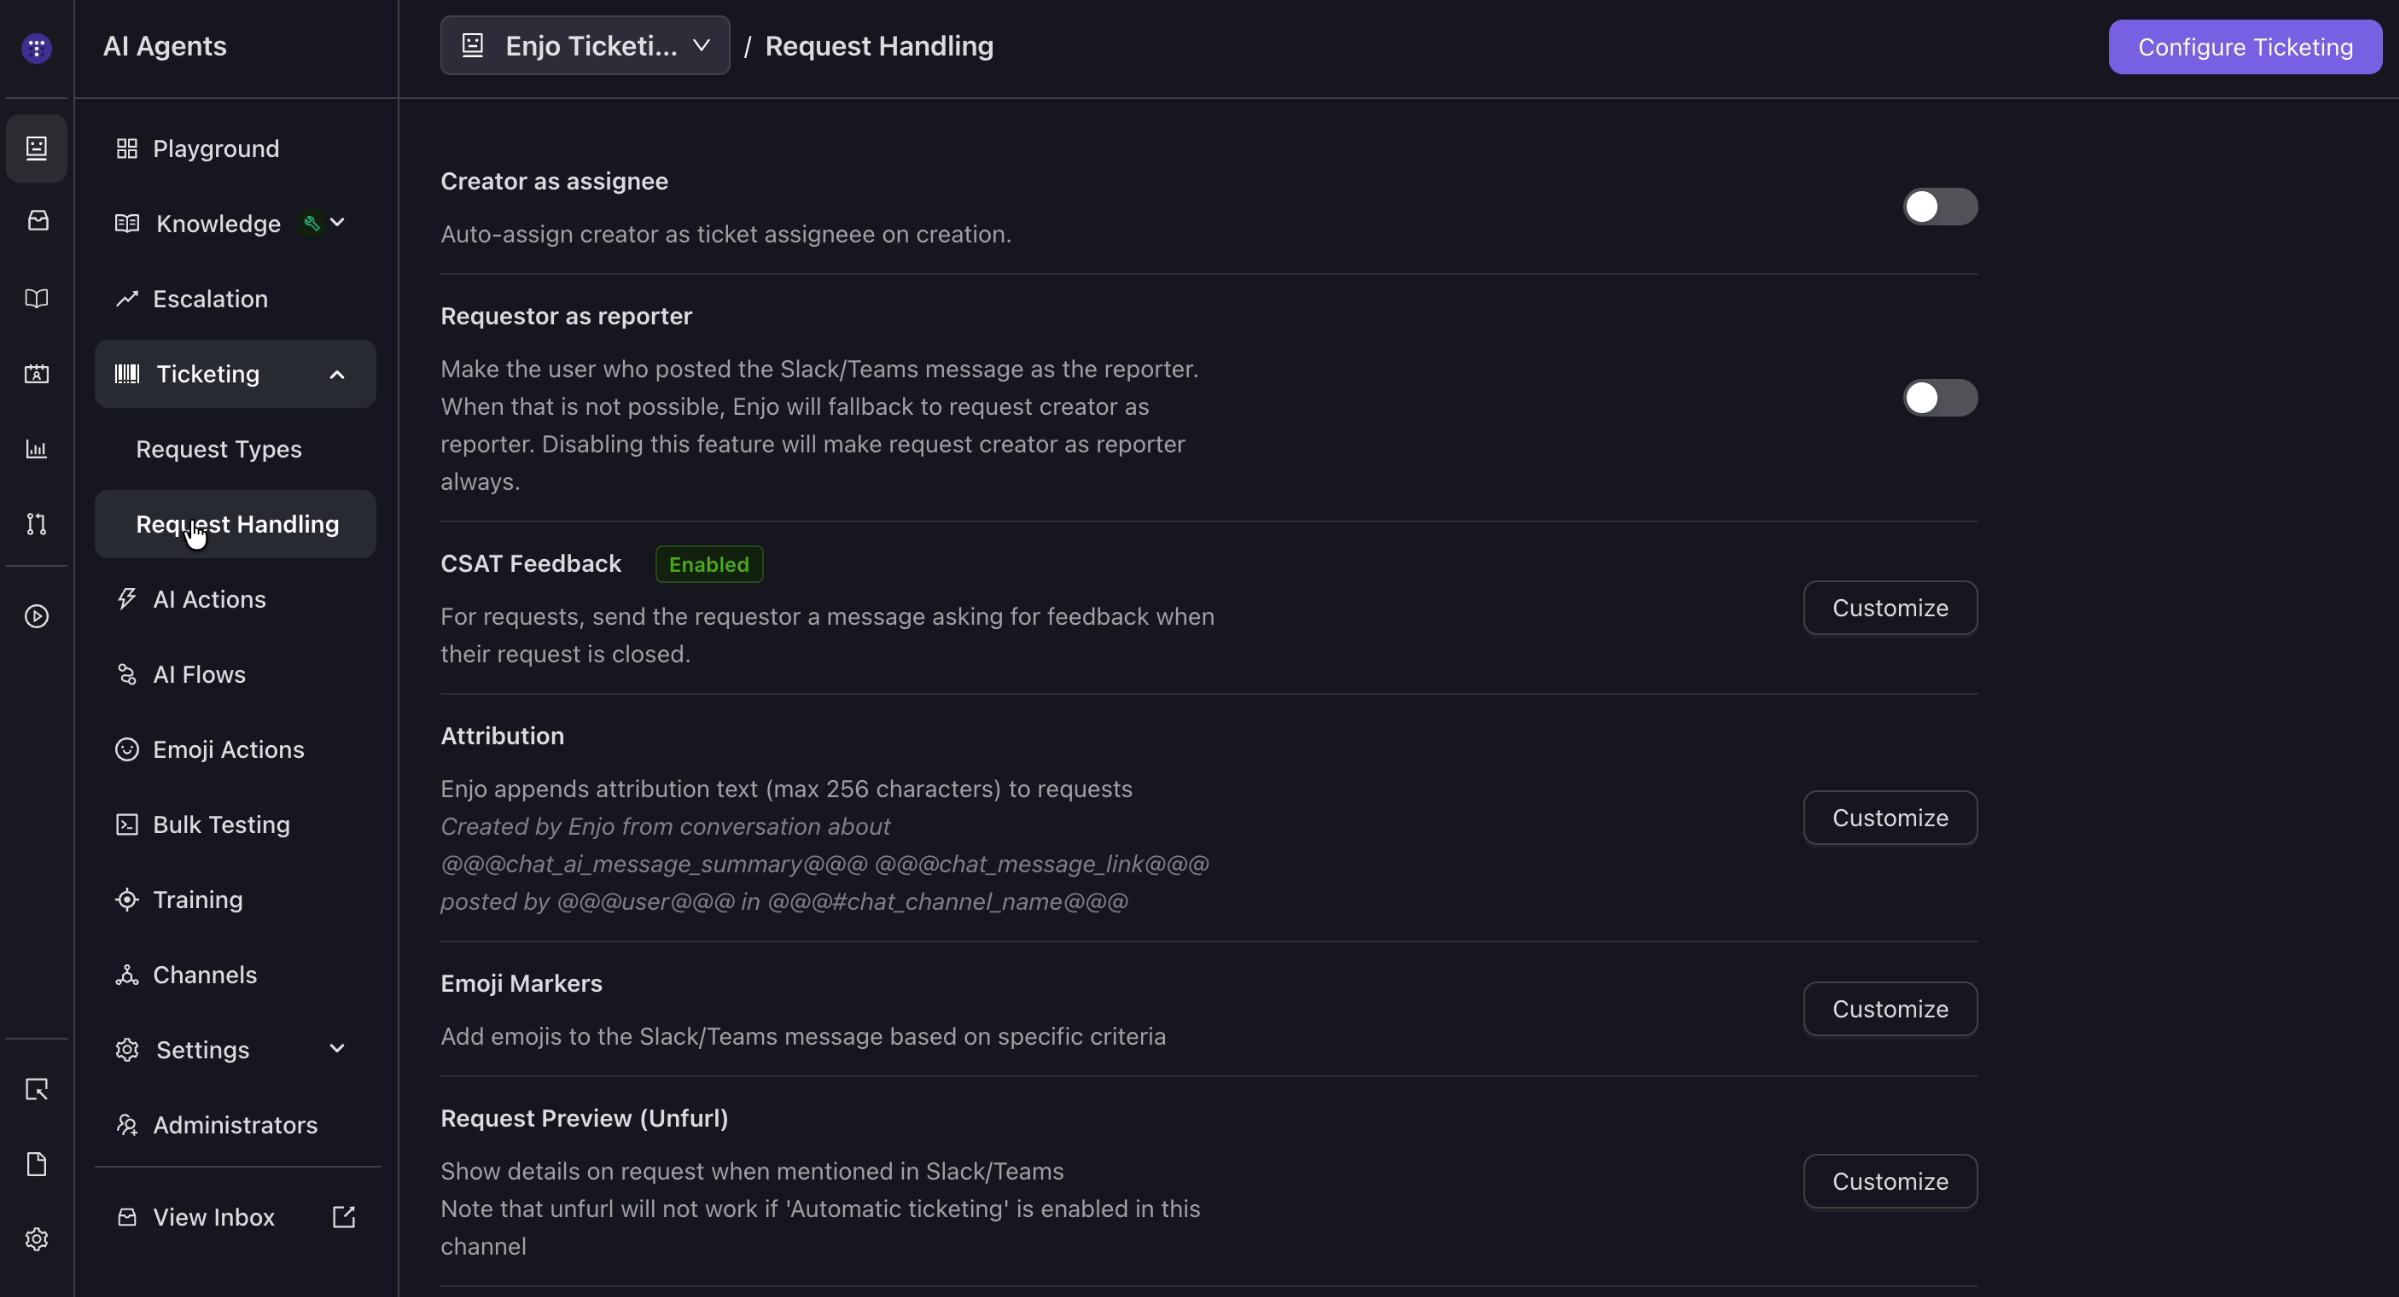
Configure the toggles:
Creator as assignee — Turn this on to automatically assign the request creator as the assignee on ticket creation.
Requestor as reporter — Turn this on to set the user who posted the Slack or Microsoft Teams message as the ticket reporter. When that isn't possible, Enjo falls back to the request creator. With this disabled, the request creator is always the reporter.
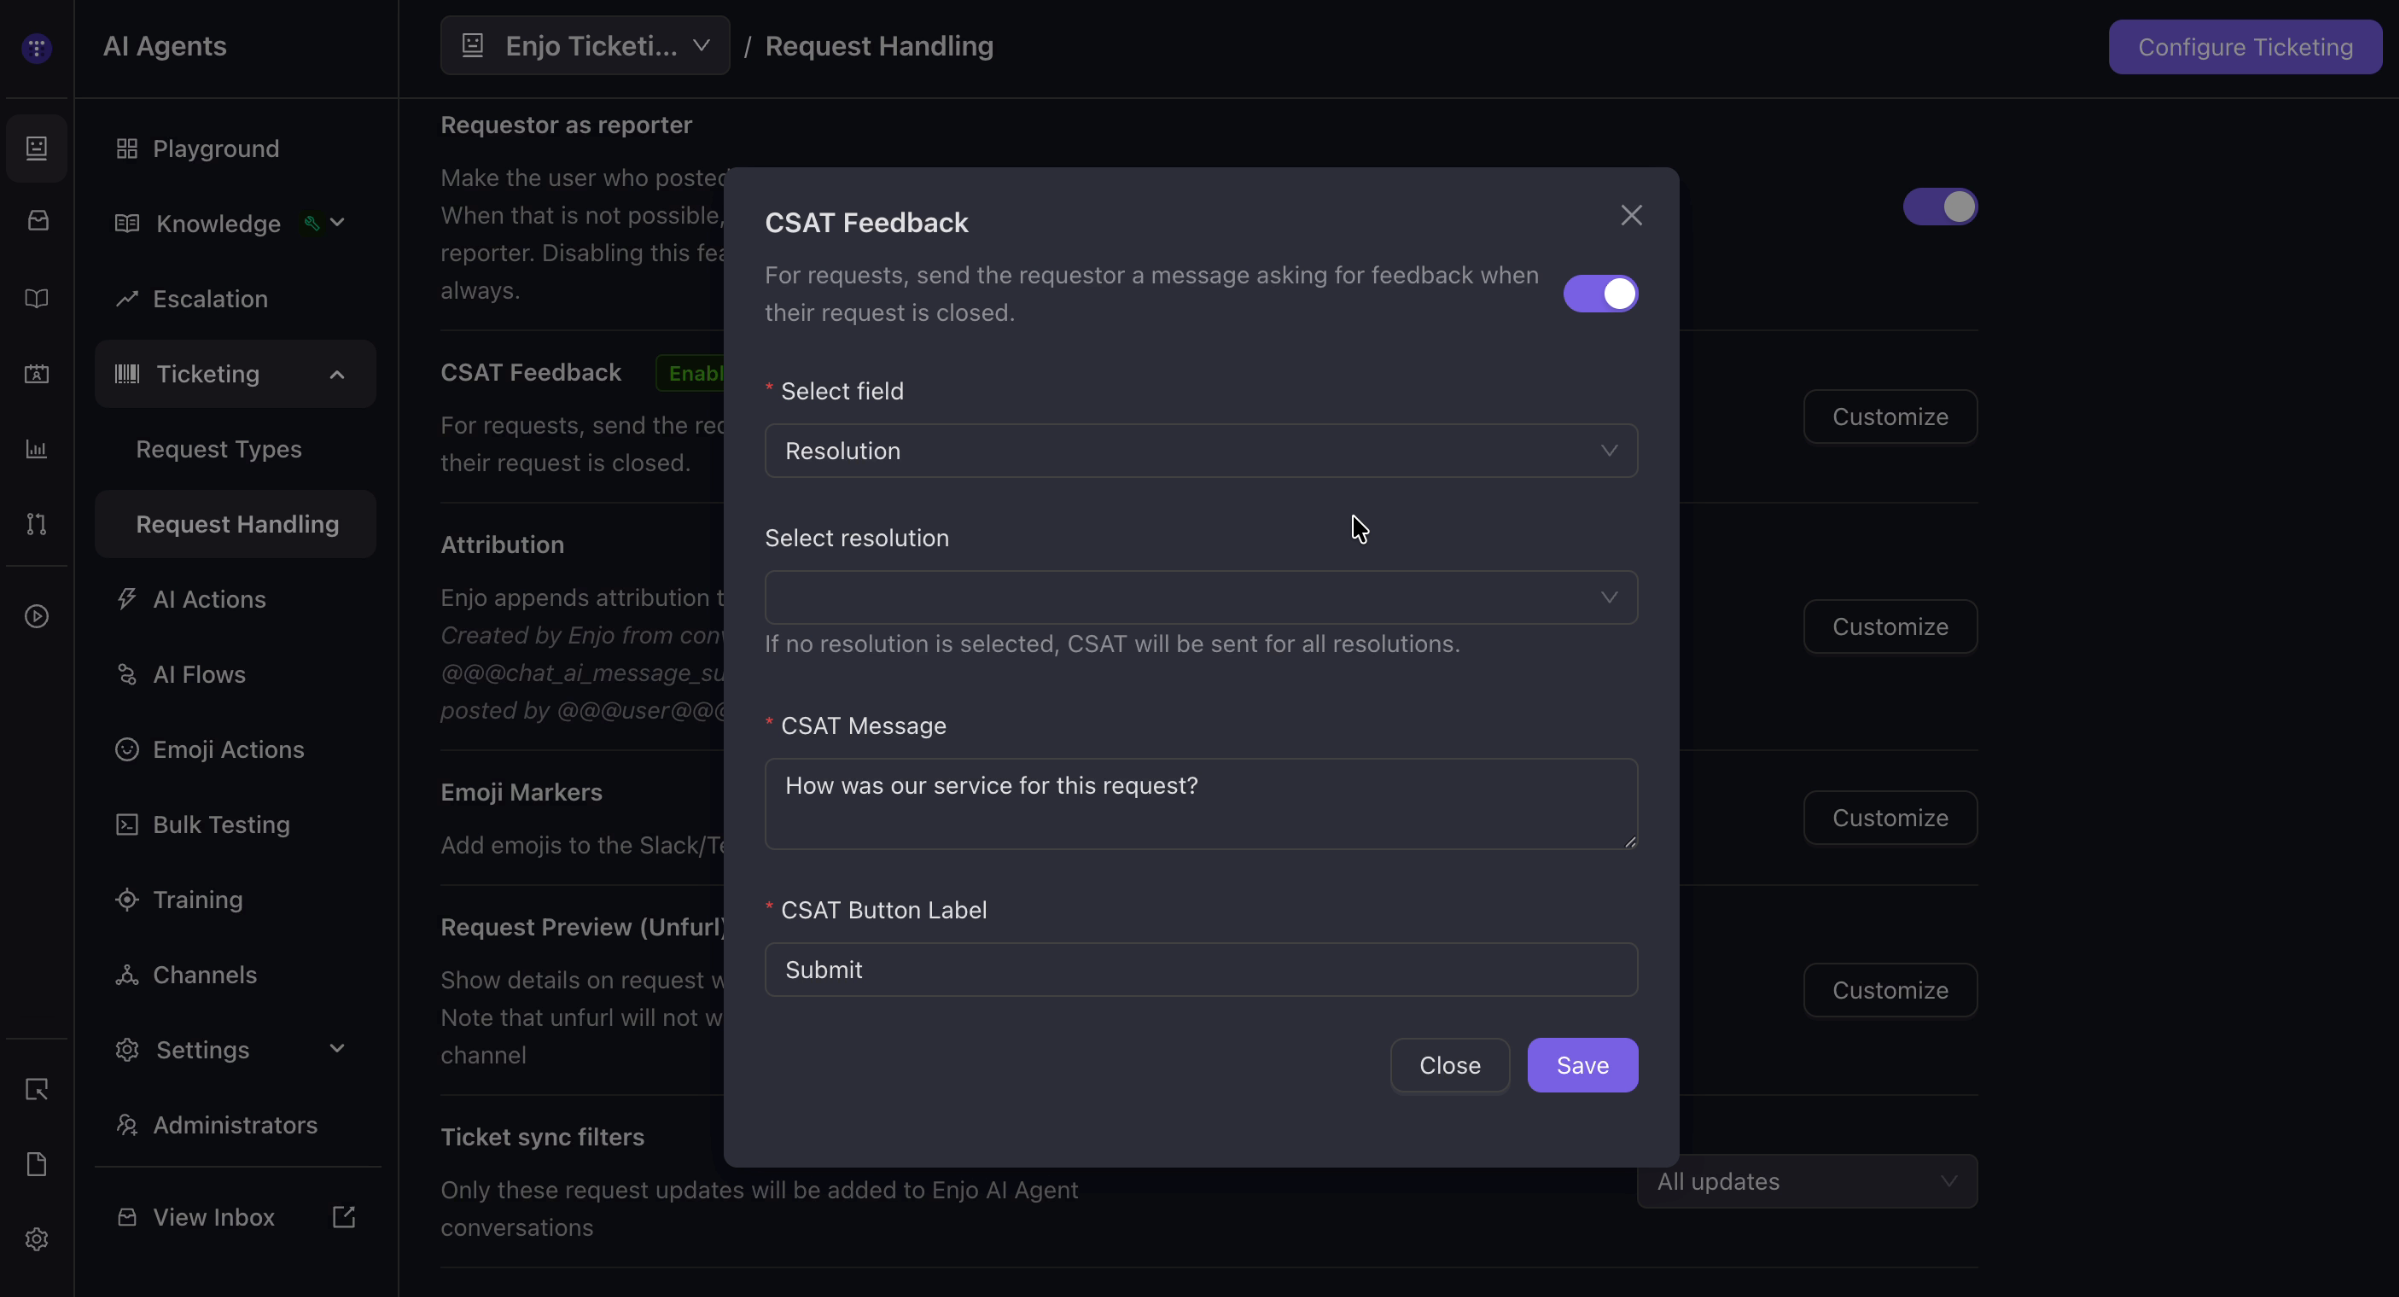
Configure CSAT feedback
CSAT feedback sends the requestor a message asking them to rate the resolution after their request closes.
Go to AI Agents > Ticketing > Request Handling.
In the CSAT Feedback row, select Customize.
Turn the feature on.
Choose the field and resolution values that trigger the request. If no resolution is selected, CSAT is sent for all resolutions.
Enter the CSAT Message and CSAT Button Label.
Select Save.
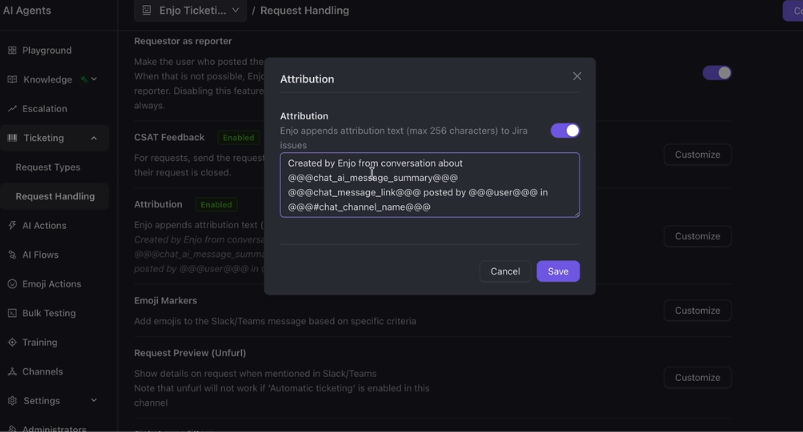
Configure attribution text
Attribution text indicates that a ticket was created by Enjo from a chat message, and can include a summary, message link, username, and channel.
Go to AI Agents > Ticketing > Request Handling.
In the Attribution row, select Customize.
Turn on the toggle to include an AI chat message summary — a short summary generated from the request description.
The attribution can also add the chat message link, the username of the person who posted, and the channel where it was posted. These details are added to the Jira ticket description.
Select Save.
To show the username when a request comes from a private Slack channel, go to AI Agents > Ticketing > Request Handling and turn on Enable user name for private channel. The username then appears in the attribution text.
ℹ️ Attribution text supports a maximum of 256 characters.
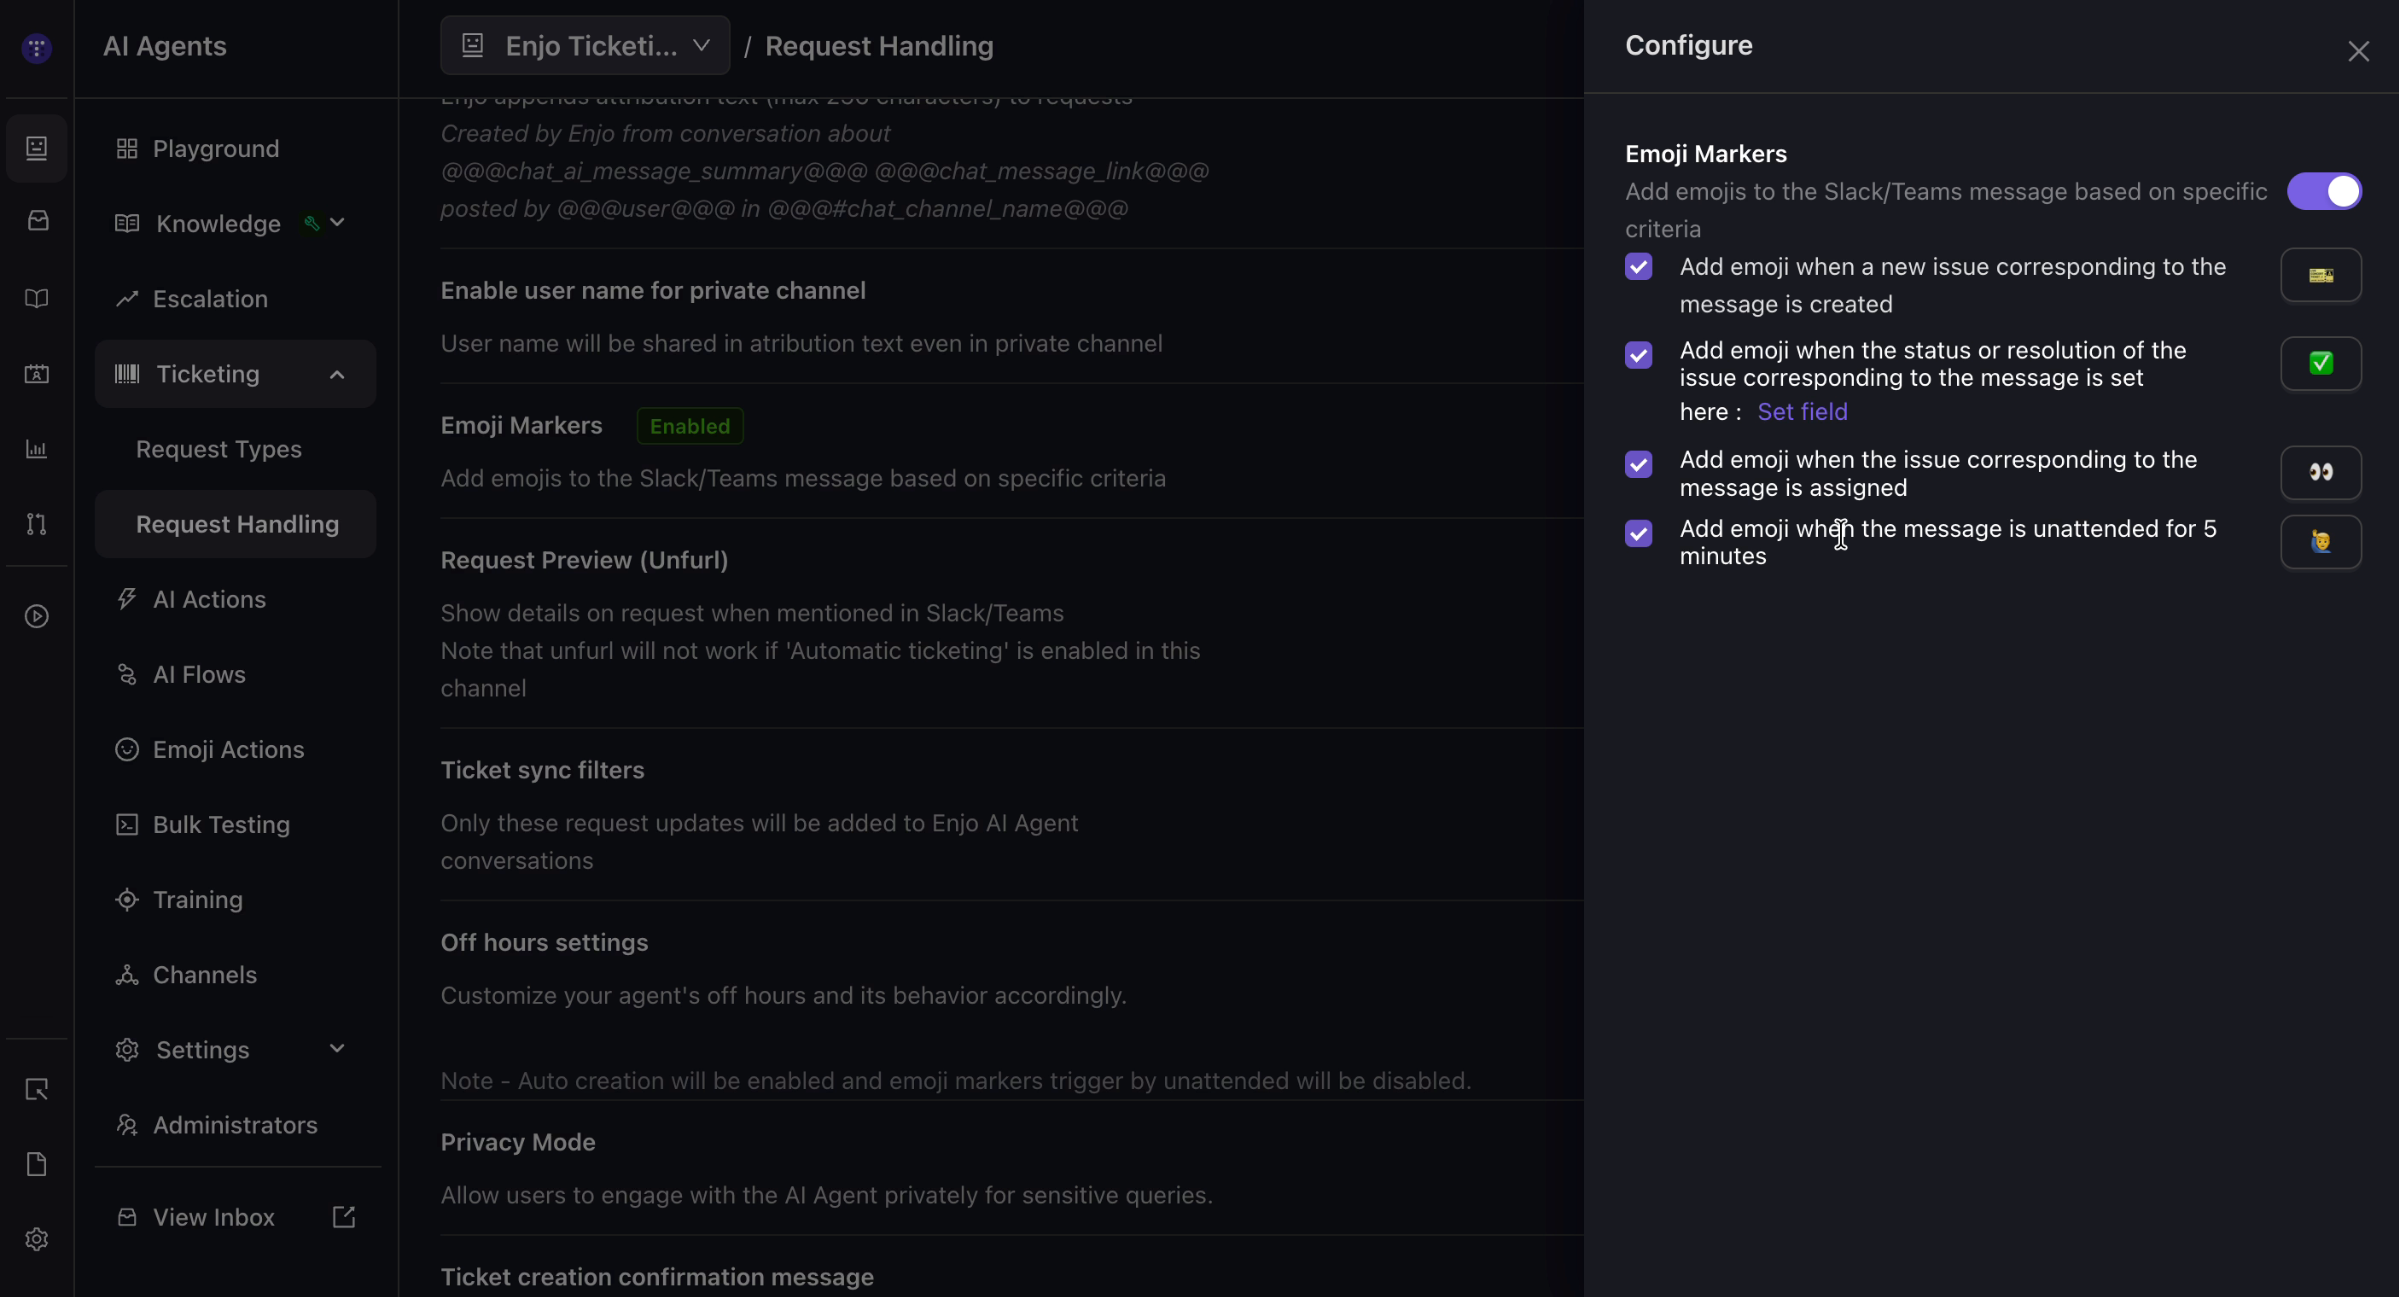
Configure emoji markers
Emoji markers add emoji reactions to the Slack or Microsoft Teams message based on ticket activity.
Go to AI Agents > Ticketing > Request Handling.
In the Emoji Markers row, select Customize.
Turn the feature on.
Select the reactions you want and set the emoji for each:
Added when a new issue is created for the message.
Added when the issue's status or resolution is set.
Added when the issue is assigned.
Added when the message is unattended for 5 minutes (no response in the thread).
Select Save.
Configure request preview (unfurl)
Request preview shows ticket details when a Jira request is mentioned in Slack or Microsoft Teams. This option is on by default.
Go to AI Agents > Ticketing > Request Handling.
In the Request Preview (Unfurl) row, select Customize.
Configure the available options:
Link Preview — Enjo generates a request preview for Jira request links. Drop a Jira ticket ID or paste a Jira link, and Enjo fetches a ticket card with the details.
Preview in Thread — Expanded request context is sent in the original message thread. With this off, the preview is a single main message in the channel.
Auto start thread sync — Thread sync starts automatically during request preview. With this off, you start thread sync manually for each preview.
Select Save.
⚠️ Request preview (unfurl) won't work if Automatic ticketing is enabled in this channel.
Set ticket sync filters
Ticket sync filters control which request updates sync to Enjo AI Agent conversations, in both directions between Slack and Jira. Updates can include comments, status, and other field changes.
Go to AI Agents > Ticketing > Request Handling.
In the Ticket sync filters row, select which updates to sync — for example, all updates, comments only, status only, or none.

Configure off-hours settings
Off-hours settings send a fixed message to users when your agents aren't available.
Go to AI Agents > Ticketing > Request Handling.
In the Off hours settings row, select Customize.
Turn the feature on.
Select the days agents are available and set the start and end time for each. You can copy a day's times to all days.
Select the time zone.
Enter the message to send during off hours.
Select Save.

⚠️ When off-hours settings are active, auto ticket creation is enabled and emoji markers trigger as unattended will be disabled.
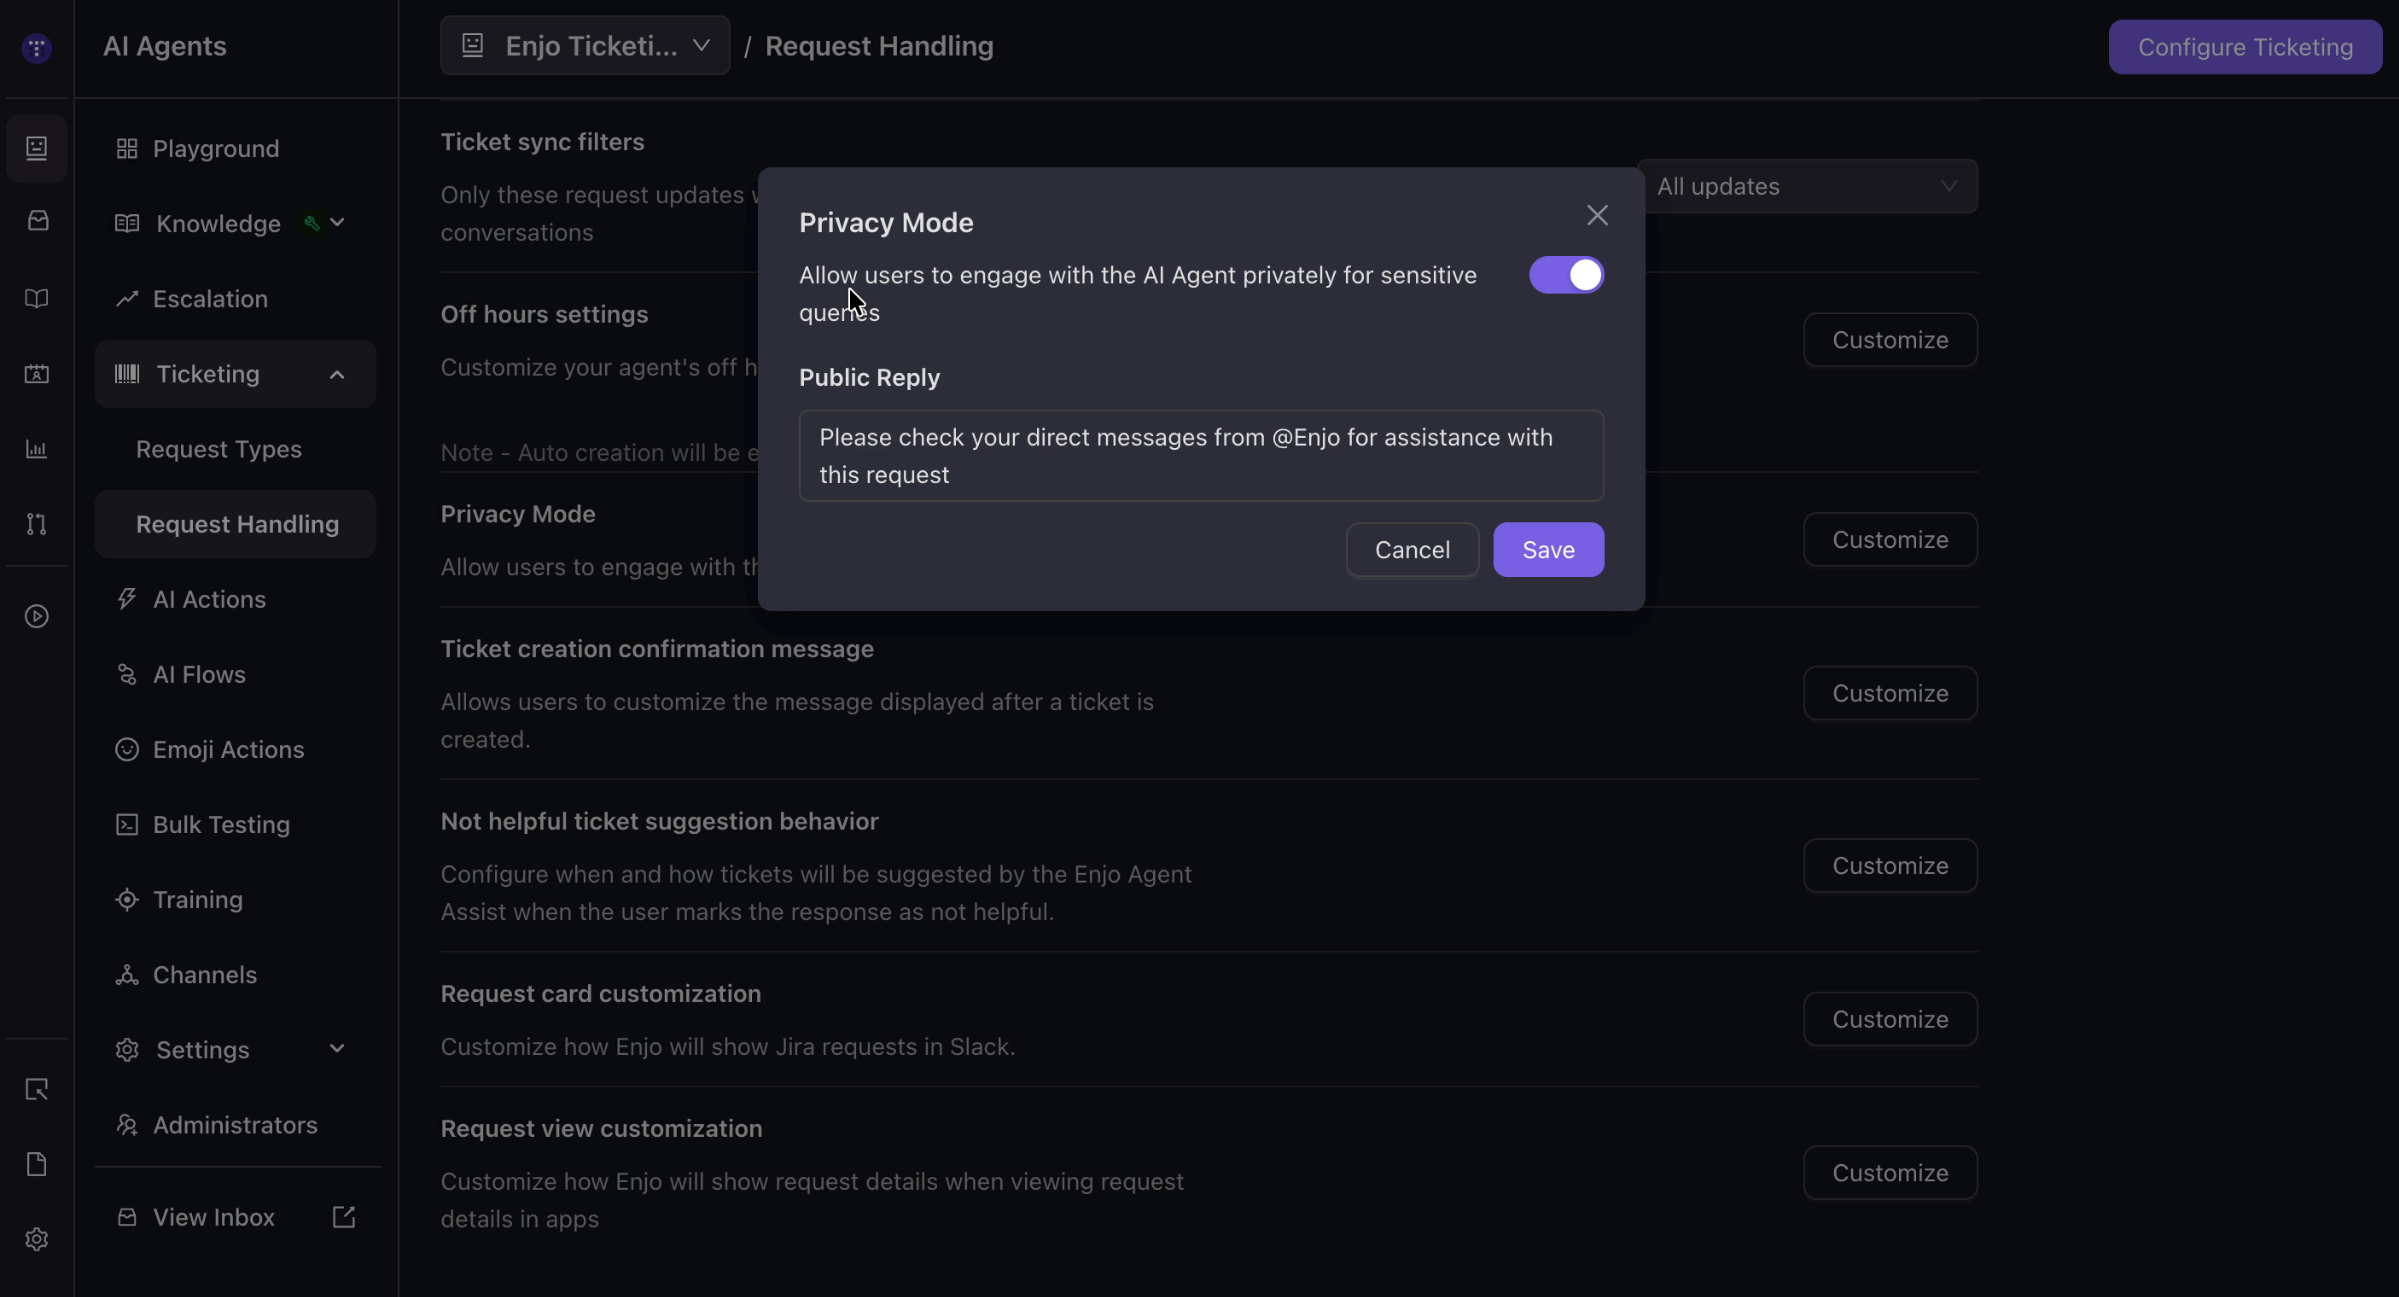
Turn on privacy mode
Privacy mode lets users engage the AI Agent privately for sensitive queries.
Go to AI Agents > Ticketing > Request Handling.
In the Privacy Mode row, select Customize.
Turn the toggle on.
Enter the Public Reply — the message shown in the channel directing the user to check their direct messages from Enjo.
Select Save.
Customize the ticket creation confirmation message
This message is shown to the user after a ticket is created.
Go to AI Agents > Ticketing > Request Handling.
In the Ticket creation confirmation message row, select Customize.
Turn it on and edit the message.
Select Save.
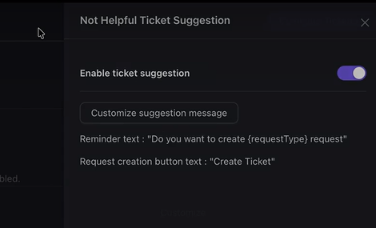
Configure not-helpful ticket suggestion behavior
When the agent responds to a query, the user can rate the response as helpful or not helpful. When a user marks a response as not helpful, the agent can suggest creating a ticket to resolve the query.
Go to AI Agents > Ticketing > Request Handling.
In the Not helpful ticket suggestion behavior row, select Customize to configure when and how tickets are suggested.
What's next
Configure and Manage Request Types — Define the request types your agent can create.
AI Actions — Let the agent retrieve data and run operations in connected systems.
Channels — Connect Slack, Microsoft Teams, and web chat to your agent.