
Sign Up for Enjo
In this article, you'll learn how to create your Enjo account, configure your first AI Agent, invite your team, and test your AI agent.
How this works
When you sign up, Enjo scans your company website to pre-fill your agent's name, conversational tone, product overview, and intended audience. You review and adjust those details, choose what to deploy first an AI Agent with Inbox, or a Help Center and finish with a working agent you can test immediately. No manual configuration is required to get started.
Before you start
Use a work email address. Enjo uses your email domain to identify your organization and locate your company website.
Make sure you have permission to create a workspace on behalf of your organization.
Step 1 — Go to the sign-up page
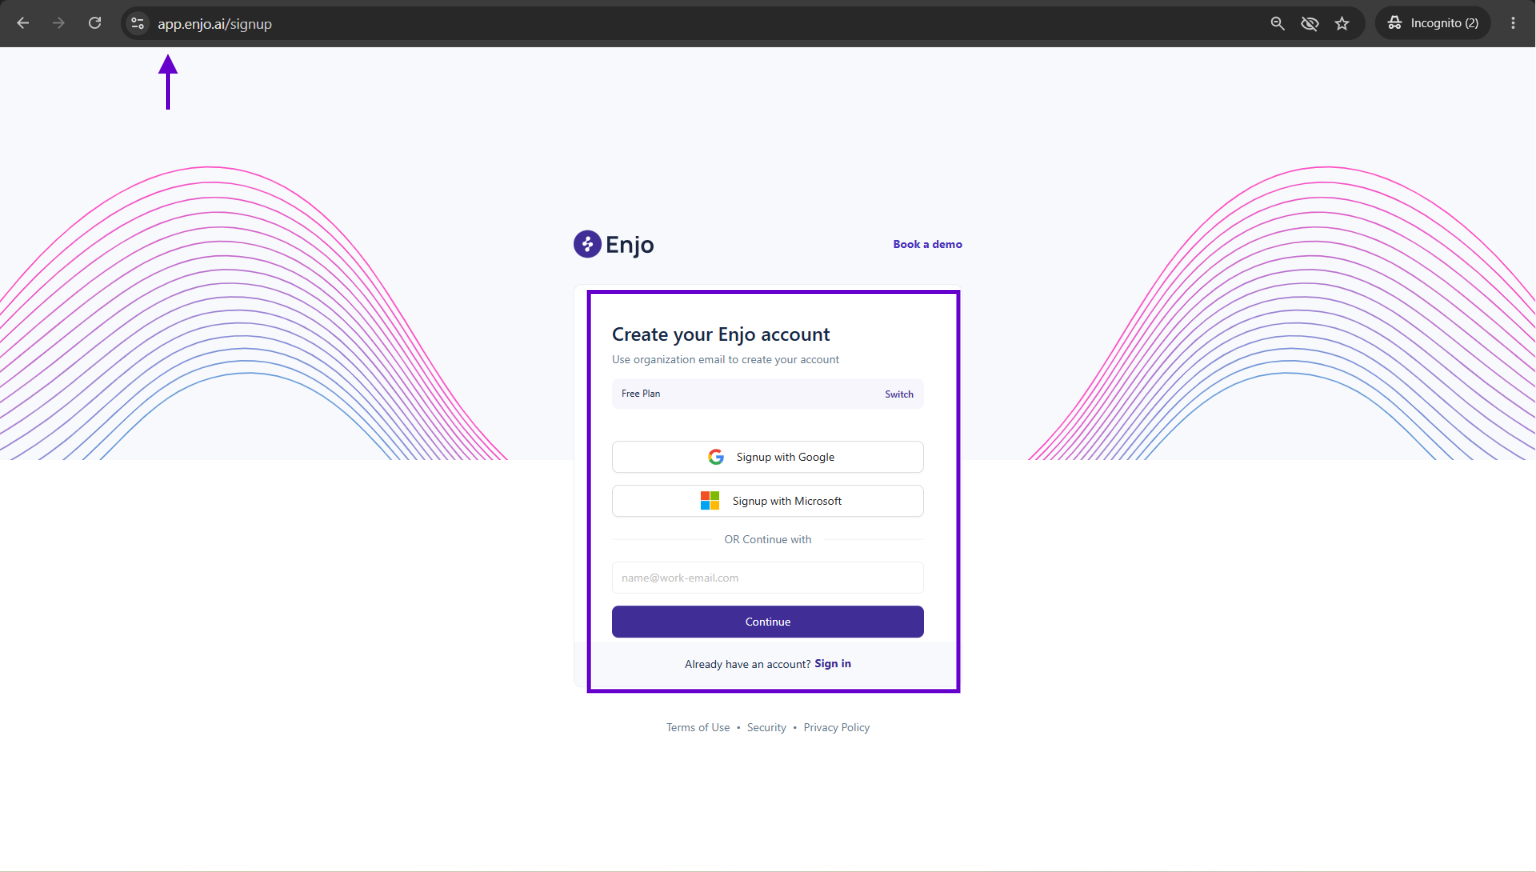
Go to app.enjo.ai/signup.
Step 2 — Choose your plan
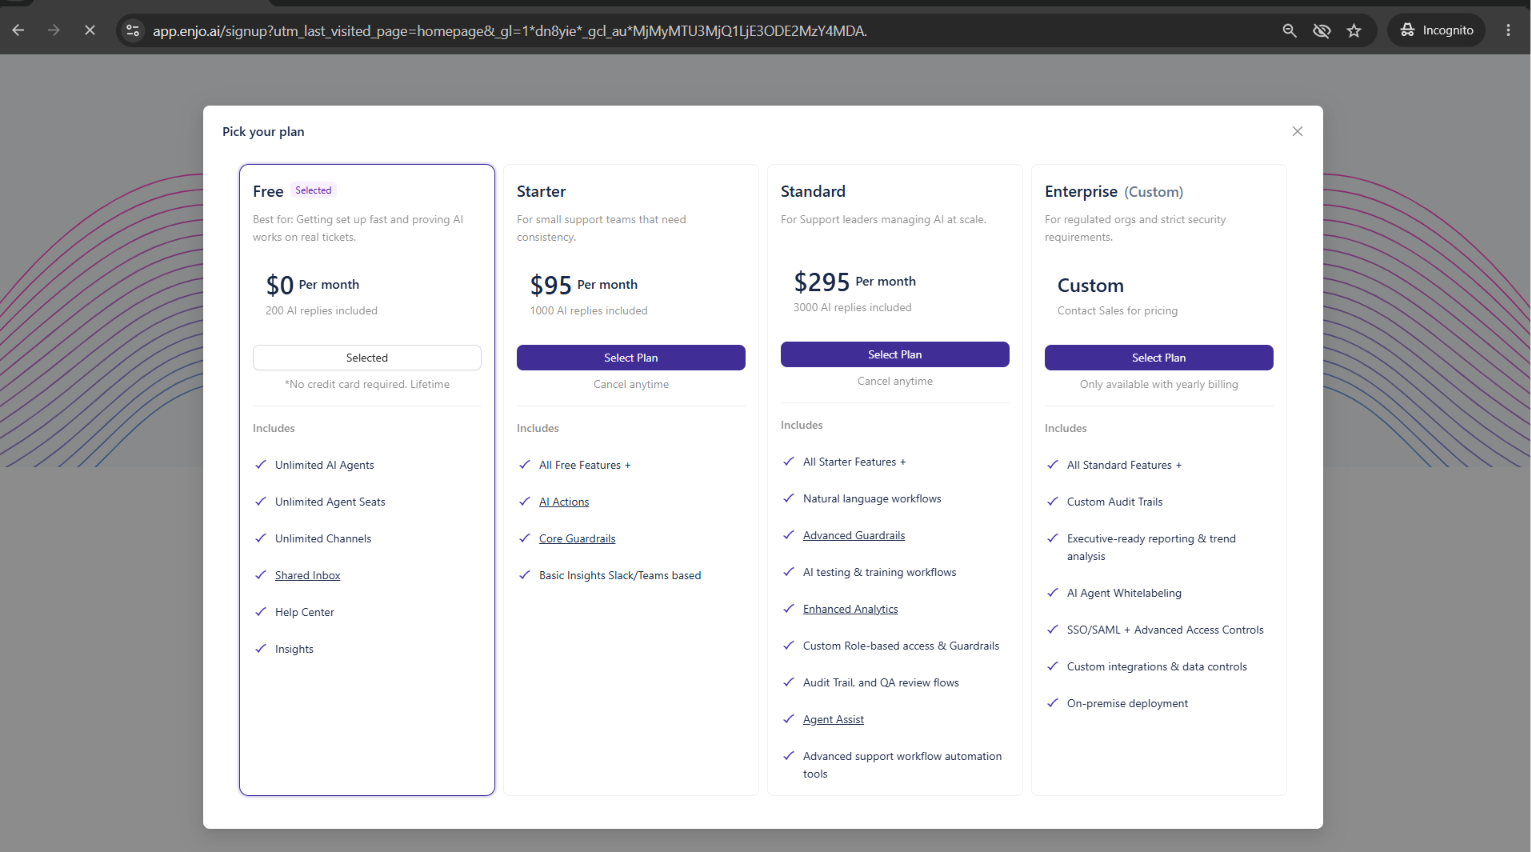
The sign-up page defaults to the Free Plan. To change it, click Switch.
The Pick your plan modal opens with four options:
Plan | Price | AI replies included | Additional replies |
|---|---|---|---|
Free | $0/month | 200 | Not available |
Starter | $95/month | 1,000 | $0.05 each |
Standard | $295/month | 3,000 | $0.05 each |
Enterprise | Custom | Custom | Custom |
Click Select Plan to continue.
If you're not sure which plan to start with, choose Starter. You can upgrade to Standard at any time from Settings > Billing without losing any configuration or data.
ℹ️ The Free plan requires no credit card. Starter and Standard can be cancelled at any time. Enterprise is available on yearly billing only — contact sales for pricing.
For the full plan comparison, see Enjo Subscription Plans.
Step 3 — Choose how to sign up
Create your account by signing in with Google, signing in with Microsoft, or entering your work email address and continuing with a verification code.
ℹ️ Use your organization email, not a personal address. Enjo uses your email domain to locate your company website and pre-fill your agent setup.
If you sign up with email, Enjo sends a 6-character verification code to that address. Enter the code on the verification screen and click Verify code.
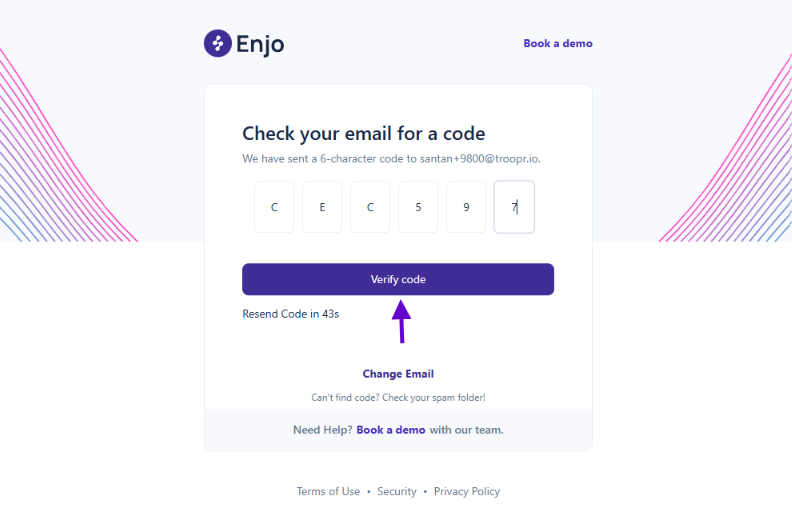
⚠️ Can't find the code? Check your spam folder. Click Resend Code — a countdown timer shows when it becomes available again. You can also click Change Email if you entered the wrong address.
Step 4 — Confirm your company website
Enjo detects your company website from your email domain and shows it as a suggested URL.
If the URL is correct, click Continue.
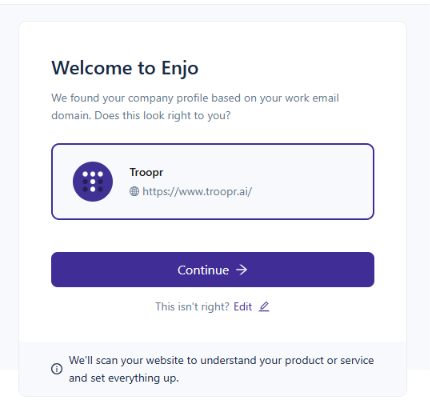
If it is not correct, click Edit, enter the correct website address, and click Continue.
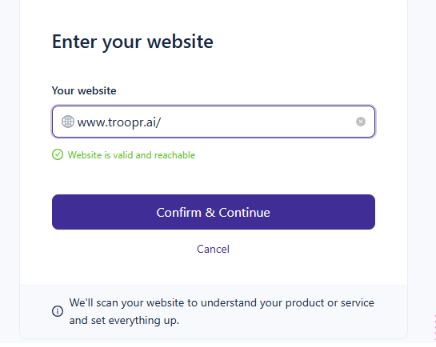
Enjo scans this website to generate your initial agent profile in the next step.
Step 5 — Choose who your agent will help
Select the audience your AI Agent will support:
Customers — the agent handles inbound customer questions and product support
Employees — the agent handles internal IT, HR, and operational requests
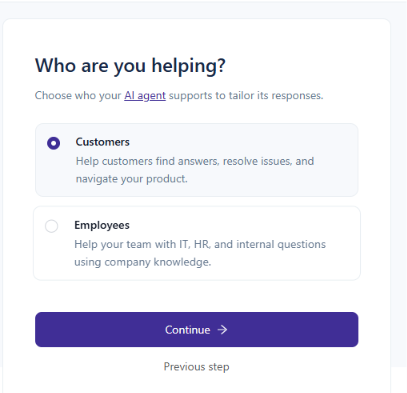
Click Continue. Enjo uses your selection to tailor the agent's default behavior and knowledge focus.
Step 6 — Review and adjust your agent profile
Enjo generates an initial agent profile based on your company website. Review the following pre-filled fields:
Field | What it controls |
|---|---|
Workspace Name | Your organization name as it appears across Enjo |
AI Agent Name | The name shown to users in conversations |
Conversational Tone | The default tone the agent uses in replies |
Offering Overview | A short description of what your organization does |
Intended Audience | Who the agent is designed to help |
Make any changes that better reflect your organization, then click Continue.
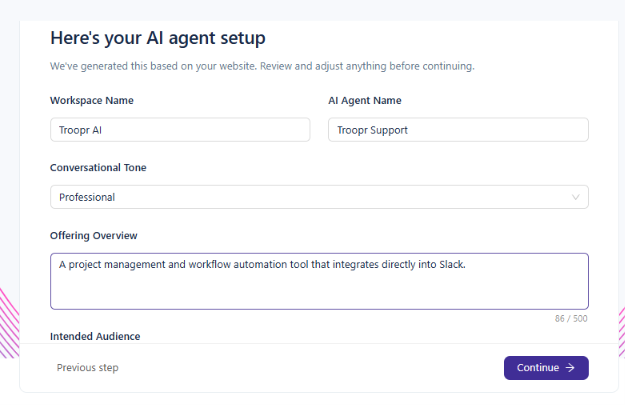
💡 Pay particular attention to Offering Overview and Intended Audience. These directly shape how the agent frames its responses. Both can be updated later under AI Agents > Settings > Persona, but getting them right at the start saves time.
Step 7 — Choose what to deploy first
Select whether to start with:
AI Agent + Inbox — the AI Agent handles requests end-to-end, and the Inbox gives your team a shared workspace to manage escalations the agent hands off to humans
Help Center — a branded self-serve portal where users can search for answers
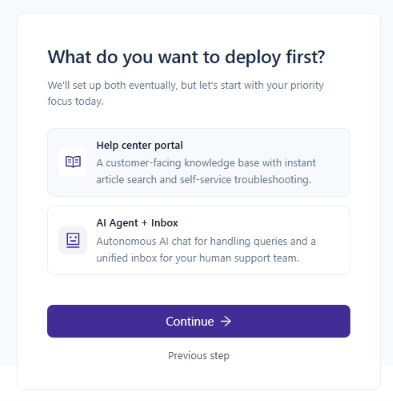
You can set up both after completing onboarding. Select your preference and click Continue.
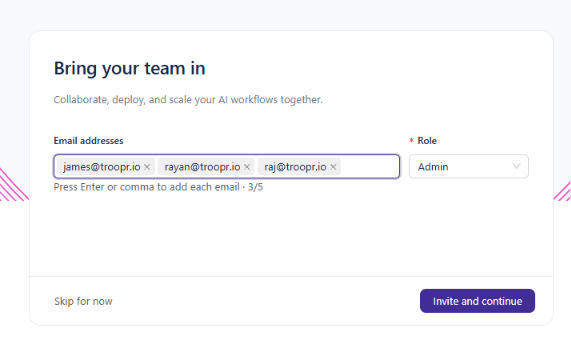
Step 8 — Invite your team
Add team members by entering their email addresses and assigning a role — Owner or Admin. You can invite up to five members during setup and add more later from Settings > Users.
Click Invite and Continue, or click Skip for now to continue without inviting anyone.
Step 9 — Test your agent in the Playground
Once setup completes, Enjo opens the Playground — a sandbox environment where you can test how the agent responds before connecting it to any live channel.
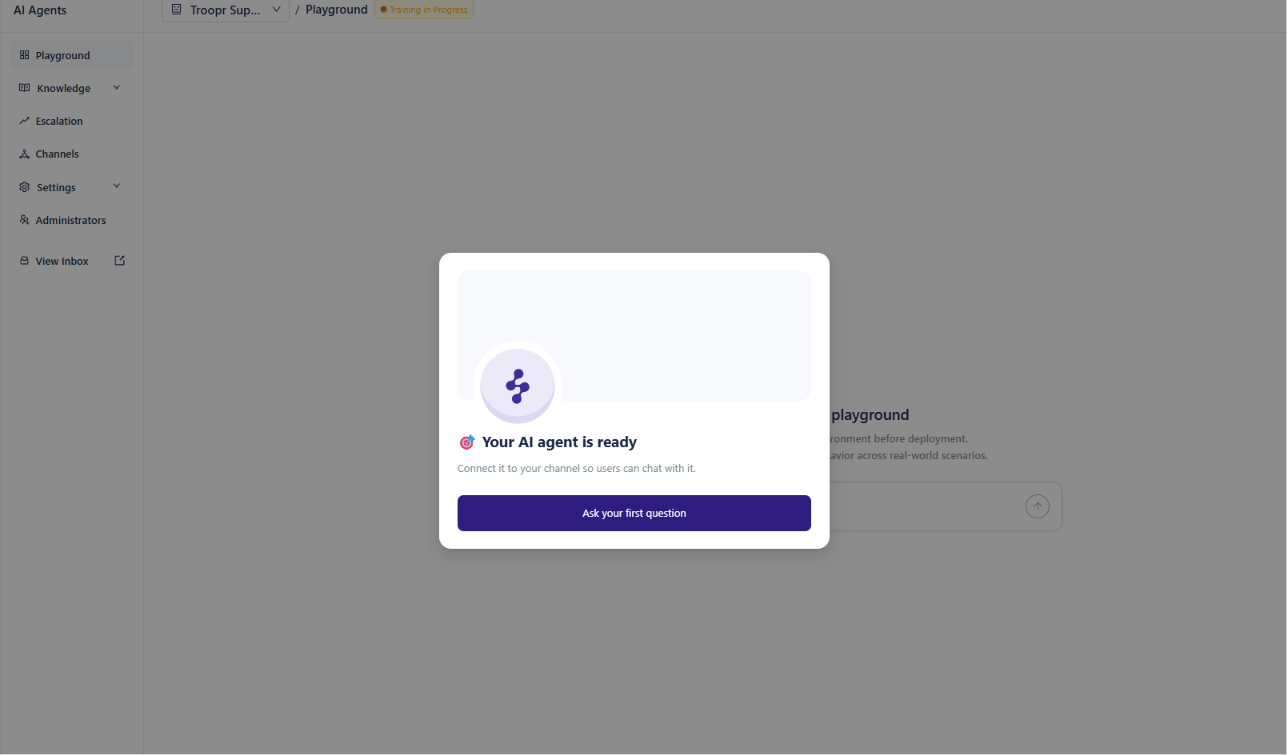
Click Ask your first question, or type your own question in the message input. The agent searches its indexed knowledge sources and generates a response with citations. Click Sources on any response to see which content was used.
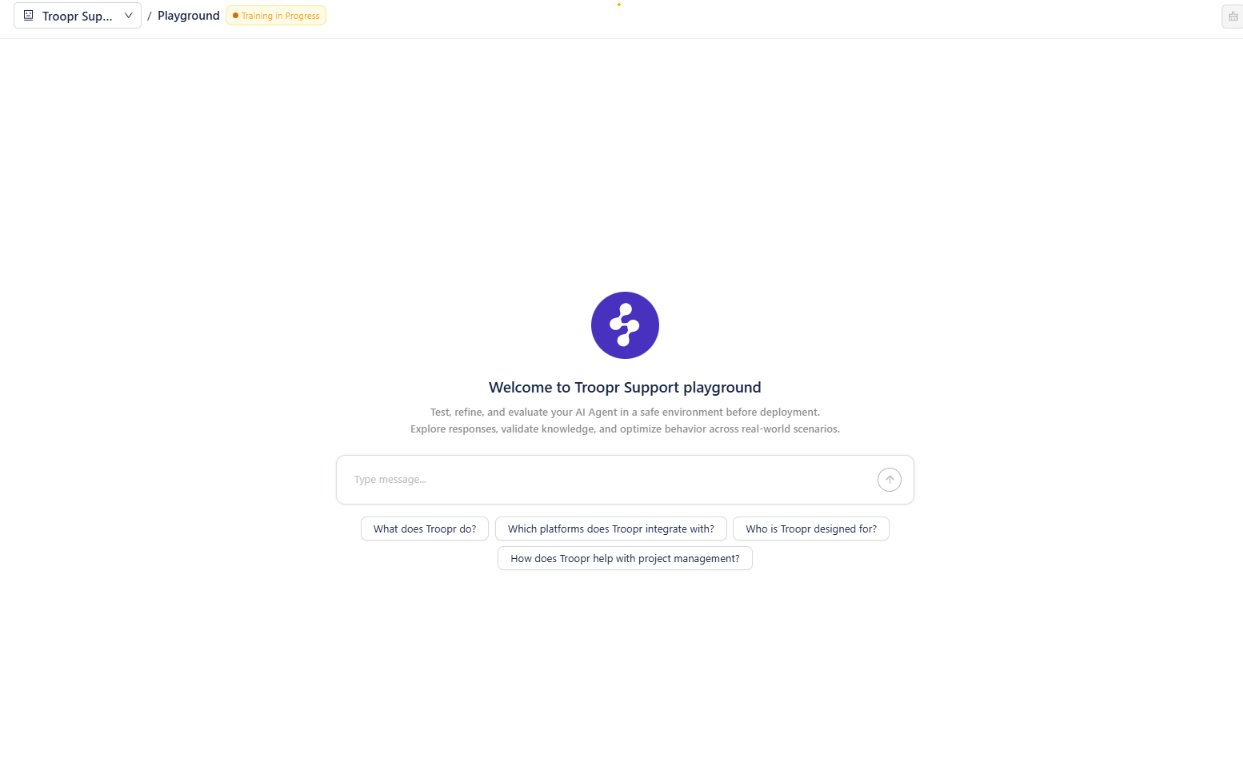
💡 The Playground does not consume production AI replies. Test freely before deploying to a live channel.
What's next
AI Agent Knowledge — Connect Confluence, Google Drive, Jira, or other sources so the agent draws from your actual documentation.
AI Agent Escalation — Define when and how the agent hands off to a human agent in the Inbox.
AI Agent Channels — Deploy the agent to Slack, Microsoft Teams, or a web widget.