
Request Types
In this article, you'll learn how to add, update, and customize request types so your AI Agent creates and handles tickets correctly.
How this works
Request types define the kinds of tickets your AI Agent can create in a connected ticketing project, such as Jira. Each request type maps to a project and includes sample requests that teach the agent which incoming requests belong to that type. When a user's request matches a type, the agent creates a ticket of that type. You can set default field values, control which fields appear to the person creating the ticket, and choose a default request type for requests that don't match any other type.
Before you start
You need access to an AI Agent with Ticketing configured.
A connected ticketing project (for example, a Jira project) must be available.
Add a request type
Go to AI Agents and open your agent.
Go to Ticketing > Request Types.
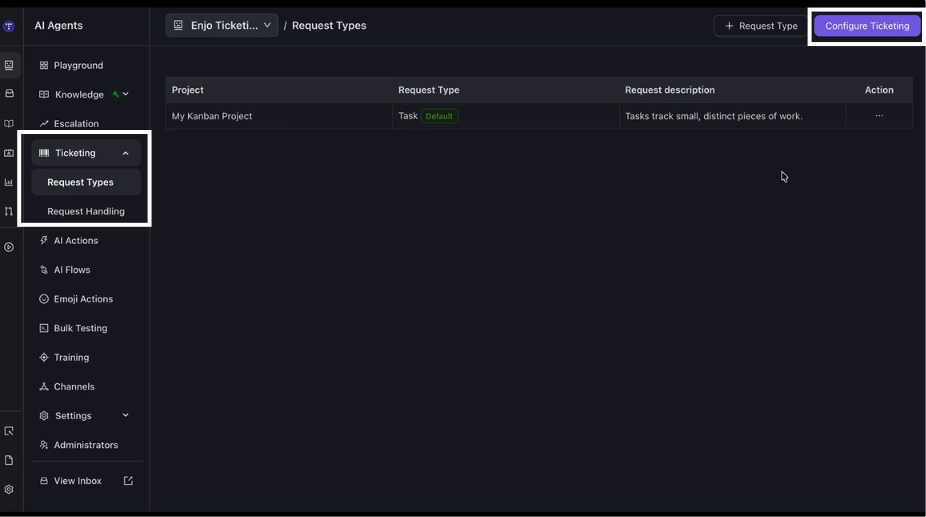
Select Request Type.
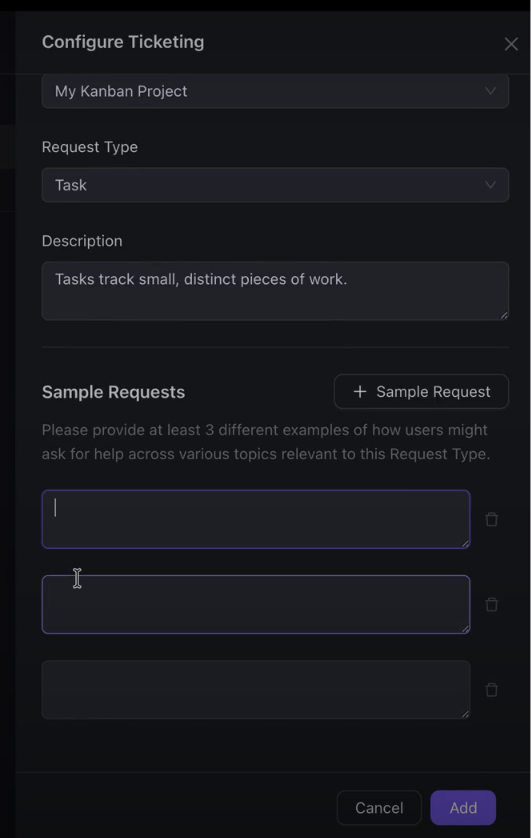
Select the Project.
Select the Request Type.
Enter a Description.
Under Sample Requests, add at least three examples of how users might ask for help for this request type.
Select Add.
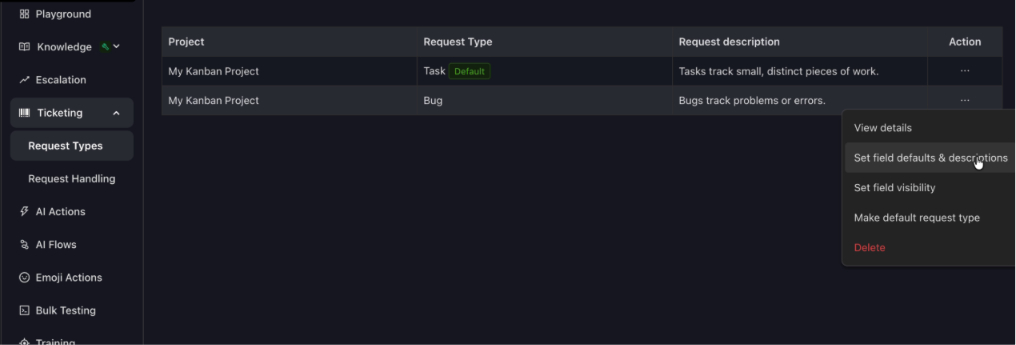
The request type now appears in the list.
💡 Sample requests teach the agent to recognize this request type. Use phrasings close to how your users actually write, and provide a range of examples.
Update a request type
In the Request Types list, select the ⋯ menu for the request type.
Select View details, then Update.
Edit the description or add, change, or remove sample requests.
Select Update.
A confirmation appears when the request type is updated.
Set field defaults and visibility
Each request type has options for controlling fields on the tickets it creates. Open the ⋯ menu for a request type to access them.
Set field defaults and descriptions
Open the ⋯ menu and select Set field defaults & descriptions.
On the Field Defaults tab, enter values for any fields you want pre-filled.
Select Save.
Values you set here appear when a ticket is created from Slack, Microsoft Teams, or web chat, and are applied to the resulting Jira ticket by default.
Set field visibility
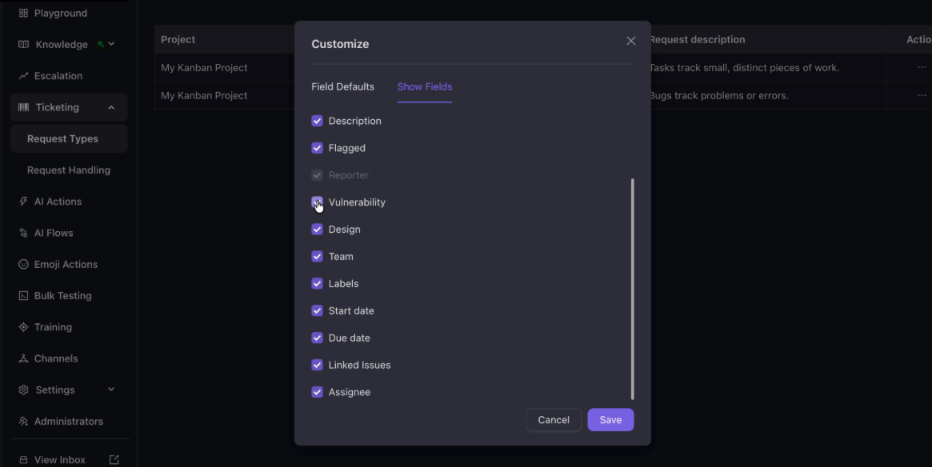
Open the ⋯ menu and select Set field visibility.
On the Show Fields tab, clear the checkbox for any field you don't want shown to the person creating the ticket.
Select Save.
ℹ️ Some fields are required and can't be hidden.
Set a default request type
Open the ⋯ menu for the request type.
Select Make default request type.
When the agent can't match a request to any specific request type, it creates the ticket using the default request type. Only one request type is the default at a time.
Delete a request type
Open the ⋯ menu for the request type.
Select Delete.
Manage the ticketing connection
From the Request Types screen, select Configure Ticketing to manage the connection to your ticketing project or to disconnect the ticketing system from this agent.
What's next
Request Handling — Configure how the agent processes and routes requests.
AI Actions — Let the agent retrieve data and run operations in connected systems.
Escalation — Define when and how the agent hands off to humans.