
Invite Users
In this article, you'll learn how to add users to your workspace, assign roles, send welcome emails, suspend users, and sync users from a connected chat app.
The Users section in Enjo gives you full control over who has access to your workspace. You can invite teammates by email, assign them roles, sync users directly from a connected Slack workspace, and export your user list when needed.
Before you begin
You will need admin or owner-level access to your Enjo workspace to invite and manage users.
If you plan to sync users from Slack, make sure your Slack workspace is already connected to Enjo under Settings → Apps.
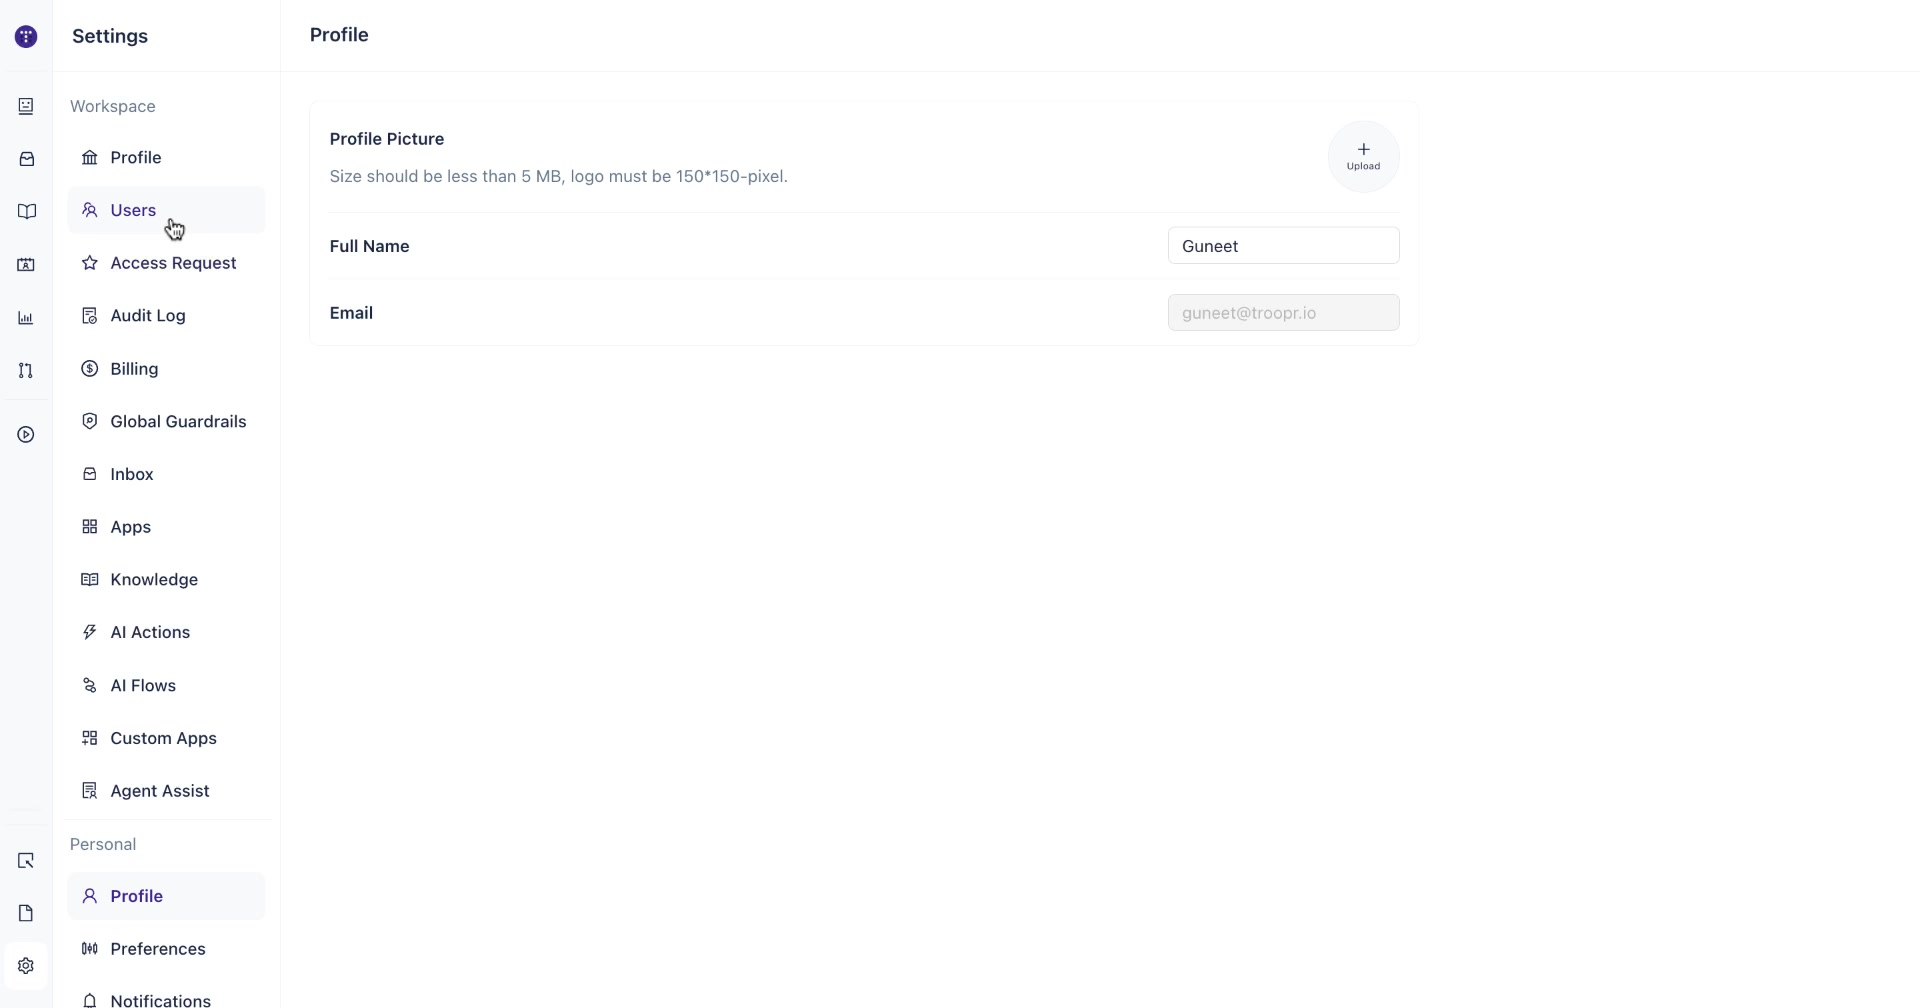
Step 1: Open Settings and go to the Users tab
From anywhere in the Enjo platform, open the navigation menu from the top-left corner. Scroll to the bottom and click Settings. In the left sidebar under the Workspace section, click Users.
Step 2: Review your current user list
The Users page shows a table of everyone currently in your workspace. For each user you can see:
Full Name and Email
Status — whether they are active or inactive
Role — their assigned permission level (Owner, Admin, Agent, or Customer)
Last Active — when they last used Enjo
Last AI Agent Used — the most recent AI agent they interacted with
Created At — the date they were added to the workspace
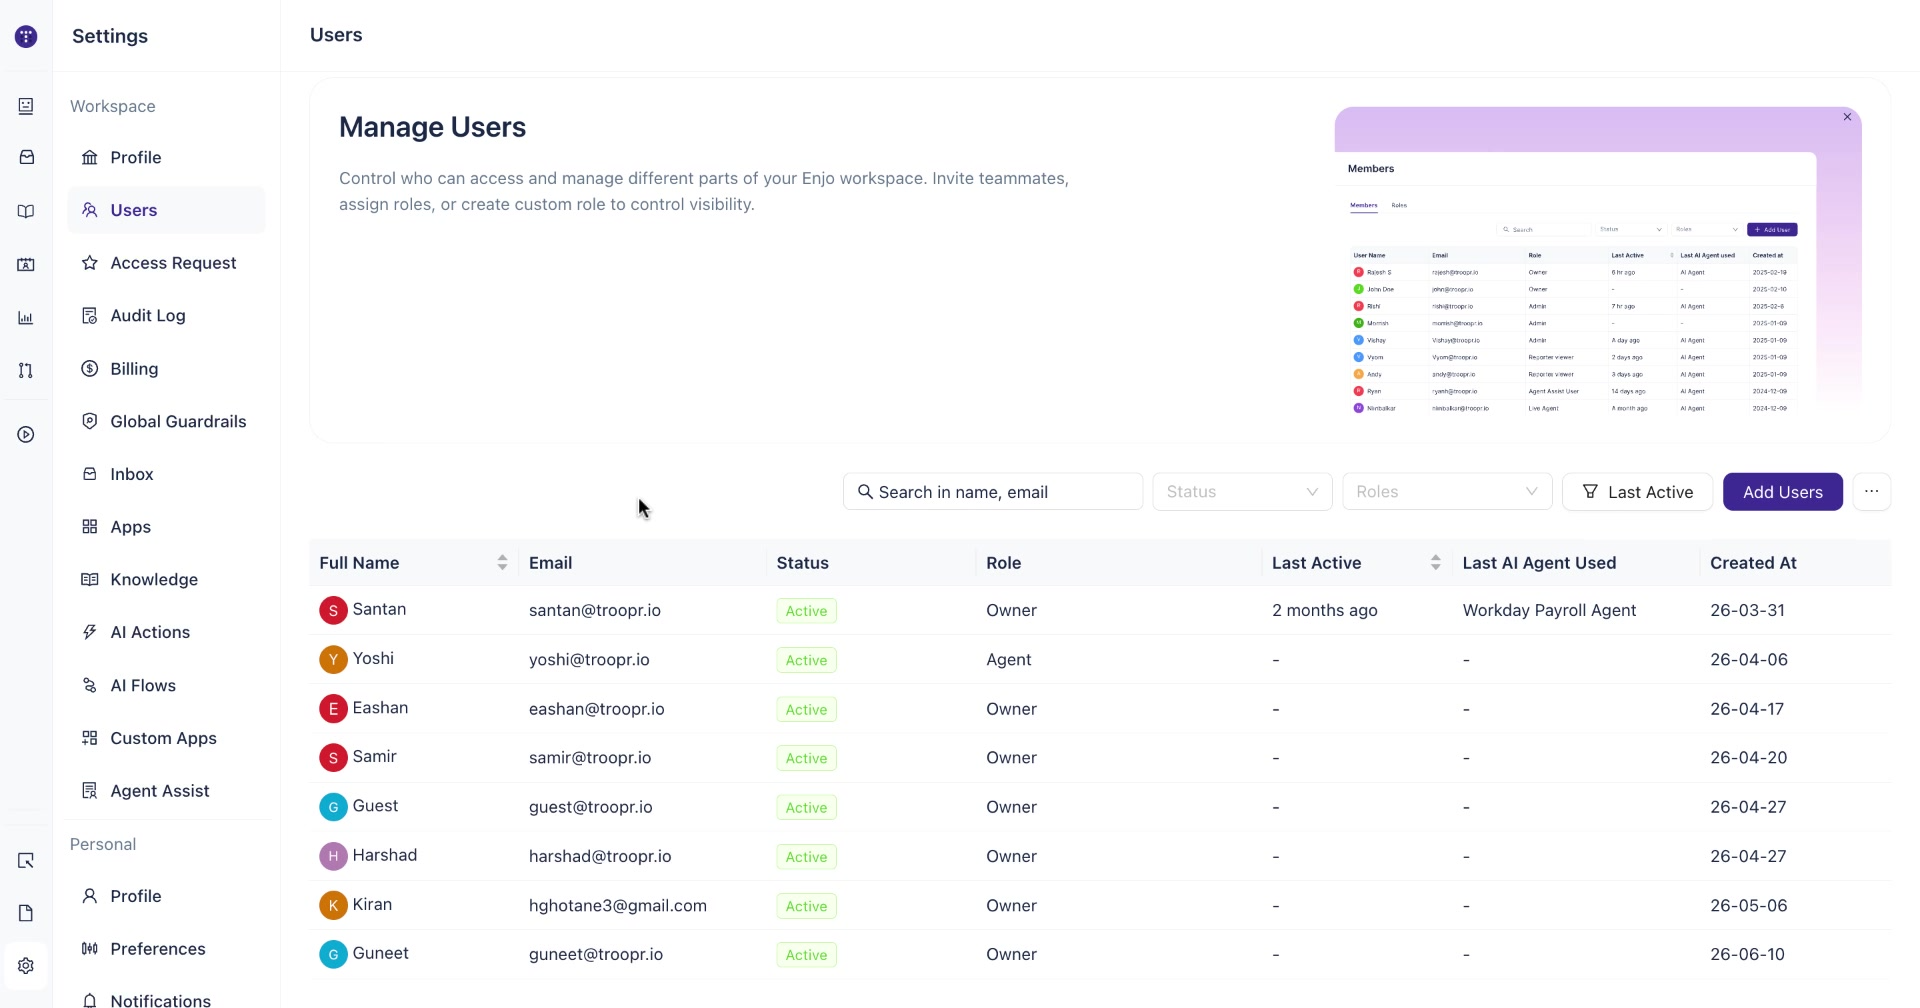
Tip: Use the search bar at the top of the table to find a specific user by name or email address. You can also filter the list by Status or Role using the dropdown filters.
Step 3: Invite a user by email
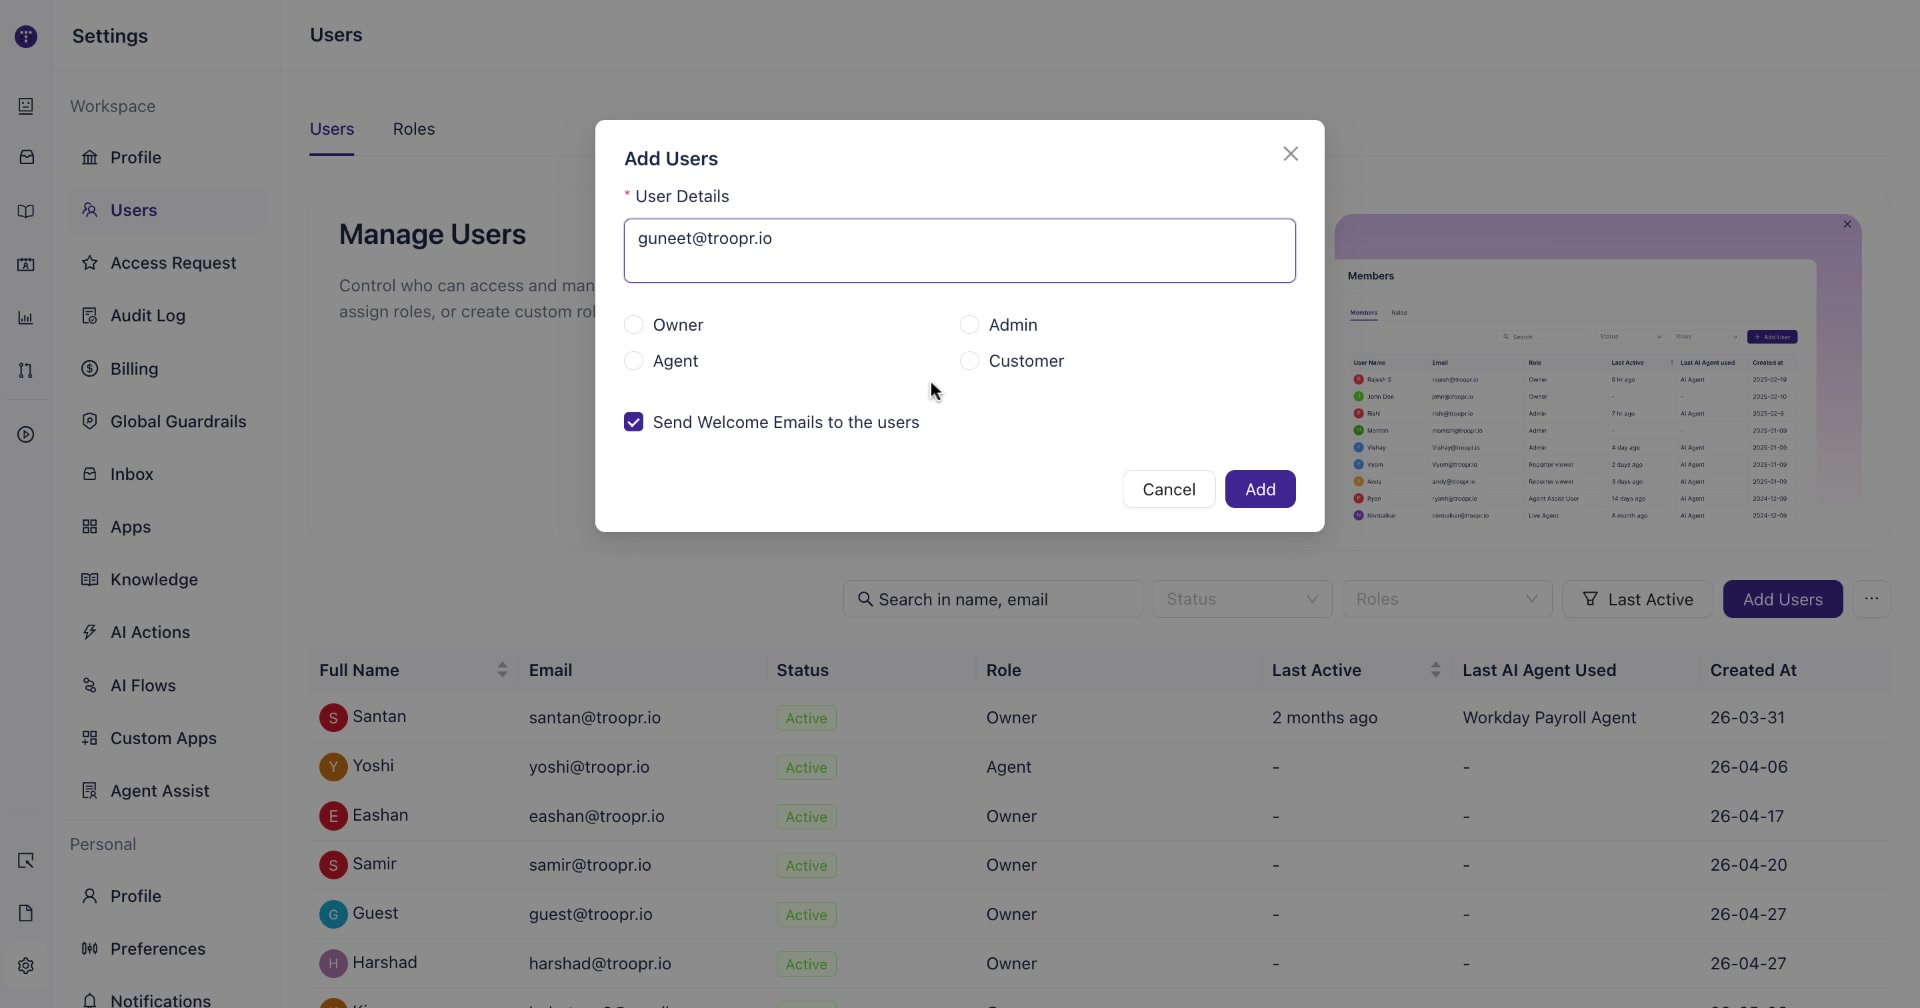
Click Add Users in the top-right corner of the Users page. A dialog box opens where you can fill in the following:
User Details — enter the email address of the person you want to invite. If the email format is invalid, Enjo will show an inline error before you can proceed.
Role — select one of the four available roles:
Owner — full access to the workspace including billing and settings
Admin — can manage agents, users, and most settings
Agent — can handle conversations and work within the inbox
Customer — end-user access only
Send Welcome Email — this checkbox is selected by default. When enabled, the invited user receives an email with a link to sign in to Enjo. Uncheck this if you prefer to share access manually.
Once everything looks correct, click Add.
Step 4: Sync users from Slack
If your team is already on Slack, you can bring users into Enjo directly from your Slack workspace instead of inviting them one by one.
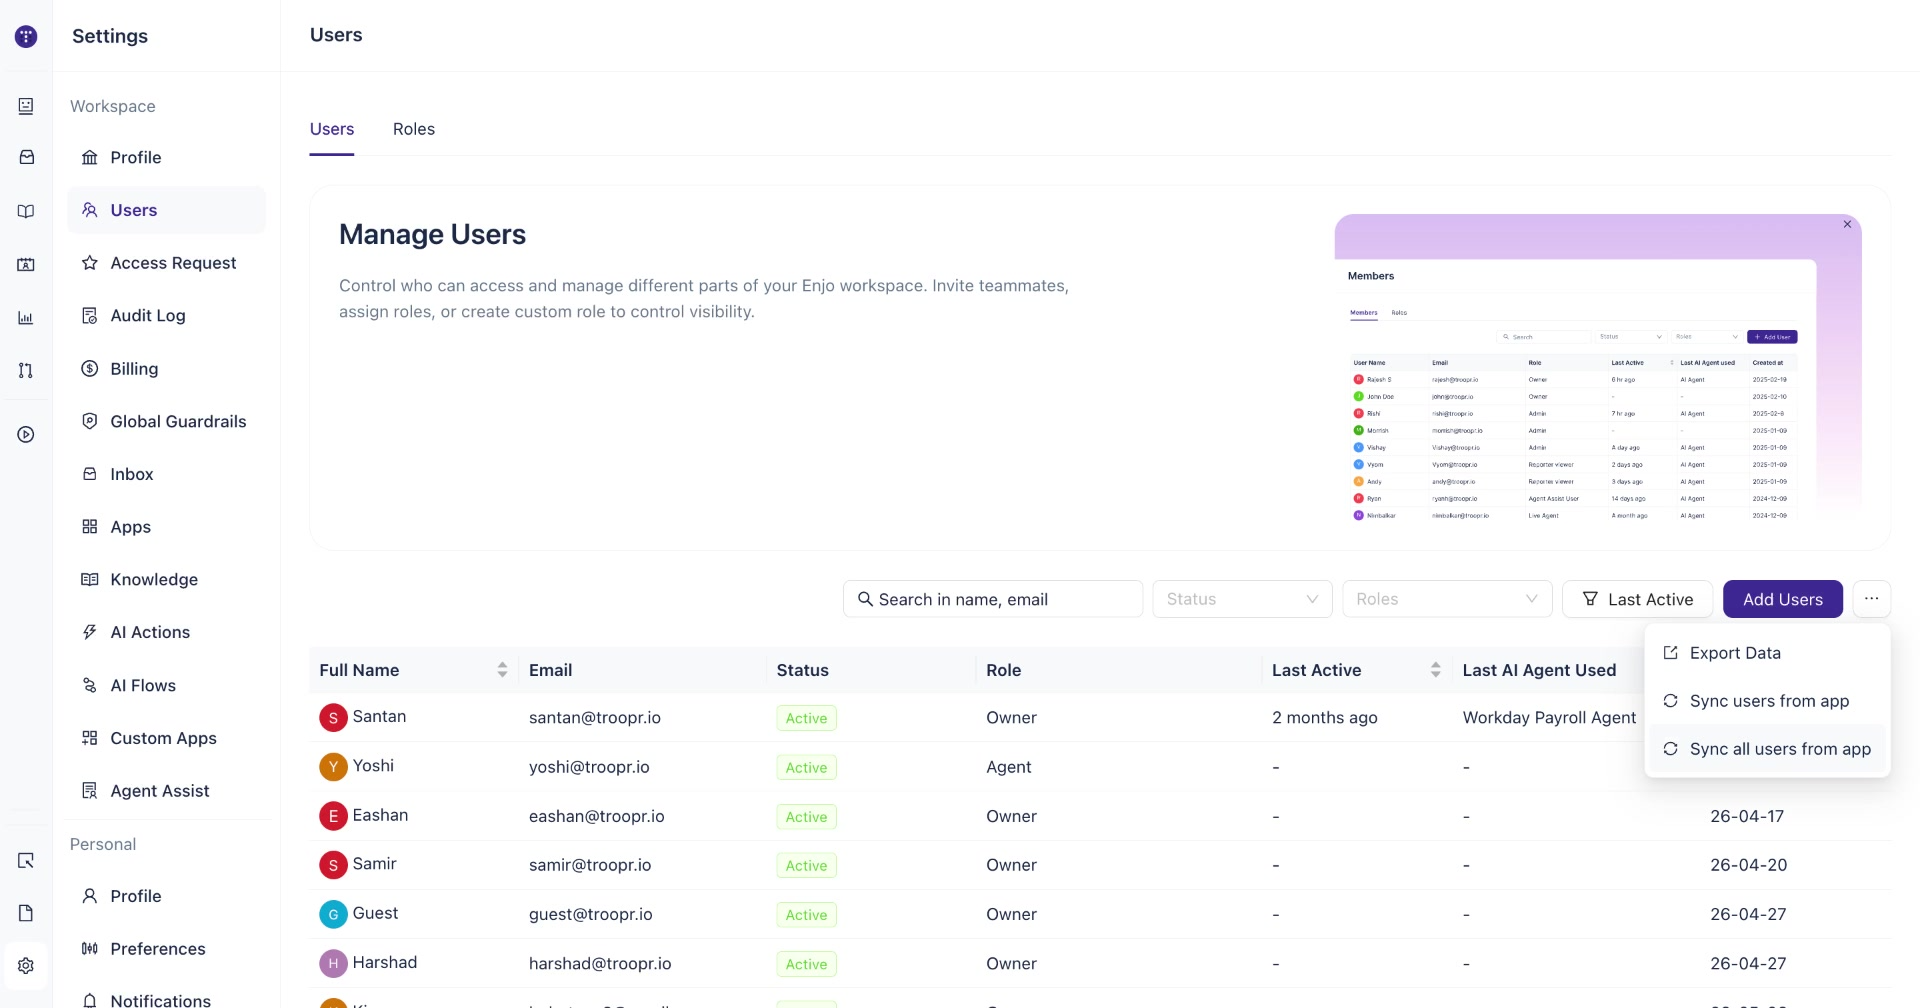
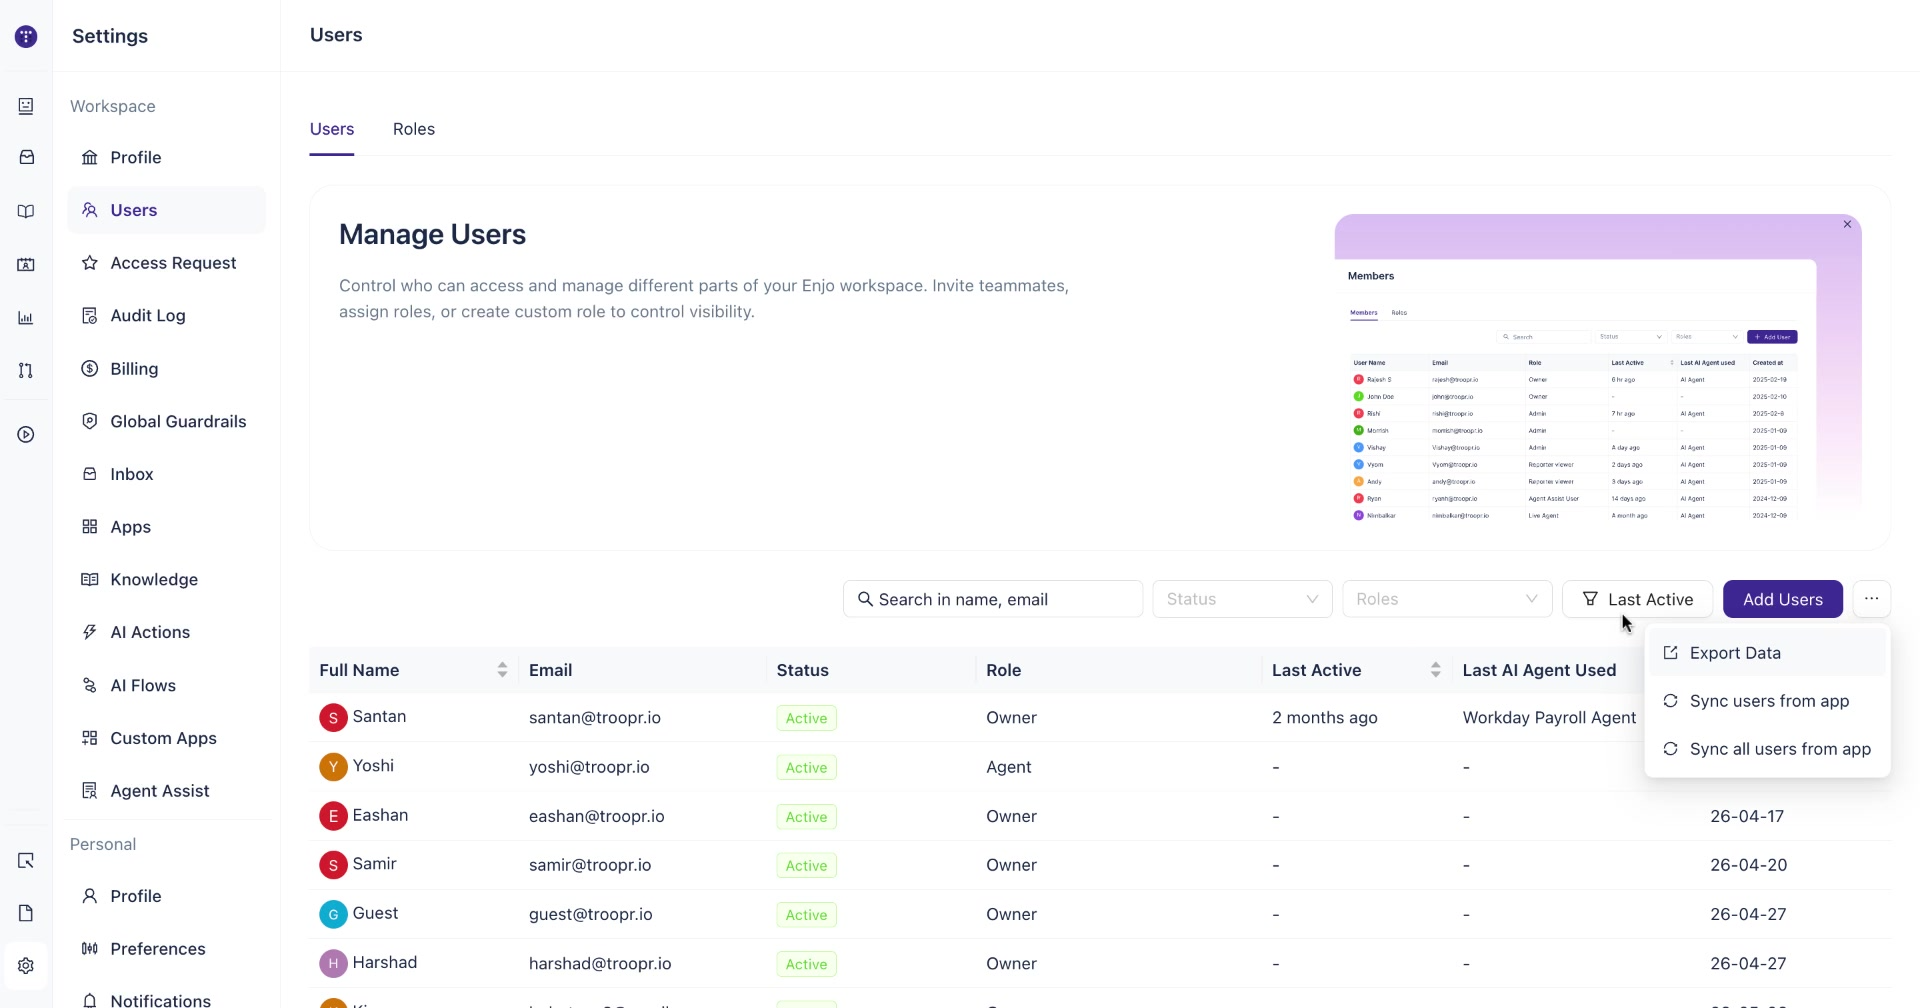
Click the "⋯" menu next to the Add Users button. You will see three options:
Export Data — downloads your current user list
Sync users from app — sync a specific user from Slack into Enjo
Sync all users from app — sync every user in a connected Slack workspace at once
Step 5: Sync all users from a Slack workspace
Click Sync all users from app. A dialog box opens with a Chat App dropdown. Select the Slack workspace you want to pull users from, then click Sync Users.
Enjo will import all members from that Slack workspace into your Enjo workspace.
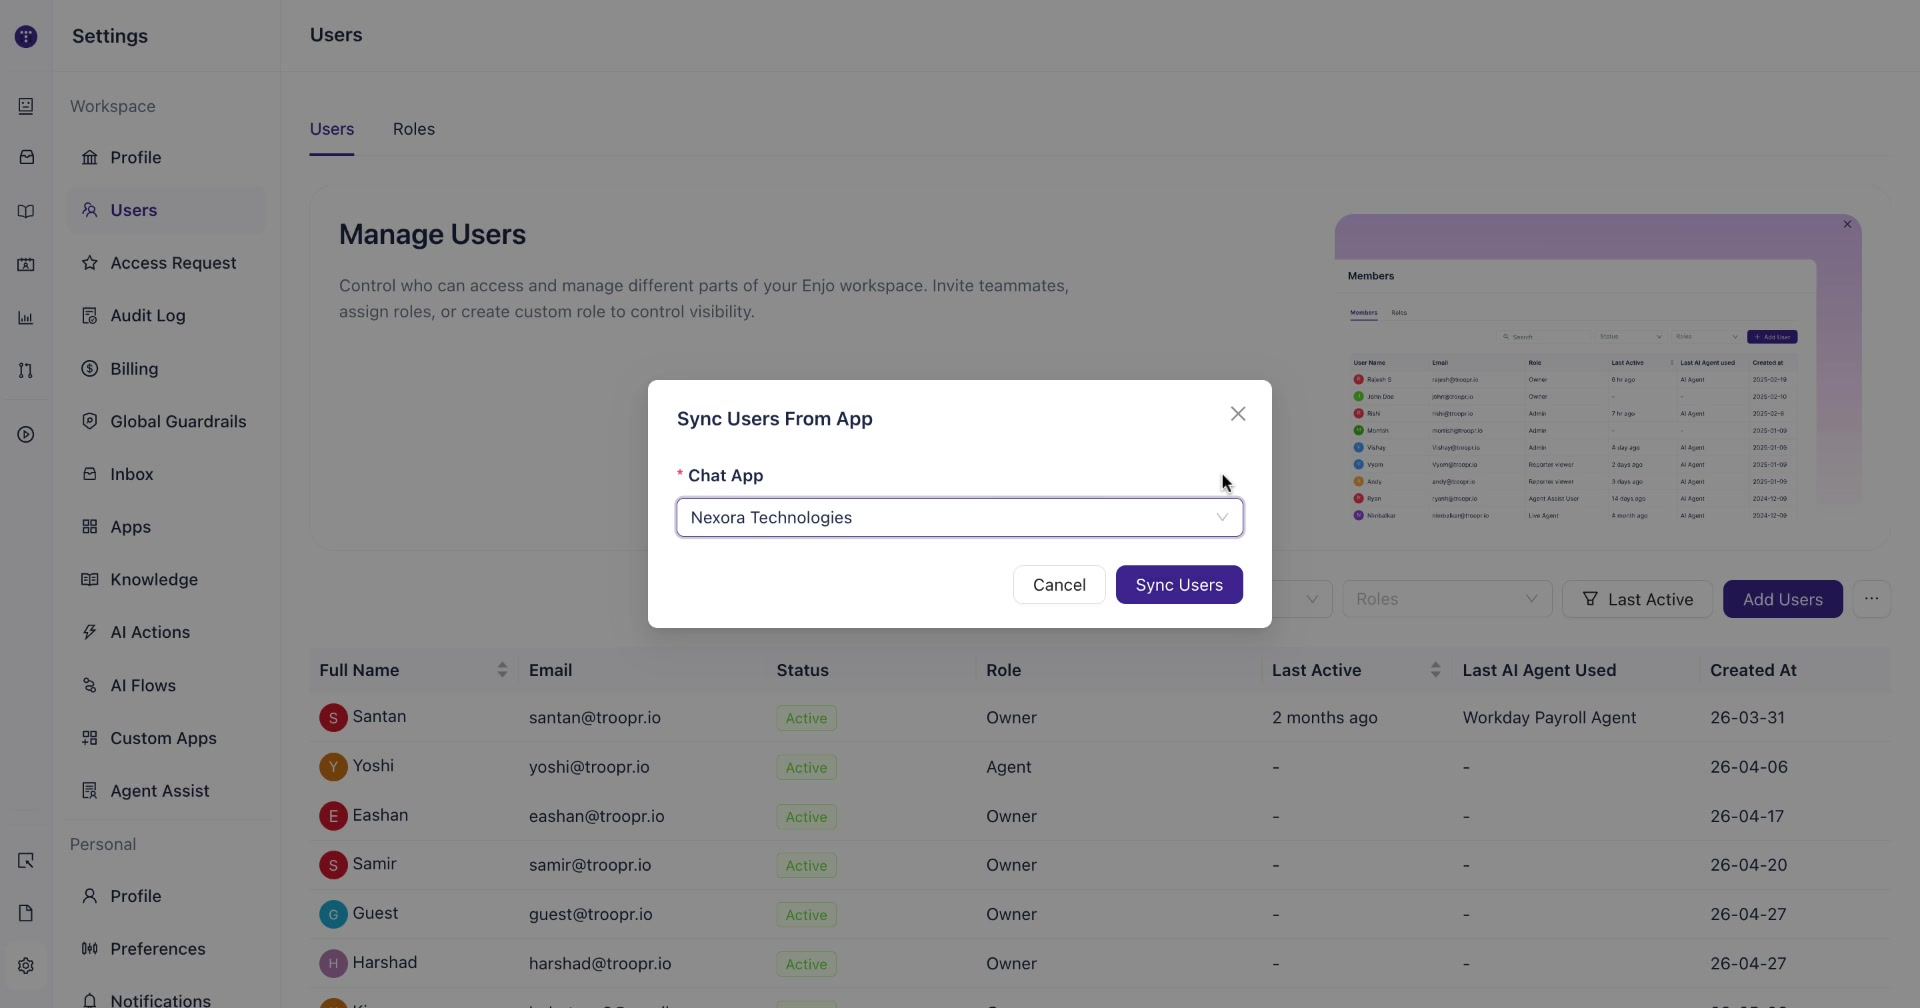
Note: Only Slack workspaces that are already connected under Settings → Apps will appear in the Chat App dropdown. If your workspace is not listed, connect it first from the Apps settings.
Step 6: Sync a specific user from Slack
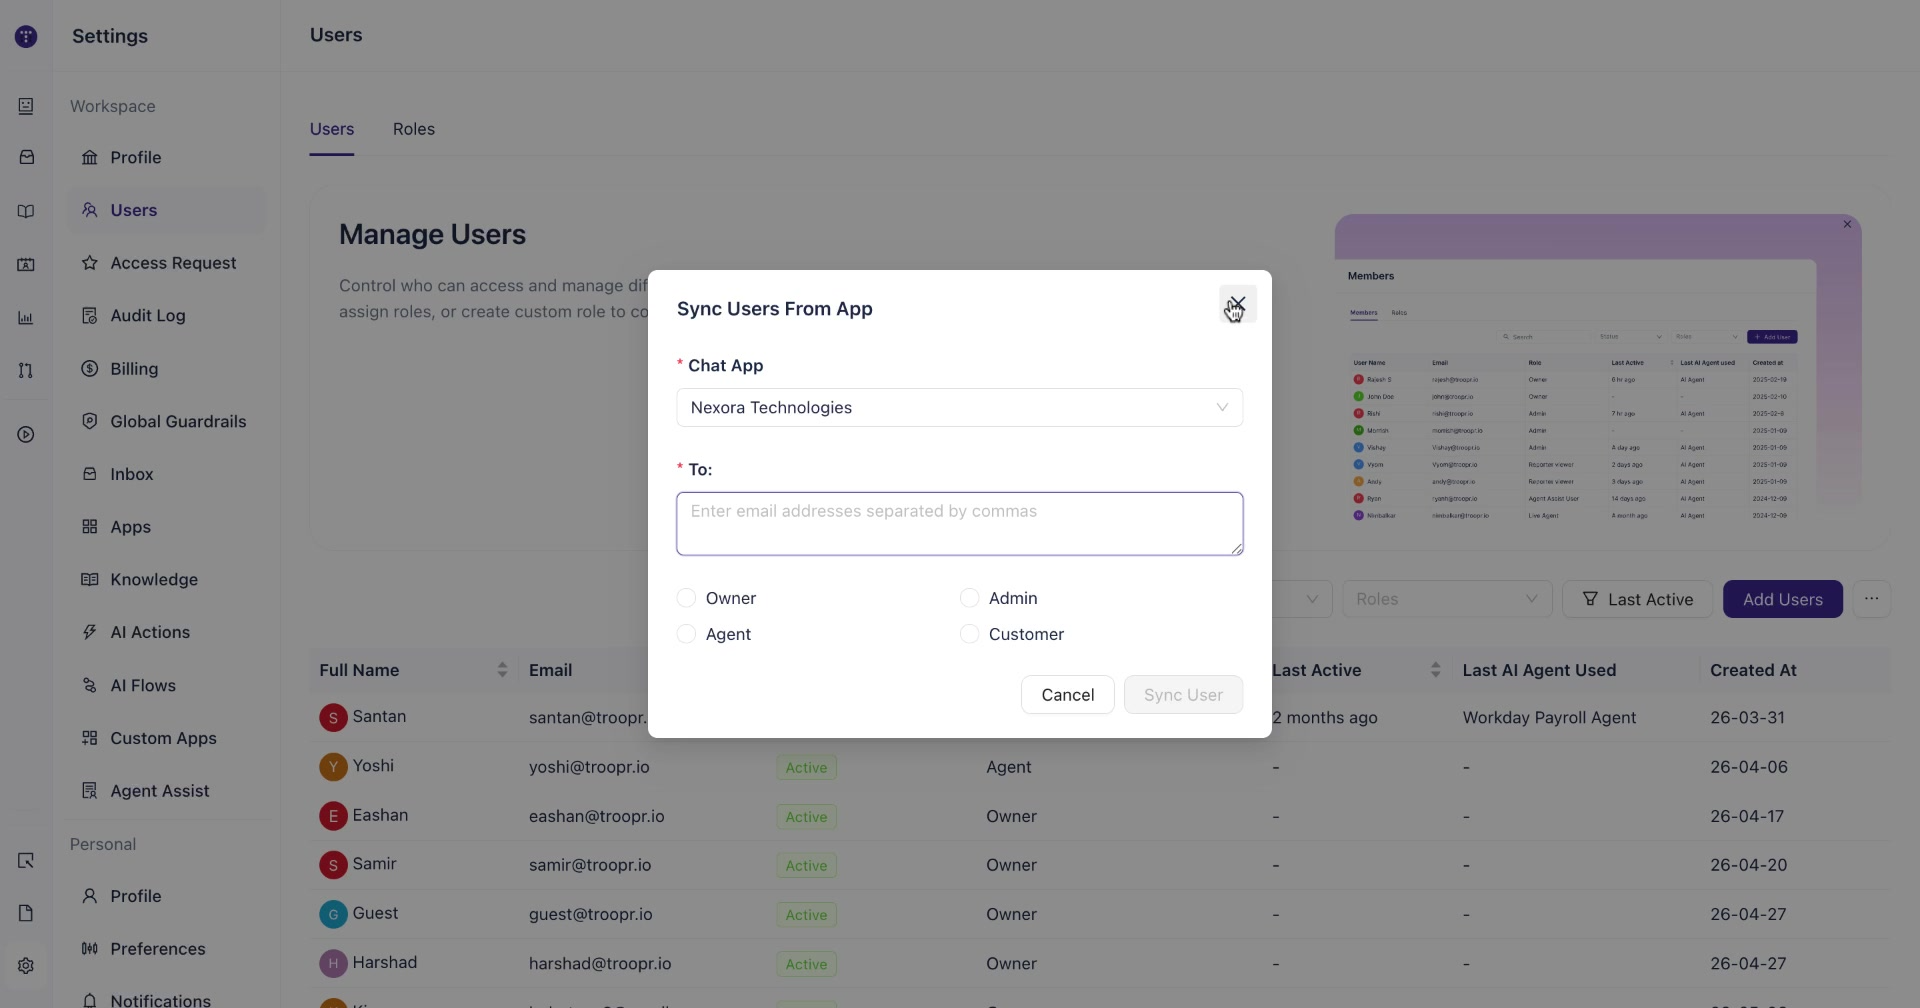
If you only need to add one person rather than syncing the entire workspace, click Sync users from app instead.
This opens the same dialog but with an additional To field. Select the Slack workspace from the Chat App dropdown, enter the user's email address in the field , select a role, and click Sync User.
Step 7: Export user data
To download a copy of your current user list, click the "⋯" menu and select Export Data. Enjo will generate a file containing your workspace member details which you can use for reporting or record-keeping.
What's next
Customers — Learn how to view and manage the end users who interact with your AI agents across channels.
Managing Accounts — Understand how to organize and manage accounts within your Enjo workspace.