Installation — ServiceNow Agent Assist
In this article, you'll learn how to install Agent Assist in ServiceNow including adding the widget in Enjo, installing the update set, configuring the UI Builder, and verifying the installation.
Before you start
You need Owner or Admin role in Enjo.
You need a valid ServiceNow account with Admin role.
Your ServiceNow account must be connected to Enjo. See ServiceNow if you haven't set that up yet.
You need at least one AI Agent created in your workspace. See Create AI Agent.
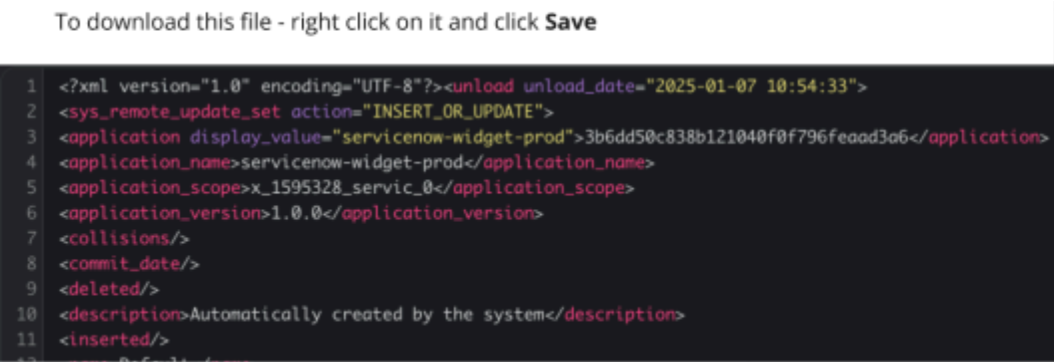
You need the Enjo update set XML file. Download it here.
Installation overview
Setting up Agent Assist for ServiceNow involves four steps:
Add the Agent Assist widget in Enjo
Install the update set in ServiceNow
Configure the UI Builder in ServiceNow
Verify the installation
Step 1 — Add the Agent Assist widget in Enjo
Go to Global Settings > Agent Assist.
Click Add Widget.
Select ServiceNow as the widget type.
Select your configured ServiceNow domain from the dropdown. If ServiceNow is not yet connected, click Add New and follow the ServiceNow setup guide.
Click Add.
Your ServiceNow Agent Assist widget now appears in the Agent Assist
Step 2 — Map an AI Agent
In the Agent Assist dashboard, find your ServiceNow widget and click ···.
Select View Details.
Go to Agent Mapping.
Click Add Mapping.
Select the AI Agent to assign from the dropdown.
Choose whether this mapping applies to:
All cases — the AI Agent handles all ServiceNow incidents
Specific cases — filtered by fields such as priority, status, or incident type
Click Submit.
💡 You can create multiple mappings to route different types of incidents to different AI Agents. See Configure Agent Assist for the full configuration guide.
Step 3 — Install the update set in ServiceNow
Import the update set
Log in to your ServiceNow instance.
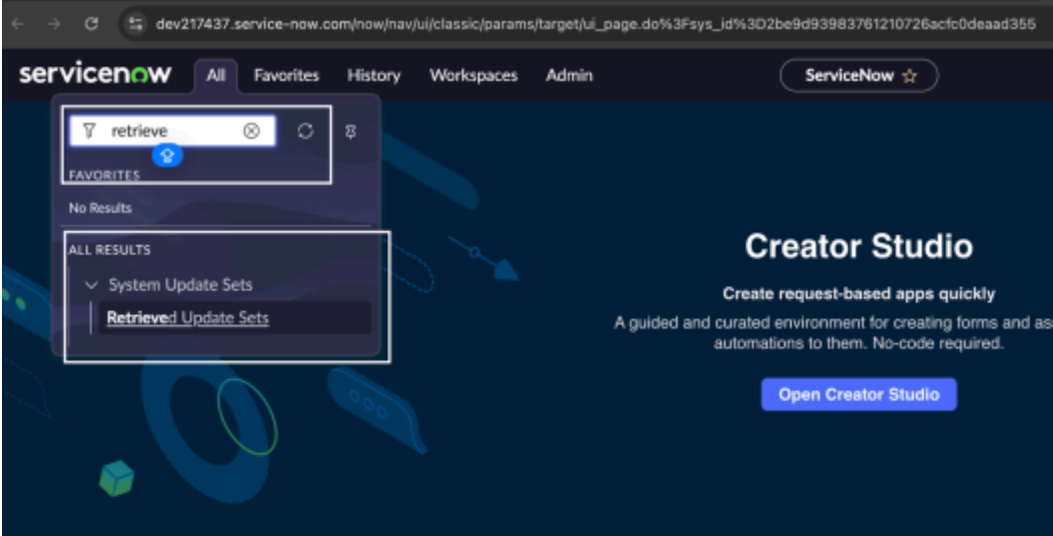
In the left-hand navigation filter, search for Update Set.
Select Retrieved Update Sets.
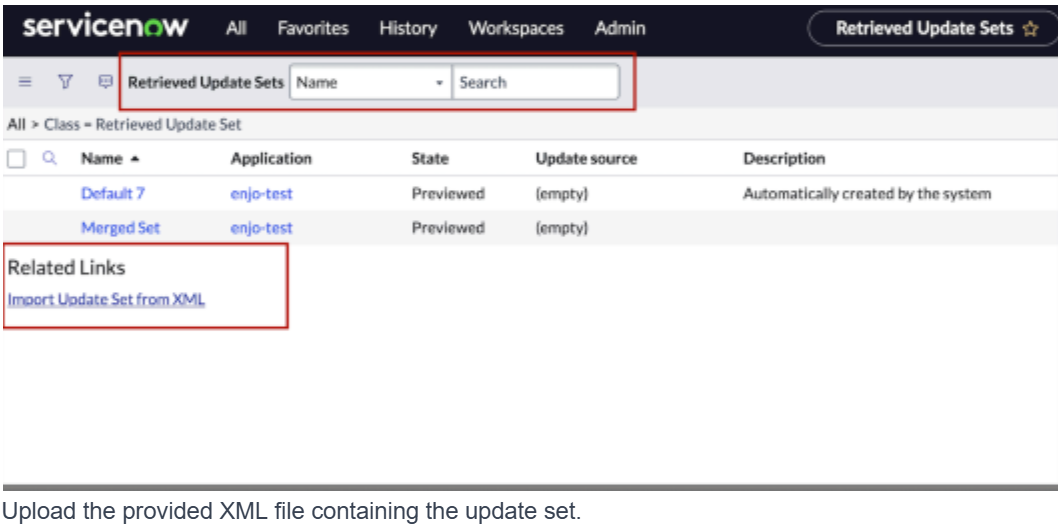
Click Import Update Set from XML.
Upload the Enjo XML update set file.
Preview and commit
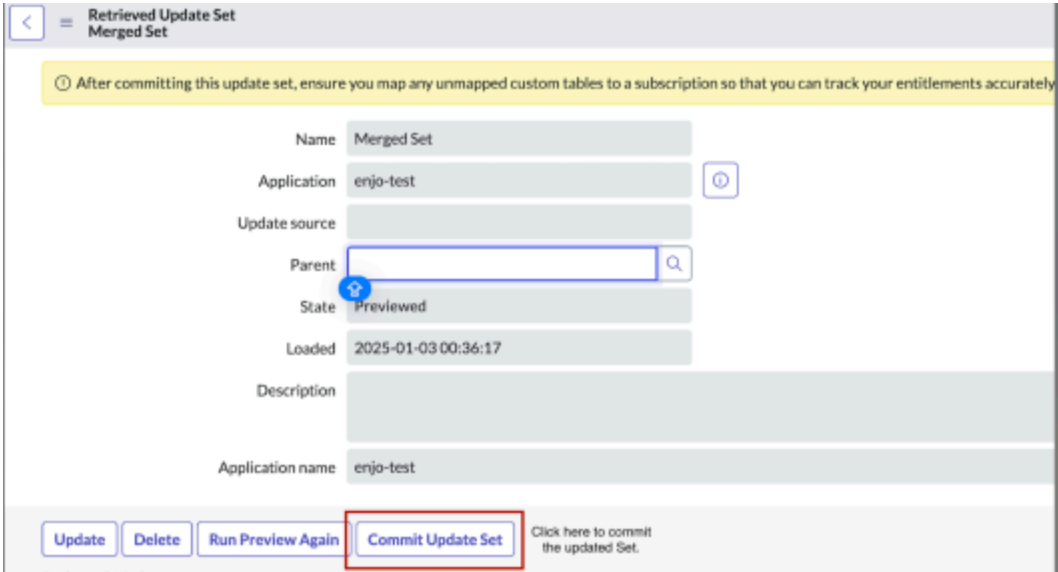
Click Preview Update Set and wait for the preview to complete successfully.
Click Commit Update Set.
💡 If you encounter merge conflicts during installation or a future update, contact the Enjo support team for assistance. Do not resolve merge conflicts manually without guidance.
Step 4 — Configure the UI Builder in ServiceNow
Get an incident ID
Before configuring the UI Builder, you need an incident ID to use as a test value.
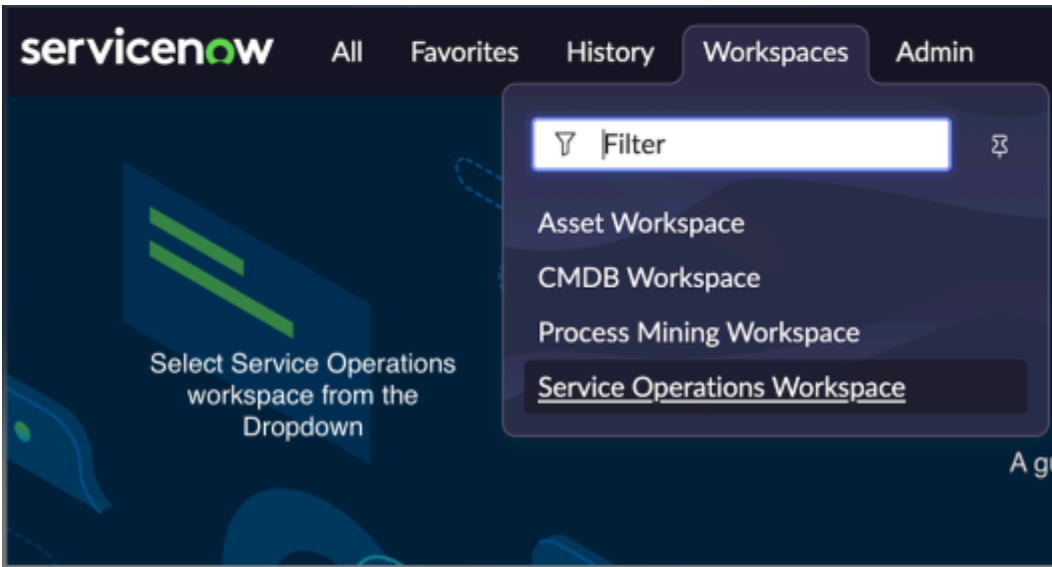
Go to Workspaces in the top menu.
Search for Service Operations Workspace and open it.
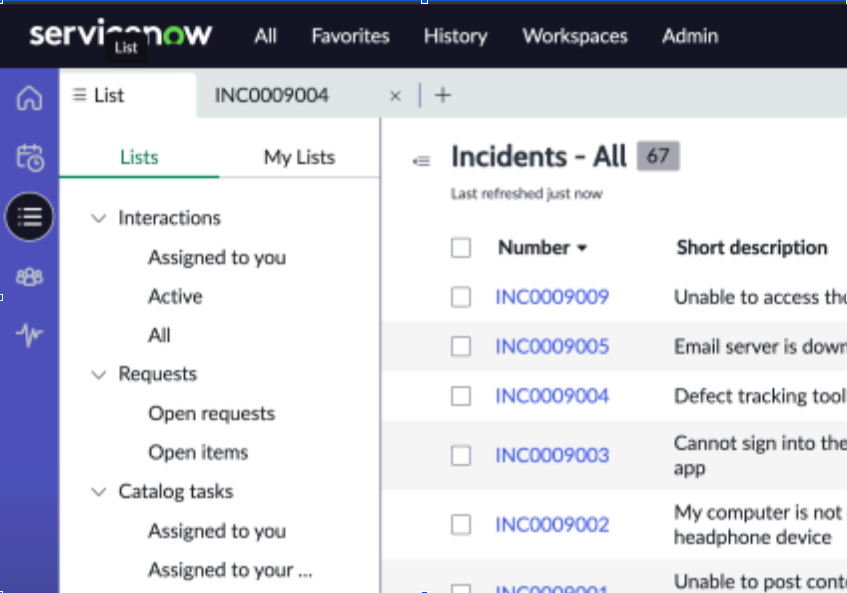
Open the Lists tab.
Select any incident and copy its Incident ID.
Open UI Builder
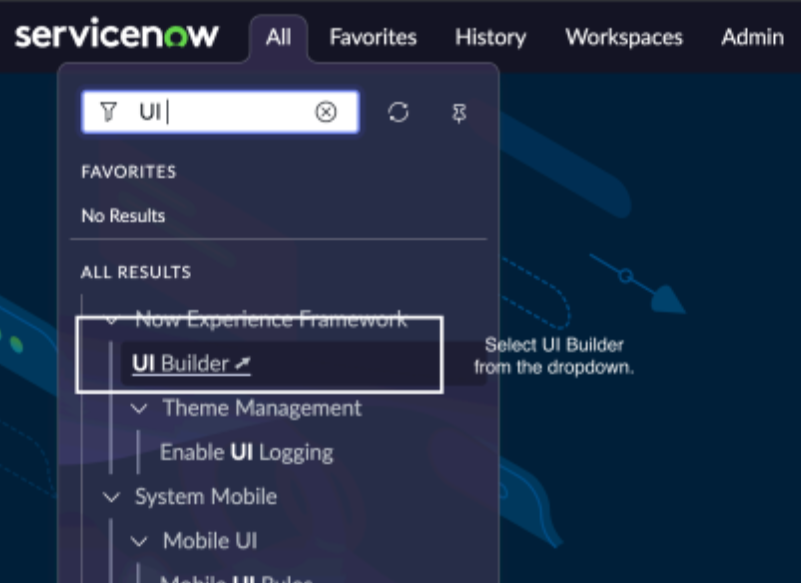
In the left-hand navigation filter, search for UI Builder.
Open UI Builder.
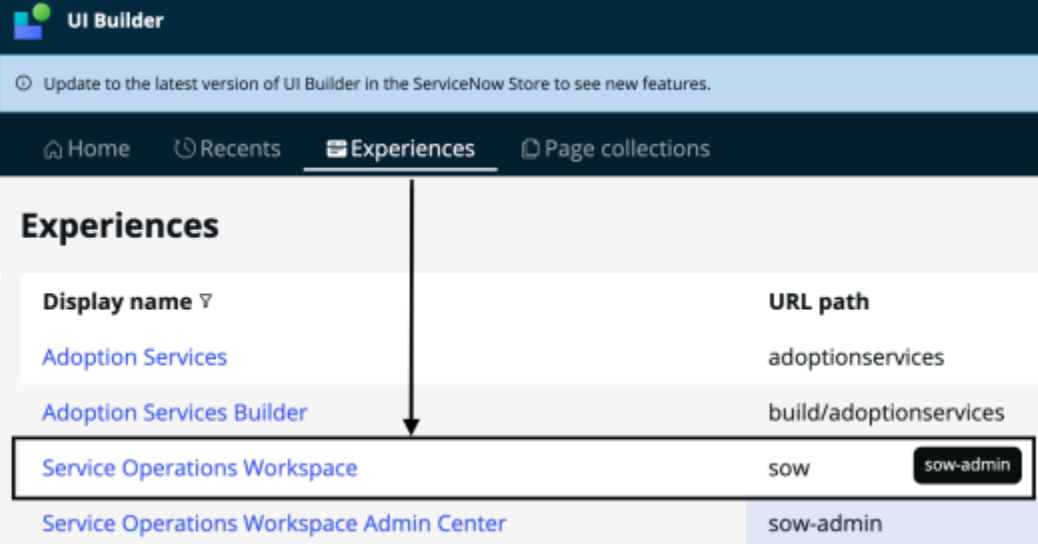
Click Experiences.
Search for Service Operations Workspace (SOW) and select it.
Locate and duplicate the record
Search for Records in SOW.
Select SRP Records.
Click Edit in Original Scope.
Click Duplicate Variant to create a copy of the existing instance for editing.
Add the Enjo component
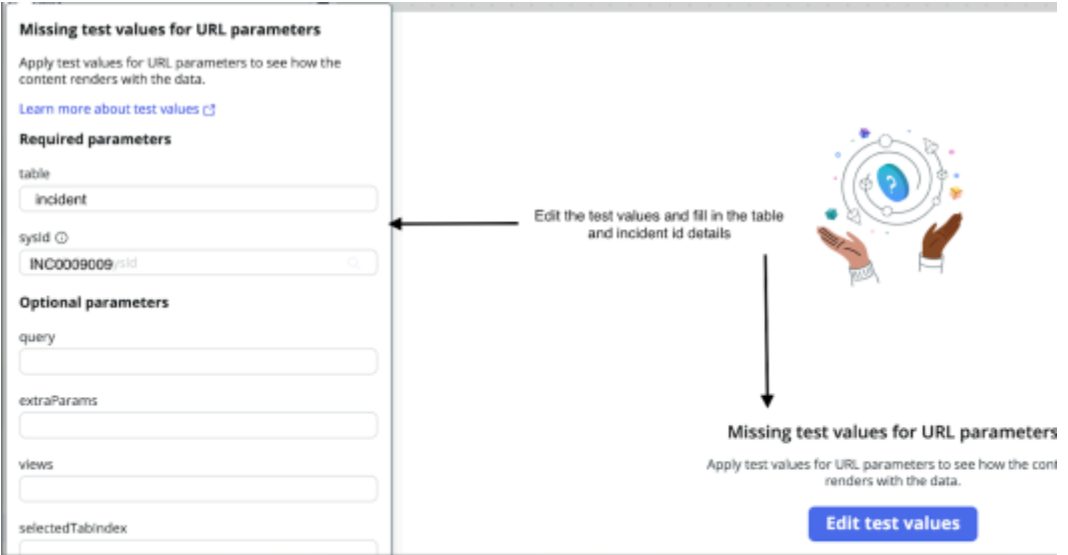
Click Edit Test Values.
Enter the Table and Sys ID — use the Incident ID copied earlier.
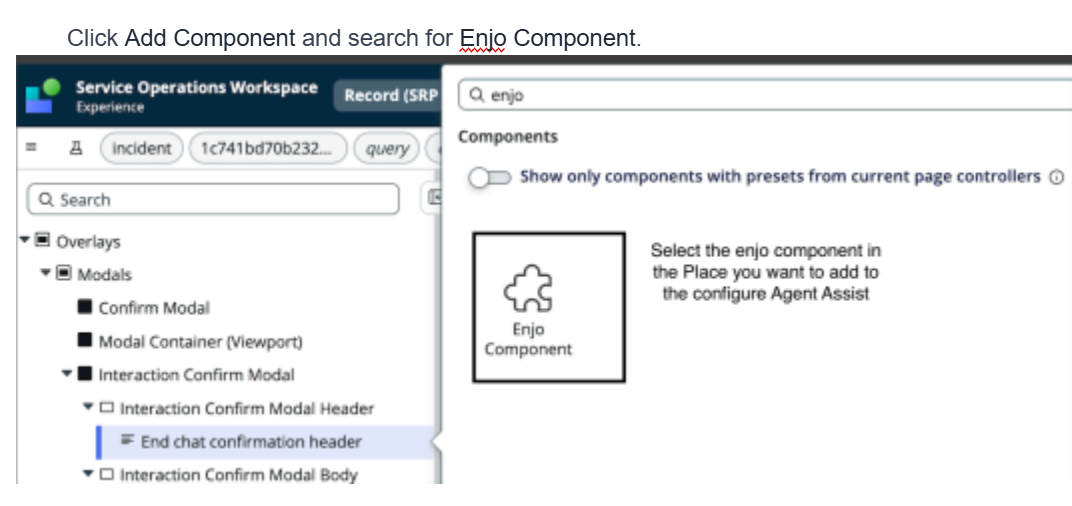
Click Add Component.
Search for Enjo Component and select it.
Click Preview to verify the component integrates correctly.
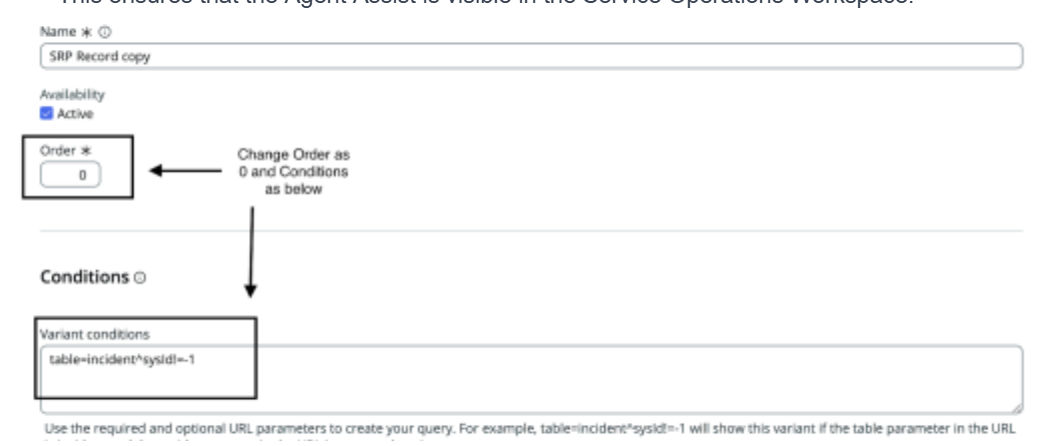
Configure visibility settings
Click Settings.
Set Order to 0.
Set Conditions to:
table=incident^sysId!=-1
This ensures Agent Assist is visible for all incidents in the Service Operations Workspace.
Step 5 — Verify the installation
Close the UI Builder.
Go back to the incident in the Service Operations Workspace.
Refresh the page.
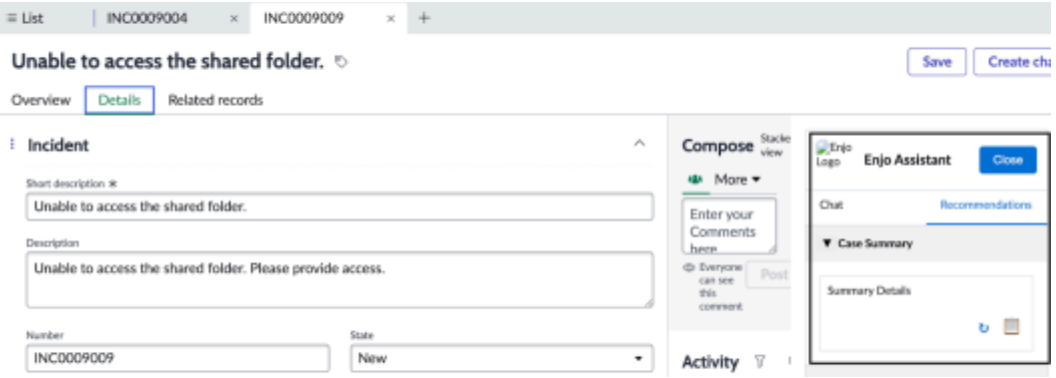
Confirm the Agent Assist panel is visible in the incident view.
When Agent Assist is working correctly you will see:
A generated case summary
An AI-generated answer based on your mapped AI Agent's knowledge
Knowledge block generation for the incident
💡 If the Agent Assist panel does not appear after refreshing, verify that the update set was committed successfully and that the Enjo Component visibility conditions are set correctly in the UI Builder.
What's next
Agent Assist Configuration — Configure appearance, recommendations, chat behavior, and Agent Mapping.
Using Agent Assist in Your Helpdesk — Learn how to use Agent Assist features during live support work.
Agent Assist Installation — Jira — Install Agent Assist in Jira.
Agent Assist Installation — Salesforce — Install Agent Assist in Salesforce.